Khoya Recipe (Homemade Mawa)
Khoya Recipe (Mawa Recipe) – This is the traditional, slow-cooked method of making khoya at home using just one ingredient – full-fat milk.
Servings 200 grams (about 1 cup)
Calories 371kcal
Ingredients
- (about 1 liter) 5 cups Milk Full fat milk
Instructions
- Take a heavy-bottom pan and pour in the milk. Heat it on medium flame.
- Once the milk comes to a boil, lower the heat to medium-low. Let it simmer and reduce slowly.
- Stir every 3–4 minutes. Use a wide spatula if possible. It covers more surface and makes stirring easier. If you use a small spoon, the milk may stick or burn at the bottom.
- After 40 minutes, the milk will become thicker and look slightly grainy. Don’t forget to scrape the bottom and sides of the pan.
- At the 50-minute mark, it will look more grainy and dense.Note: Cooking time may vary depending on the shape and size of the pan. It also depends on the quantity you're making—whether it's half, double, or triple the recipe.
- From this point, you need to stir more often and scrape the sides constantly.
- Keep stirring and cooking until the mixture becomes solid and thick like halwa. You’ll notice it gets harder to stir — that means it’s ready.
- Turn off the heat. This stage took me around 1 hour and 15 minutes.
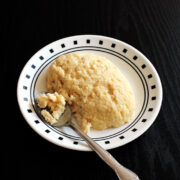
- Transfer the khoya to a clean bowl. Let it cool completely. As it cools, it will firm up even more.
Notes
Nutrition
Serving: 100g | Calories: 371kcal | Carbohydrates: 22g | Protein: 14g | Fat: 25g | Cholesterol: 0mg
