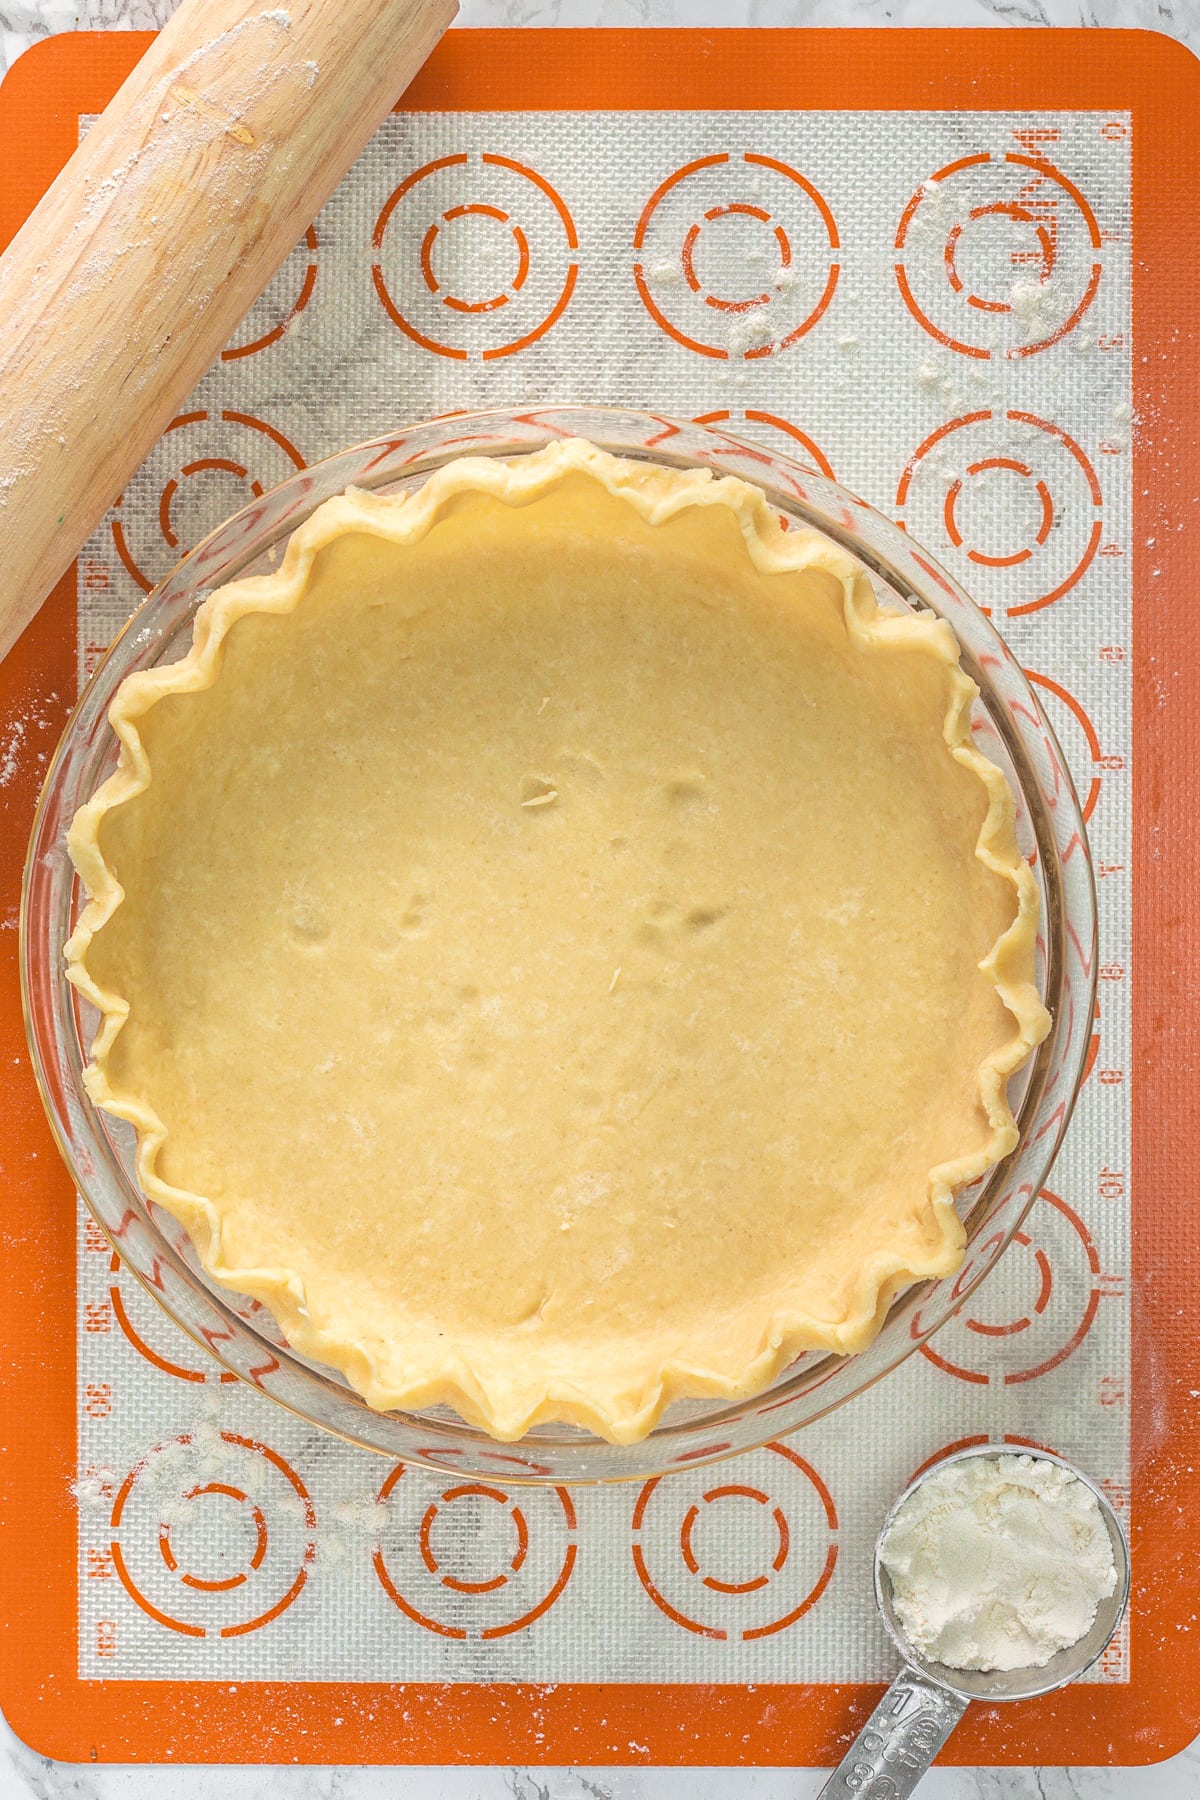
The Food Processor Pie Crust is a game-changer when making flaky, homemade pie crusts. This straightforward recipe creates a pie crust that's tender, rich, buttery, and flaky. With the help of a food processor, you can make the pie dough in less than 5 minutes.
Jump to:
❤️ You’ll Love This Food Processor Pie Crust
- Pie Crust: The Food Processor Pie Crust recipe is your ultimate guide to achieving flawless buttery and flaky pie crusts.
- Better than store-bought: Say goodbye to store-bought crusts and welcome a pie crust that stands head and shoulders above the rest. Homemade version ensures the use of quality ingredients and is free from any preservatives.
- Easy to make: This pie dough recipe is super easy to make, and using a food processor makes it even easier.
🧾 Ingredient Notes
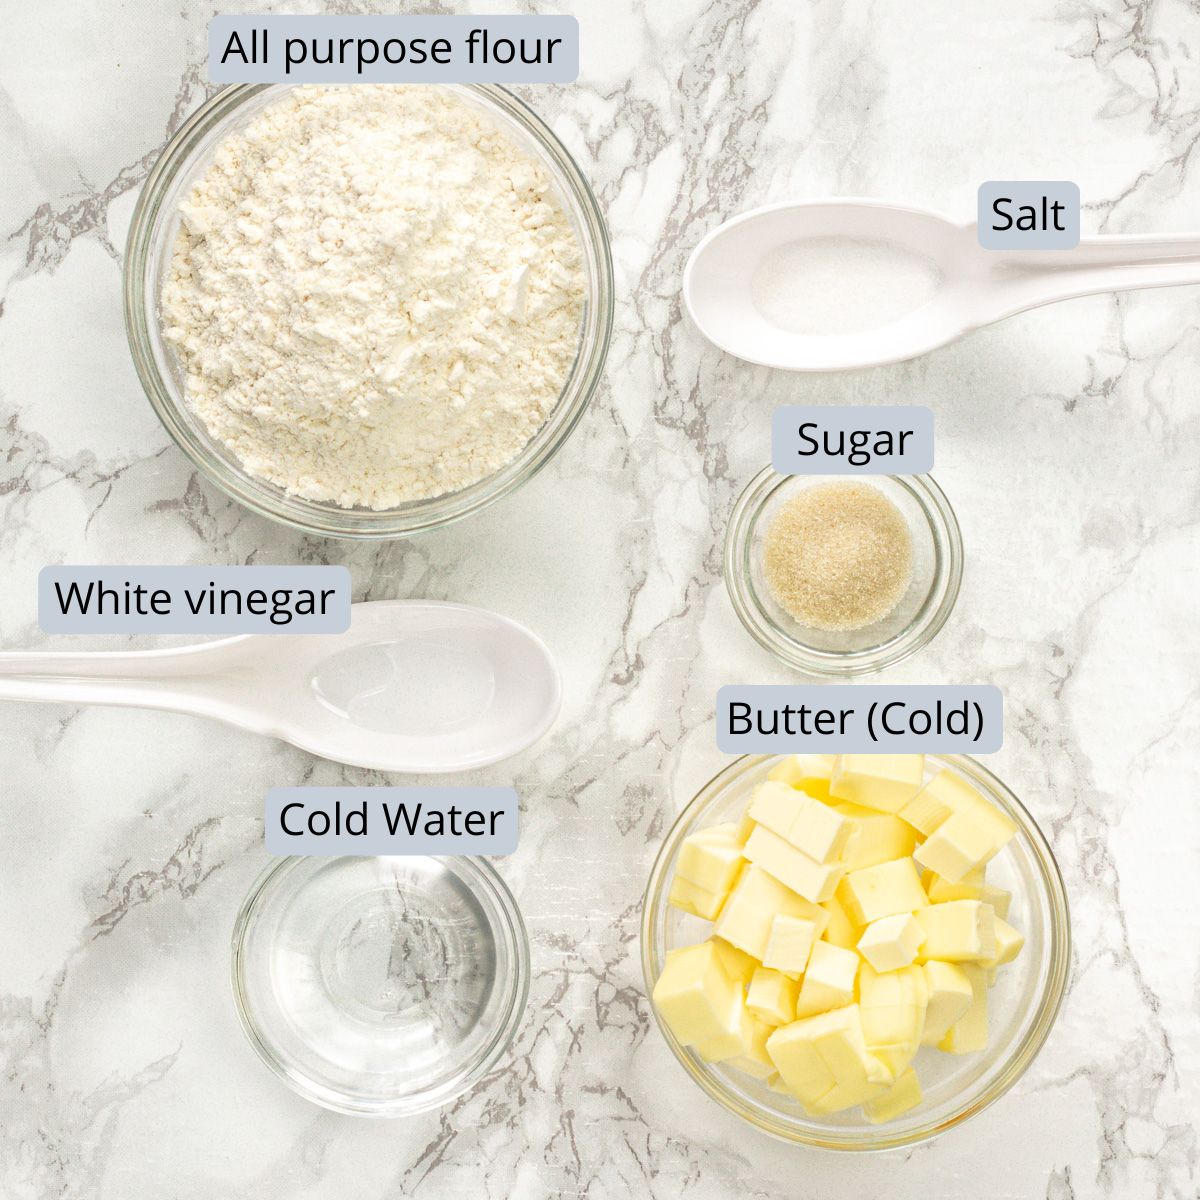
- Flour: All Purpose flour is the foundation of this recipe. Its finely milled texture creates a crumbly and crispy pie crust when baked to perfection.
- Unsalted Butter: The butter is the key to achieving that coveted flakiness in your pie crust. Cold butter is essential because when it hits the hot oven, it creates steam, resulting in those perfect flaky layers.
- Vinegar: It inhibits gluten formation in the dough, which helps keep the crust tender and flaky.
- Salt: Salt adds a savory balance to the sweet or savory filling you'll add to your pie.
- Sugar: Sugar adds a hint of sweetness to the crust.
- Ice-Cold Water: Ice-cold water is crucial because it keeps the butter chunks cold and intact instead of melting them. These small butter chunks are what gives the crust its delightful flakiness. Using water that's at room temperature or warmer would soften or melt the butter, which we want to avoid.
👩🍳 How To Make Pie Dough In Food Processor? (Pics)
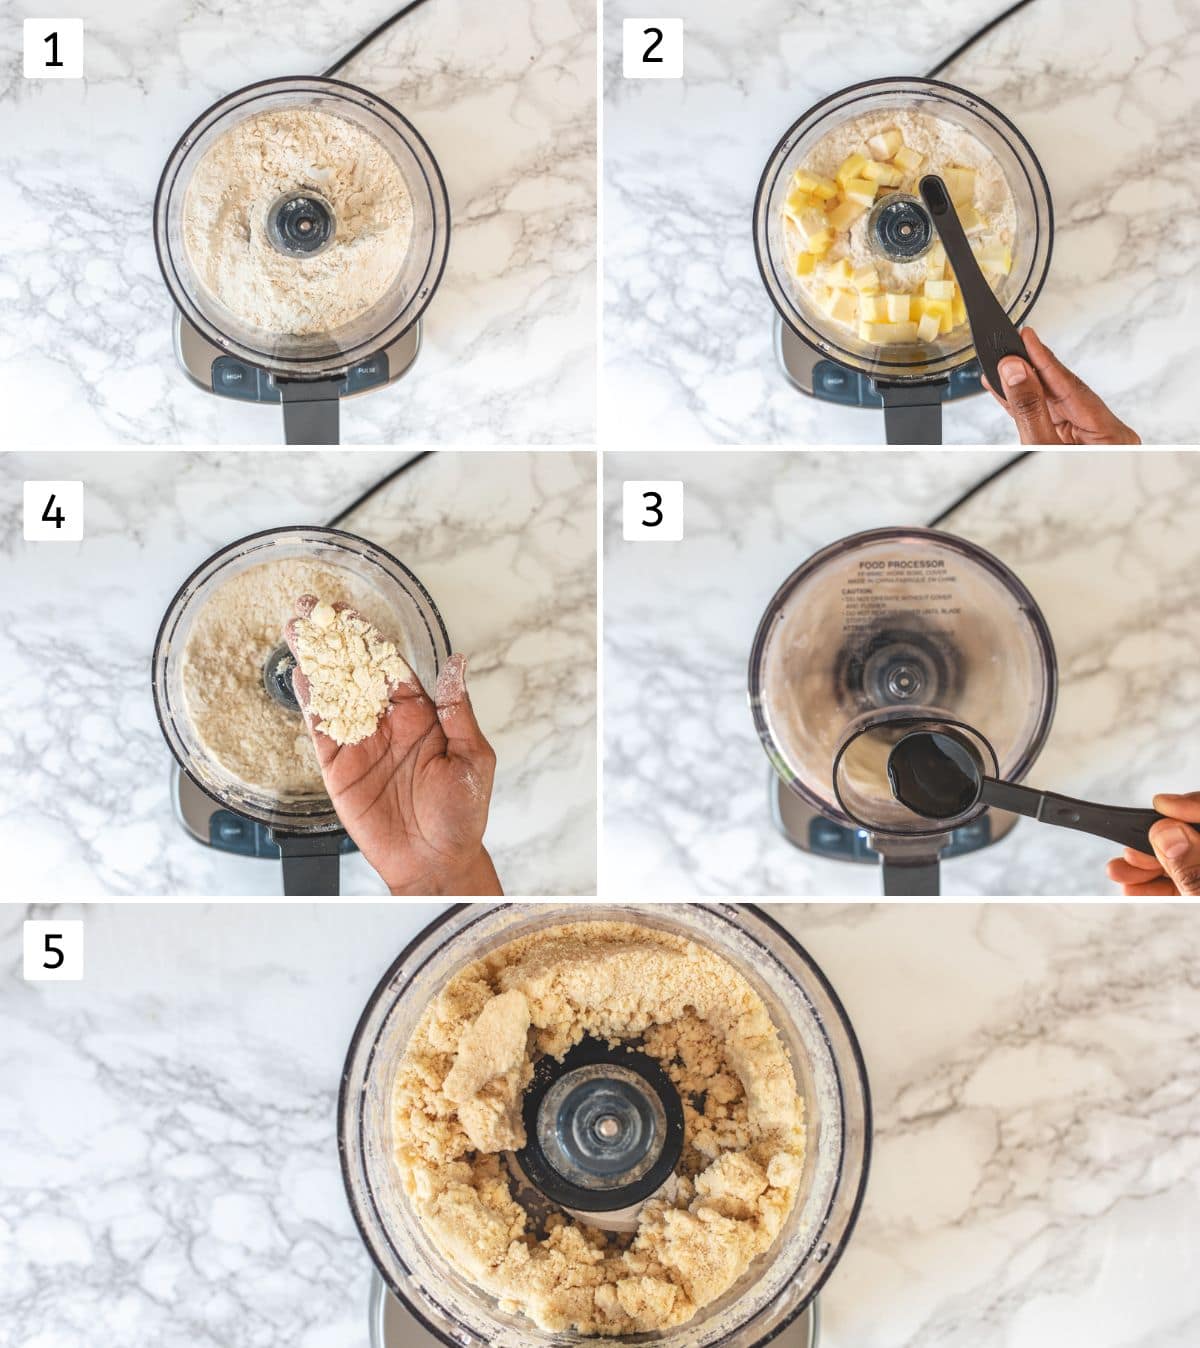
1) Add all-purpose flour and salt to your food processor. Pulse the mixture for about 15 seconds until the flour and salt are thoroughly combined. Let it sit for a minute with the lid on and let the flour settle down. Then open the lid.
2) Add the cold, cubed butter into the food processor and sprinkle vinegar over the butter.
3) Pulse the mixture again, but this time only 8-9 times until you get breadcrumbs-like texture, with a few slightly larger butter pieces still visible.
4) While the food processor runs, slowly pour two tablespoons of ice-cold water through the tube. Continue running the processor until the dough begins to come together. It should take about 30 seconds only.
The dough won't form a solid ball, but it should easily come together when you pinch it. It shouldn't feel overly dry or too wet.
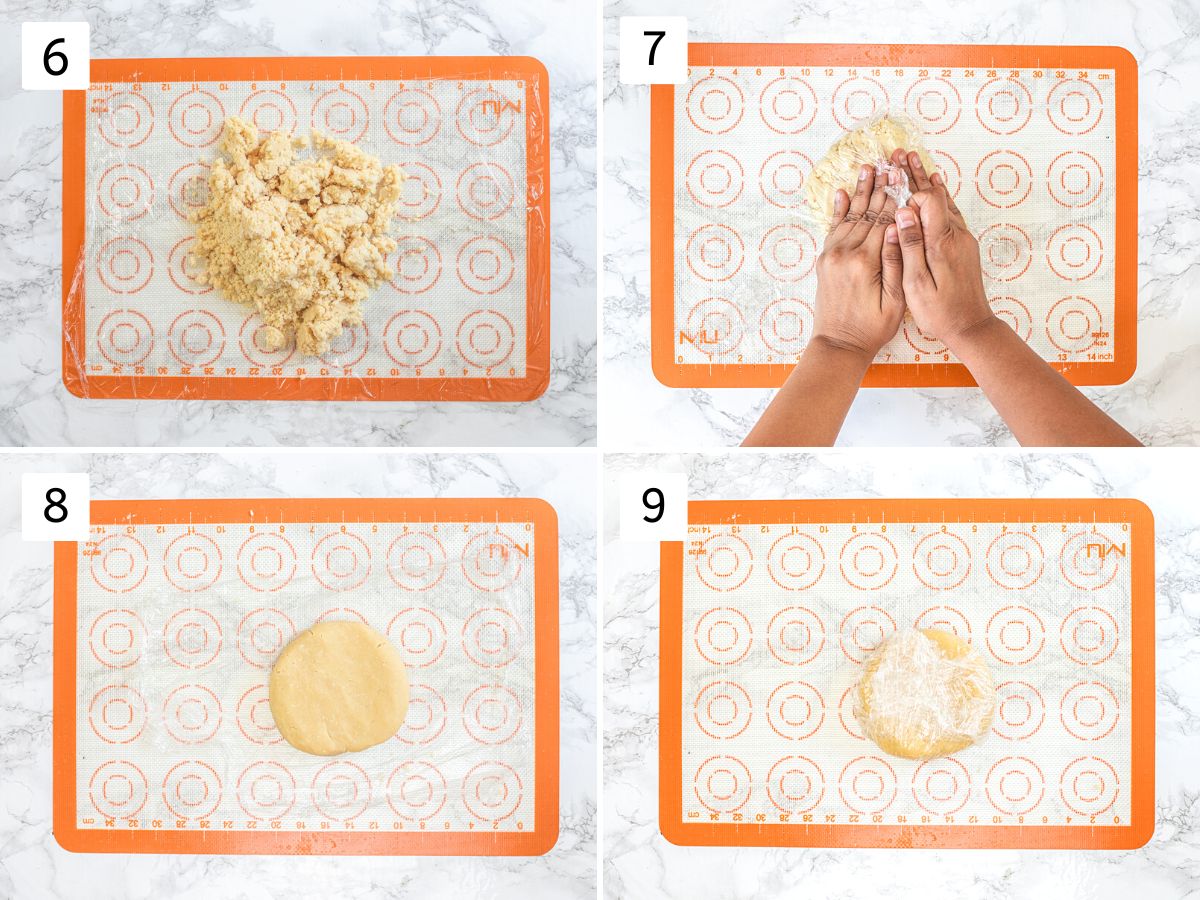
6) Place a sheet of plastic wrap on your work surface and transfer the prepared pie dough onto it.
7, 8) Gather the dough and shape it into a ball. Then, flatten it slightly to form a disc shape.
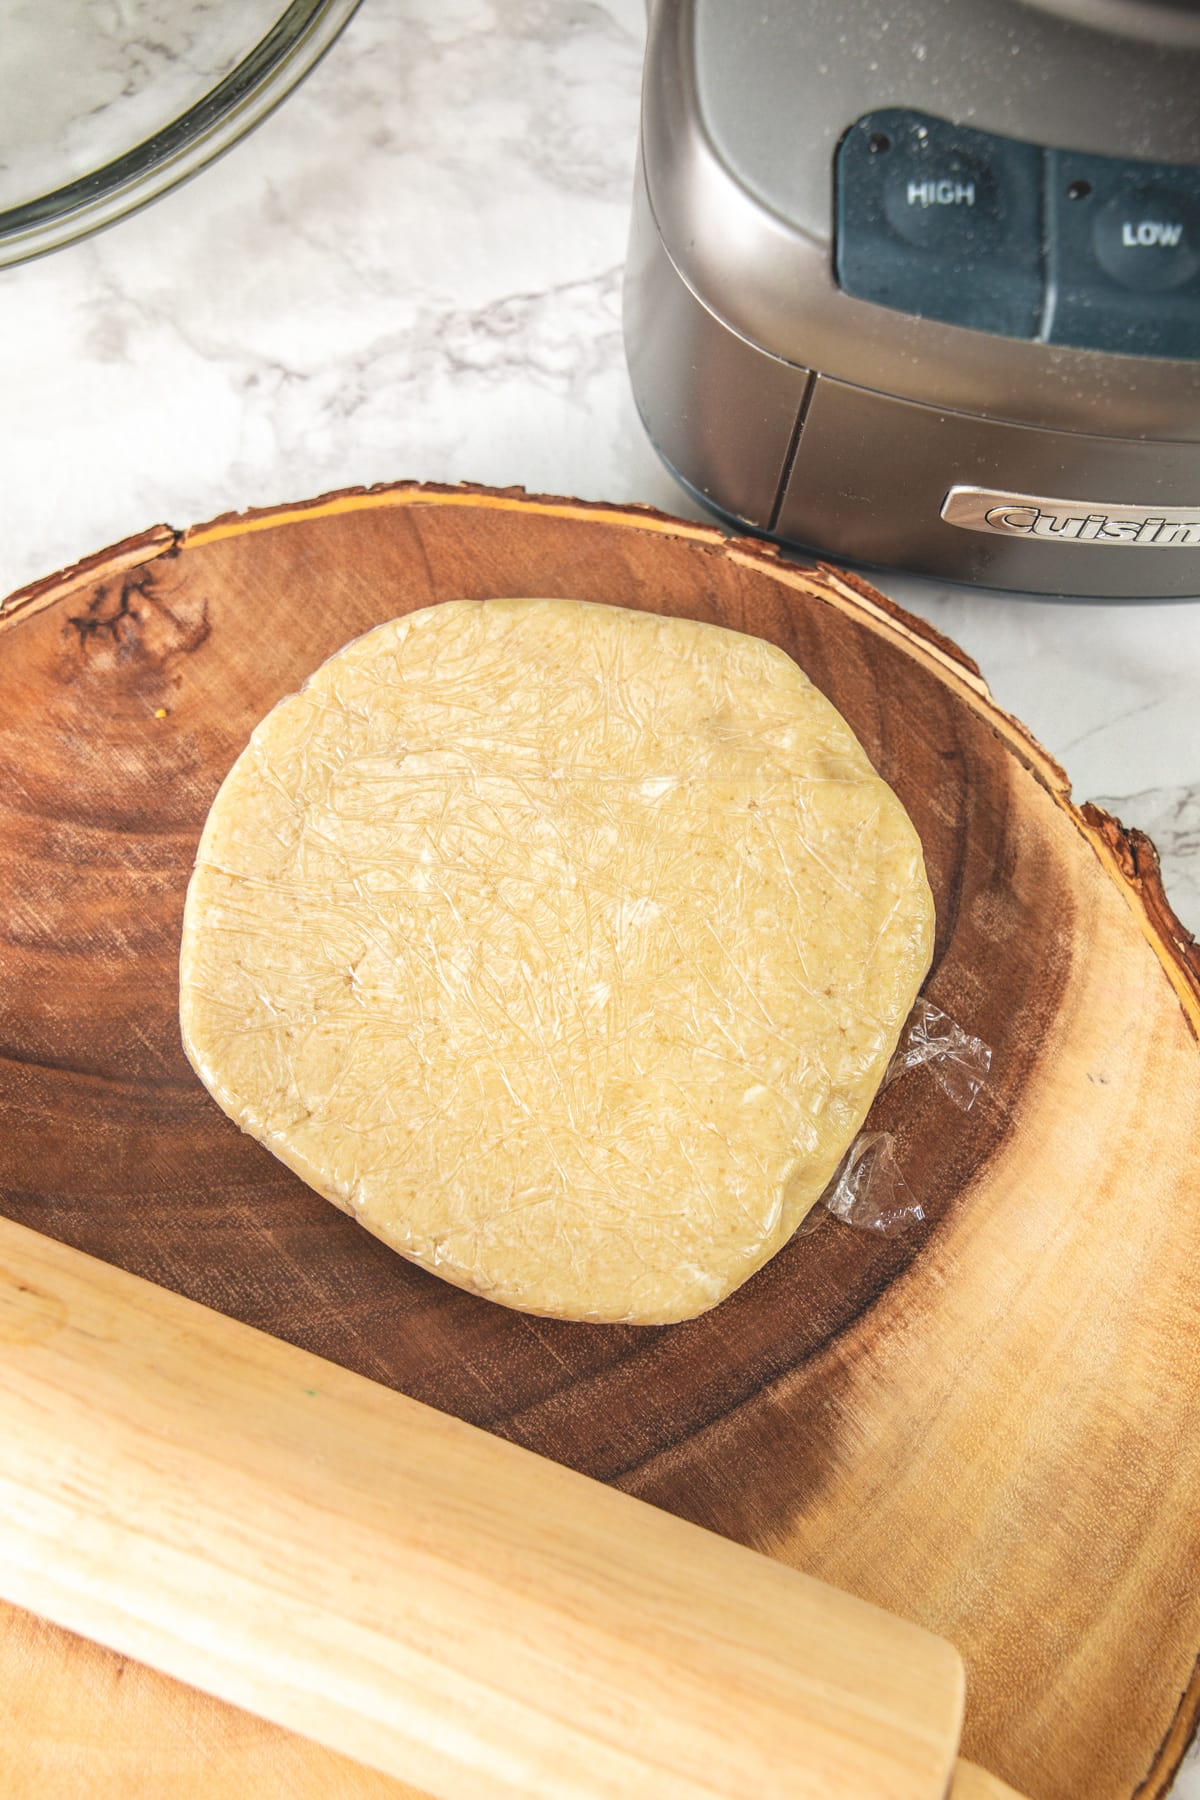
9) Wrap the dough in plastic wrap and refrigerate it for 30-45 minutes or until it's firm enough to roll out.
👩🍳 Rolling Pie Crust (Step-By-Step Pics)
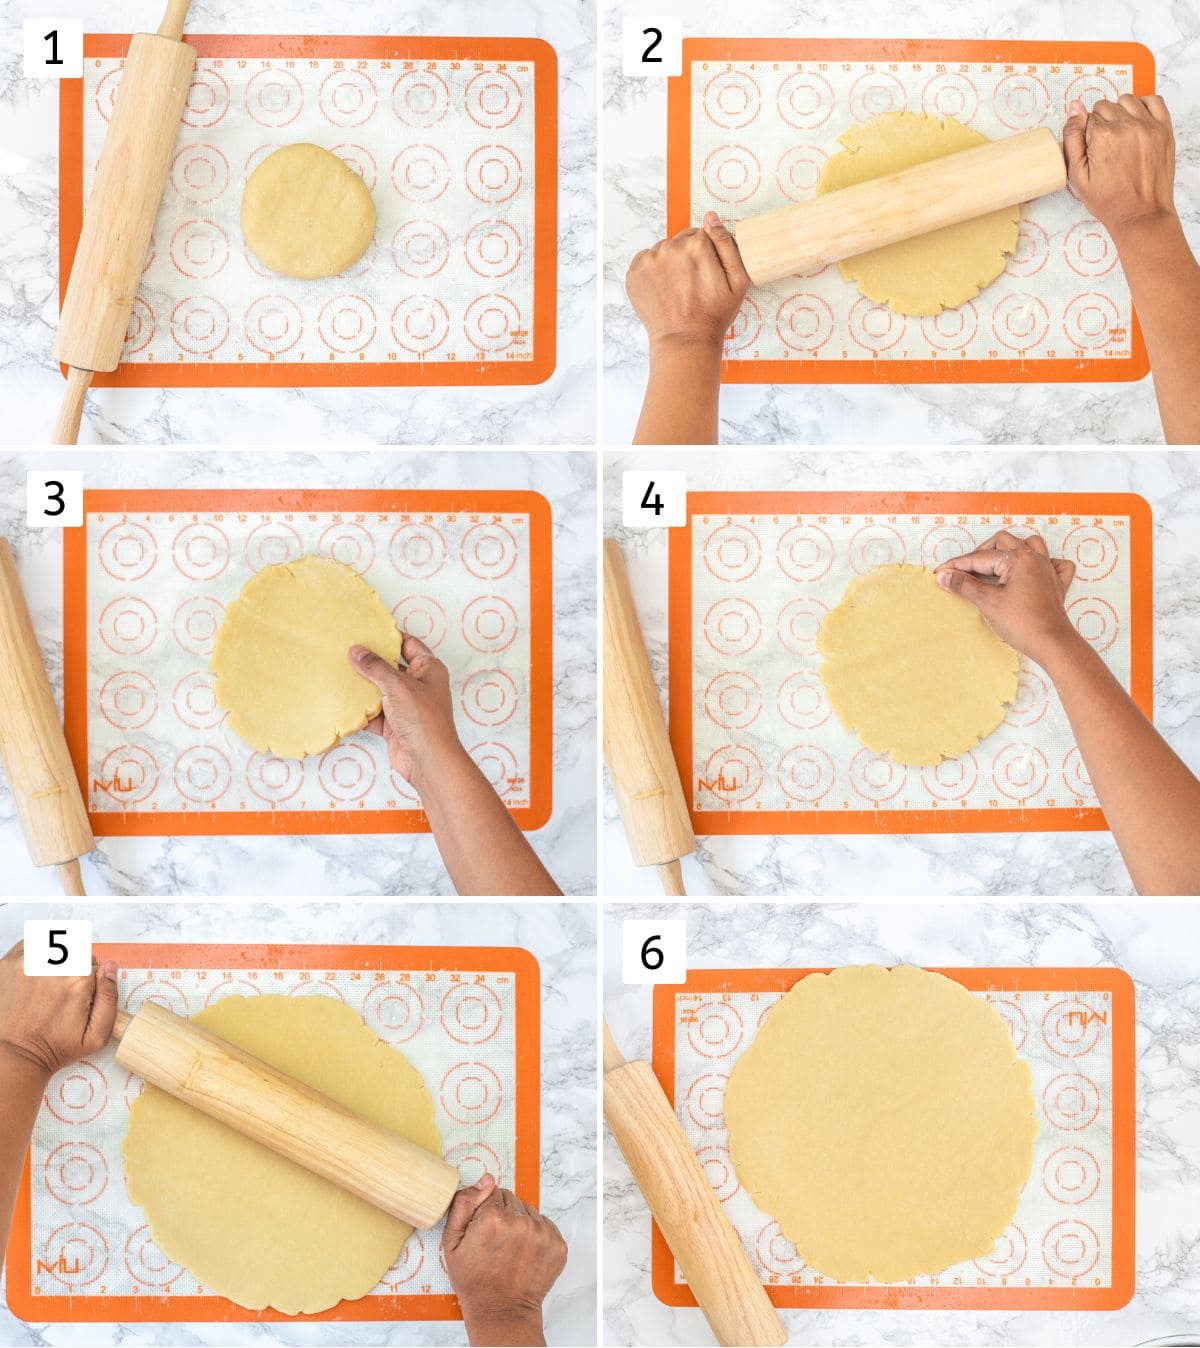
1) Once the dough has chilled, remove it from the refrigerator and let it sit at room temperature for about 5 minutes.
2) Lightly flour your work surface and rolling pin. I recommend using a silicone mat on your work surface.
3) Begin rolling out the dough, turning, and flouring frequently to prevent sticking.
4) While rolling, keep pinching the edges using your thumb and finger to seal them as they crack.
5, 6) Keep rolling, turning and sealing as needed until you have a circle that's about 12 inches in diameter and ⅛ inch thick.
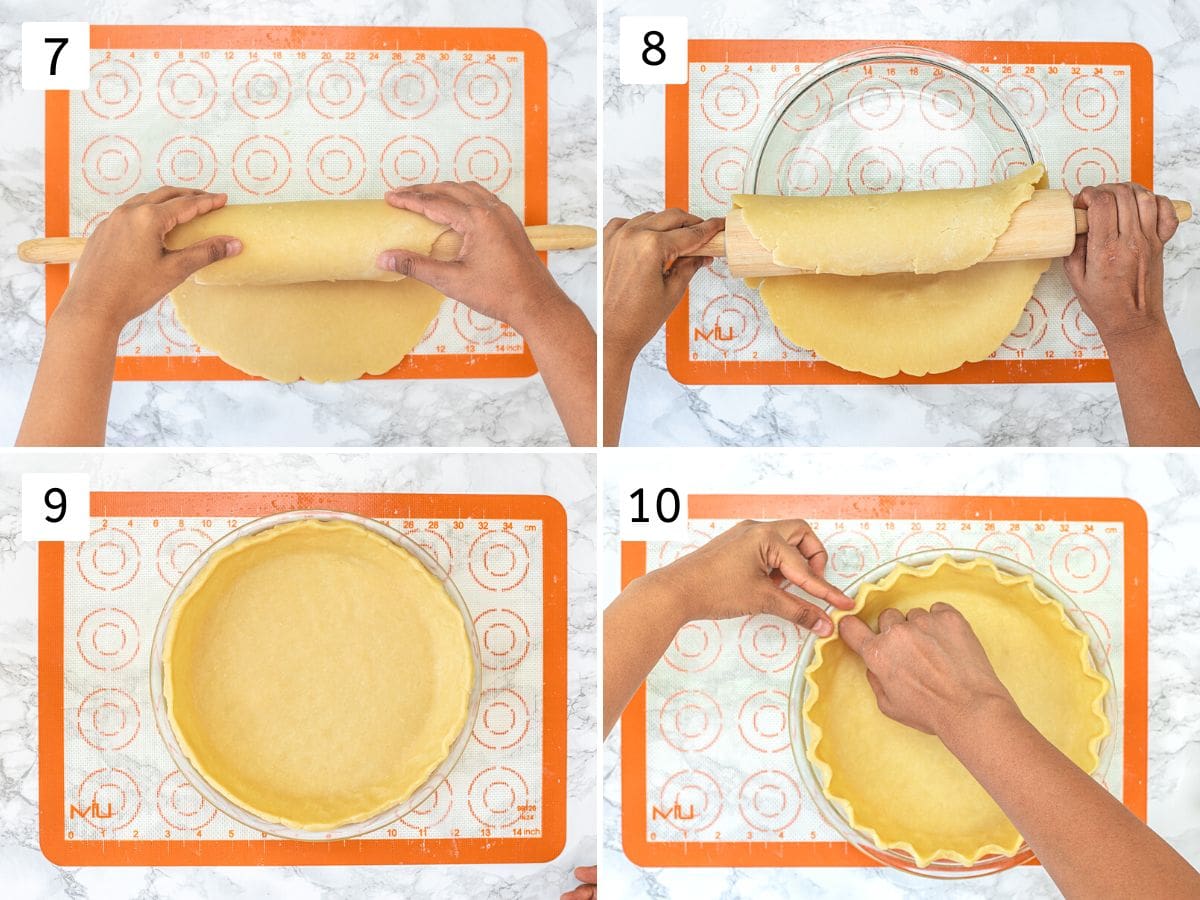
7) Carefully transfer the rolled dough to a 9-inch pie dish with the help of a roller.
8) Press it gently into the bottom and sides of the dish.
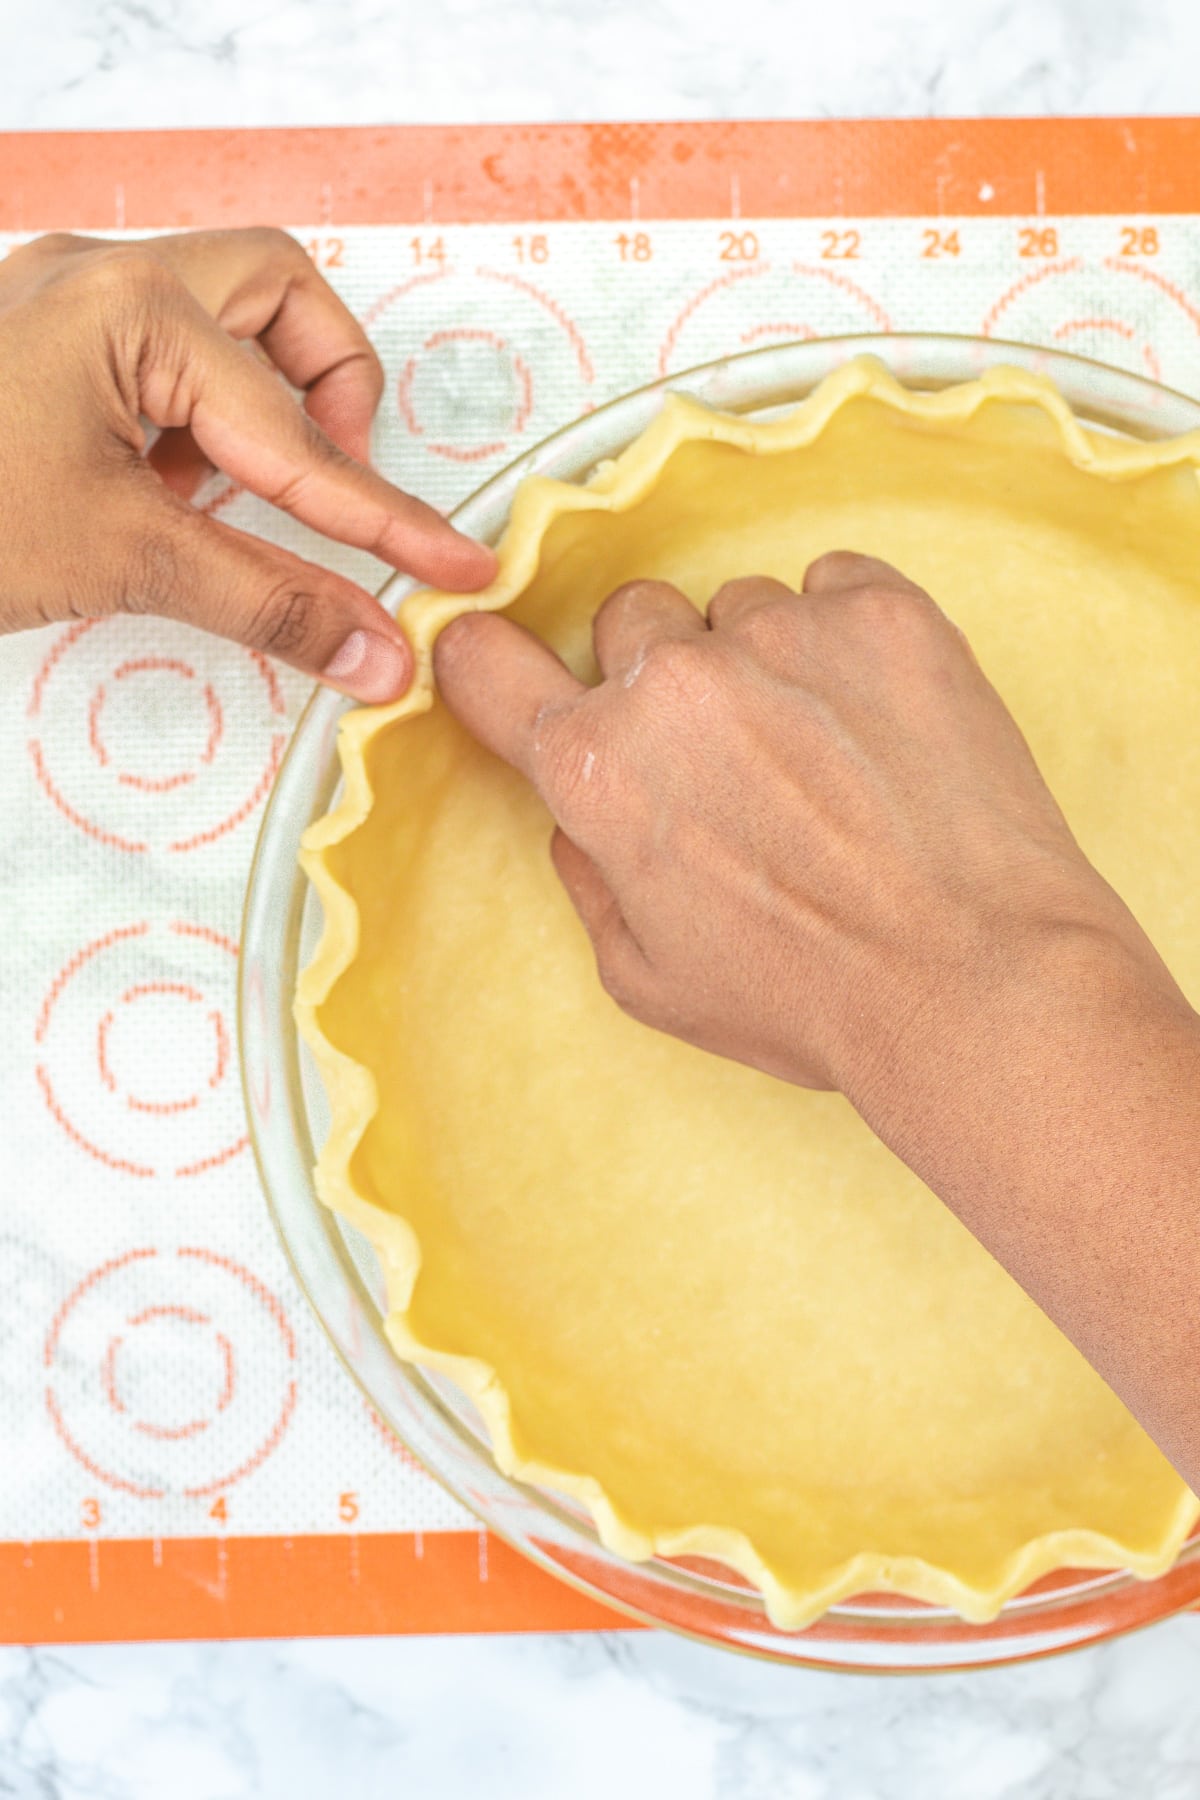
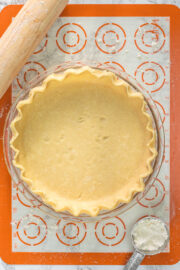
9, 10) Trim any excess dough hanging over the edges, and shape the edges as desired. I have used my fingers to flute the edges.
Chill the pie crust the fridge for about 20-30 minutes or until firm before baking. Then from here, you can partially blind bake, or fully bake, or add filling bake as the recipe calls for.
💭 Tips For BEST Food Processor Pie Crust
- It's a good idea to double the pie crust recipe when preparing pies like classic apple pies or quiches that require both a top and bottom crust.
- Accurately measuring ingredients, especially flour, is essential. Use measuring cups and spoons designed for dry ingredients and level them off for accuracy.
- Cold ingredients are the secret to a flaky crust. Ensure your butter is well-chilled, and use ice-cold water.
- Handle the dough as little as possible. Overhandling can lead to a tougher crust. It's okay if there are some visible butter pieces in the dough; these will melt during baking, creating those coveted flaky layers.
- Add ice-cold water gradually and through the food processor's tube while running. It helps distribute the moisture evenly and prevents overworking the dough.
- Before wrapping the dough to chill, perform the pinch test. It should come together when pinched but not feel too dry or too wet. Adjust with tiny amounts of water or flour if needed.
- Don't rush the chilling process. Let the dough rest in the fridge for at least 30 minutes.
- If the dough becomes too soft or sticky at any point during the rolling process, place it in the refrigerator for a short while to firm up before continuing.
- To prevent your pie crust from shrinking during baking, ensure it's well-chilled before filling and baking.
🥣 Storage Instructions
- To Refrigerate, wrap food processor pie dough tightly in plastic wrap or place it in an airtight container. Store it in the refrigerator for up to 2 days.
- To Freeze, Wrap the pie dough in plastic wrap, followed by aluminum foil, or in an airtight freezer bag. Frozen pie dough can be stored for up to 2-3 months.
- To Thaw, allow it to rest in the refrigerator overnight.
I have made eggless pumpkin pie using this pie crust.
Did you try this food processor pie crust recipe? I’d love to hear about it! Leave a review in the comment section below.
Recipe Card
Food Processor Pie Crust Recipe
Ingredients
- 1 ¼ cups All purpose flour (Maida)
- ½ teaspoon Salt
- ½ tablespoons Sugar
- ½ cup Unsalted butter Chilled, cut into small cubes
- ¼ teaspoon White distilled vinegar
- 2 tablespoons Ice cold water
Instructions
Making Pie Dough:
- Add all-purpose flour and salt to your food processor. Pulse the mixture for about 15 seconds until the flour and salt are thoroughly combined. Let it sit for a minute with the lid on and let the flour settle down. Then open the lid.
- Add the cold, cubed butter into the food processor and sprinkle vinegar over the butter.
- Pulse the mixture again, but this time only 8-9 times until you get breadcrumbs-like texture, with a few slightly larger butter pieces still visible.
- While the food processor runs, slowly pour two tablespoons of ice-cold water through the tube. Continue running the processor until the dough begins to come together. It should take about 30 seconds only.
- The dough won't form a solid ball, but it should easily come together when you pinch it. It shouldn't feel overly dry or too wet.
- Place a sheet of plastic wrap on your work surface and transfer the prepared pie dough onto it.
- Gather the dough and shape it into a ball. Then, flatten it slightly to form a disc shape.
- Wrap the dough in plastic wrap and refrigerate it for 30-45 minutes or until it's firm enough to roll out.
Rolling Pie Crust:
- Once the dough has chilled, remove it from the refrigerator and let it sit at room temperature for about 5 minutes.
- Lightly flour your work surface and rolling pin. I recommend using a silicone mat on your work surface.
- Begin rolling out the dough, turning and flouring frequently to prevent sticking, until you have a circle that's about 12 inches in diameter and ⅛ inch thick.
- While rolling, keep pinching the edges using your thumb and finger to seal them as they crack.
- Carefully transfer the rolled dough to a 9-inch pie dish with the help of roller.
- Press it gently into the bottom and sides of the dish.
- Trim any excess dough hanging over the edges, and shape the edges as desired. I have used my fingers to flute the edges.
- Chill the pie crust the fridge for about 20-30 minutes or until firm. Then from here, you can partially blind bake, or fully bake, or add filling bake as the recipe calls for.
Notes
- It's a good idea to double the pie crust recipe when preparing pies like classic apple pie or quiches that require both a top and bottom crust.
- Cold ingredients are the secret to a flaky crust. Ensure your butter is well-chilled, and use ice-cold water.
- Handle the dough as little as possible. Overhandling can lead to a tougher crust. It's okay if there are some visible butter pieces in the dough; these will melt during baking, creating those coveted flaky layers.
- Don't rush the chilling process. Let the dough rest in the fridge for at least 30 minutes.
- If the dough becomes too soft or sticky at any point during the rolling process, place it in the refrigerator for a short while to firm up before continuing.
- To prevent your pie crust from shrinking during baking, ensure it's well-chilled before filling and baking.

Comments
No Comments