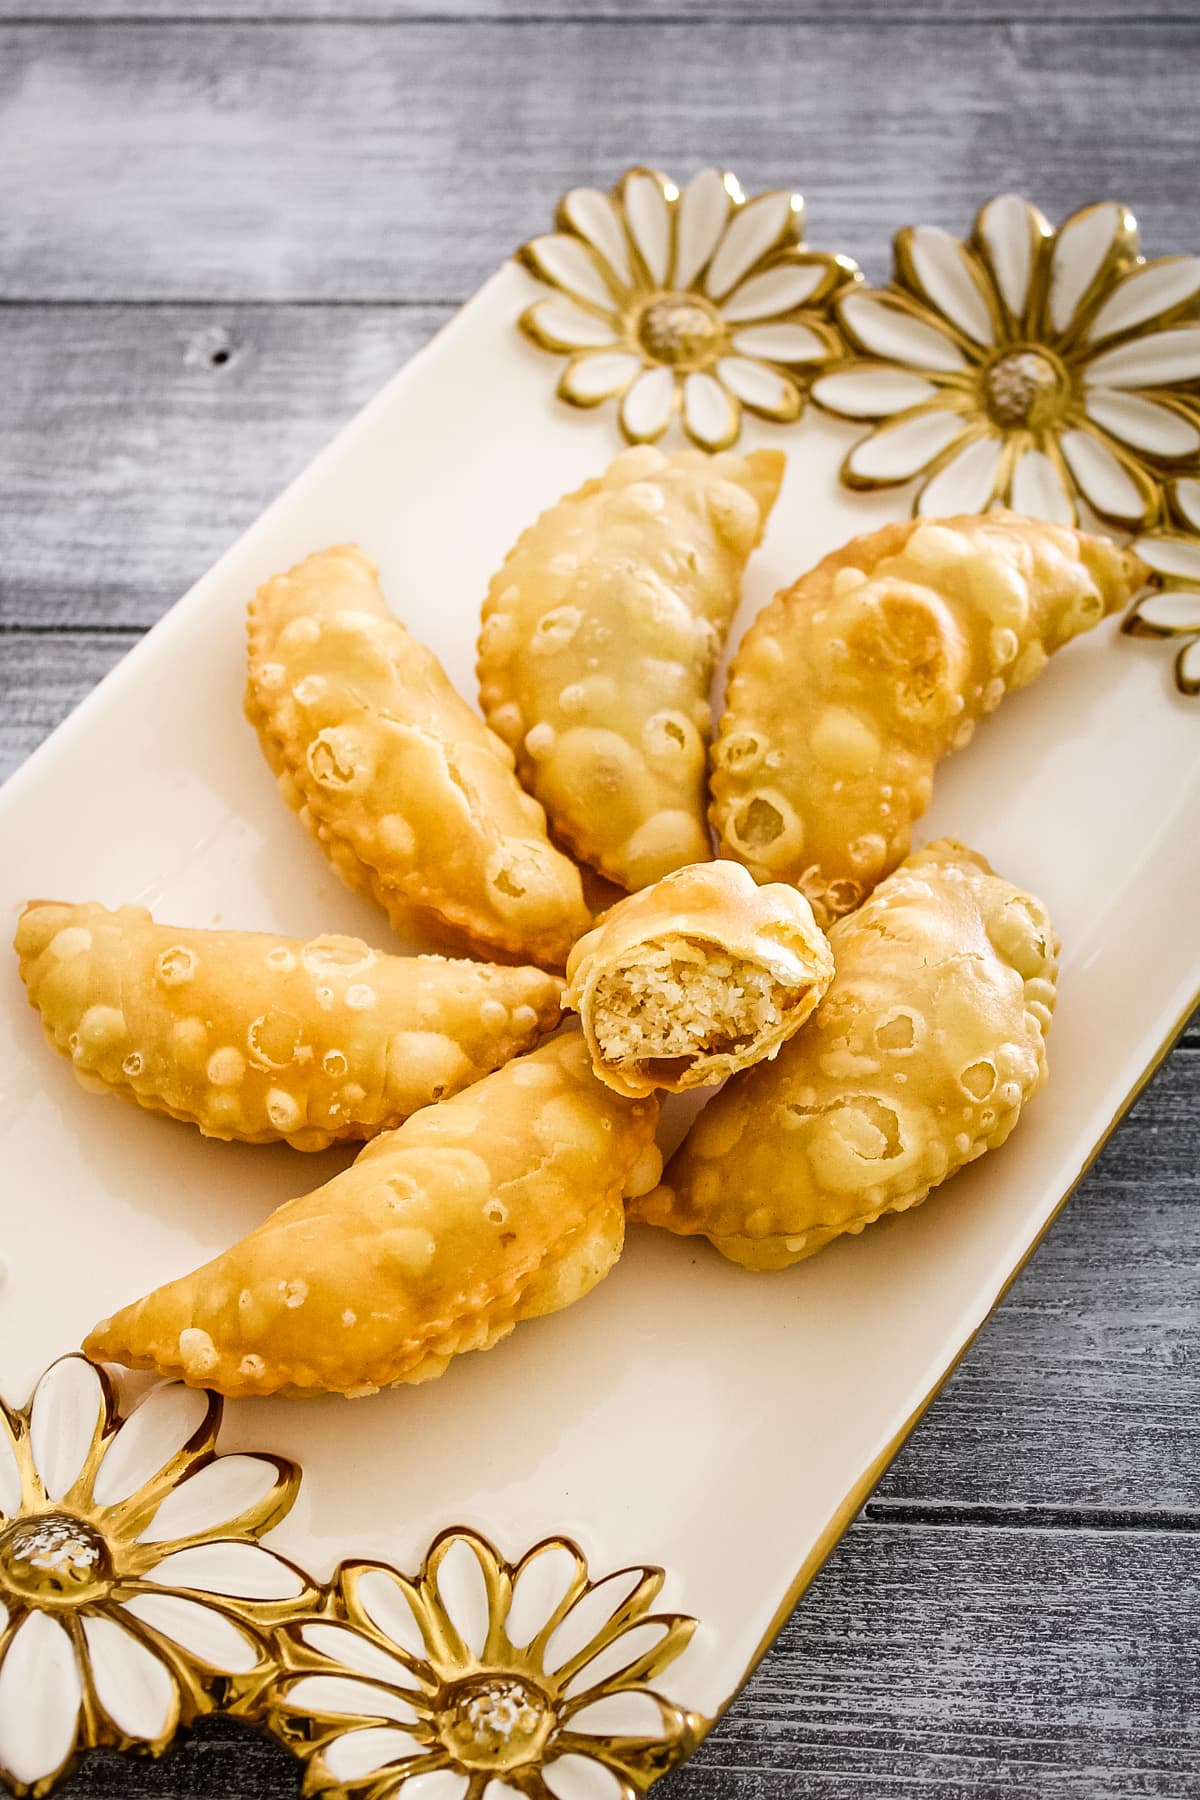
Karanji
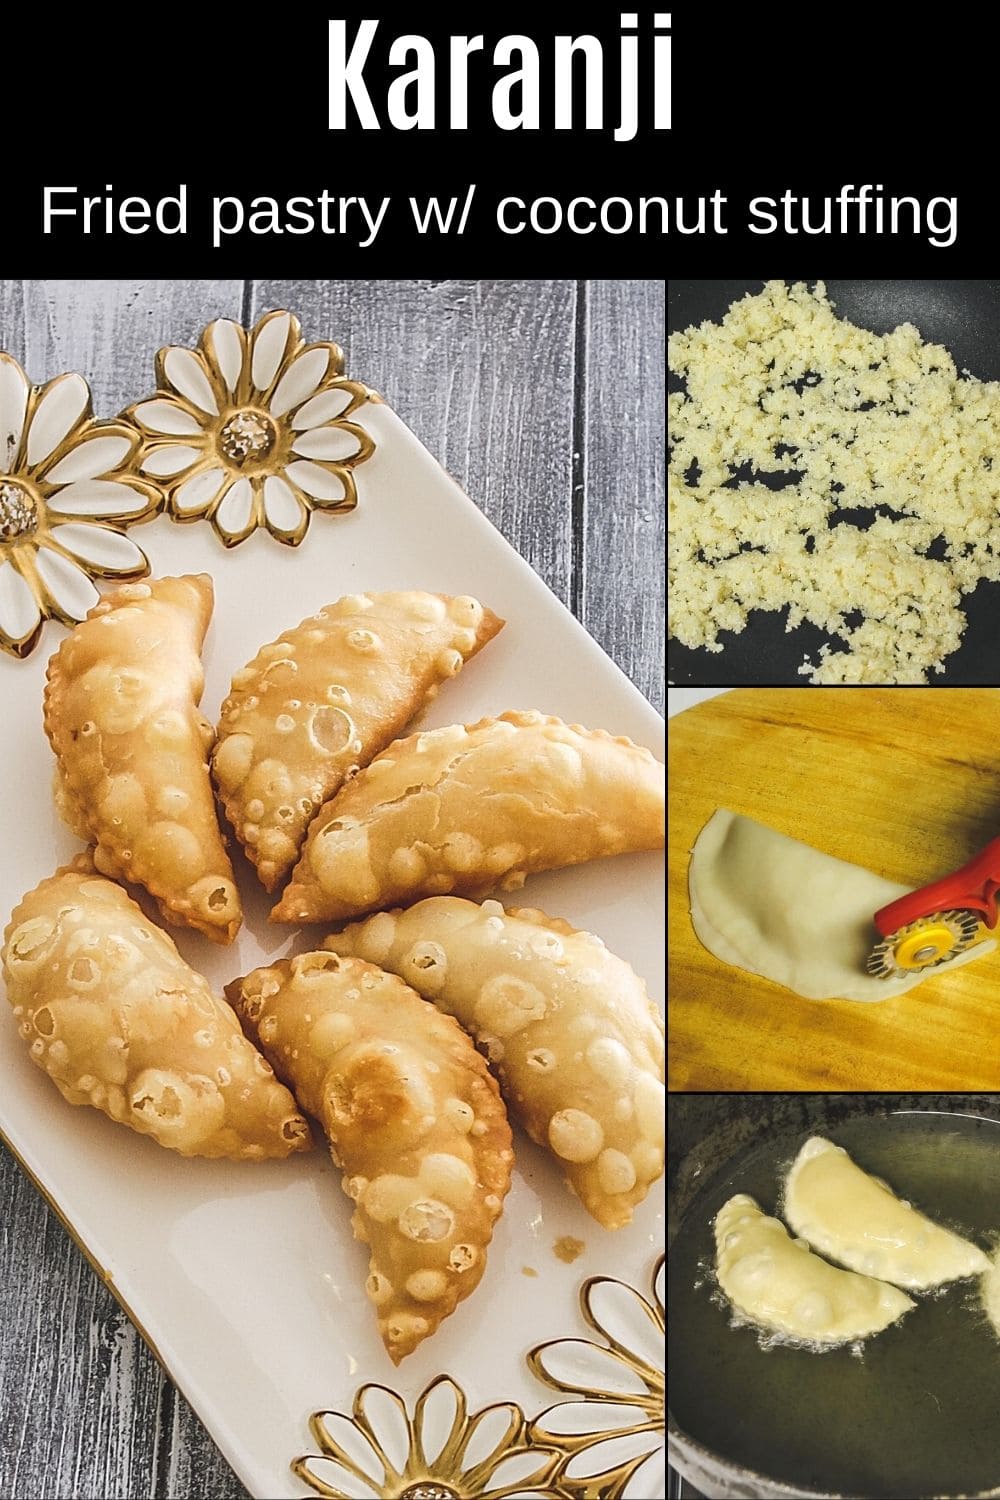
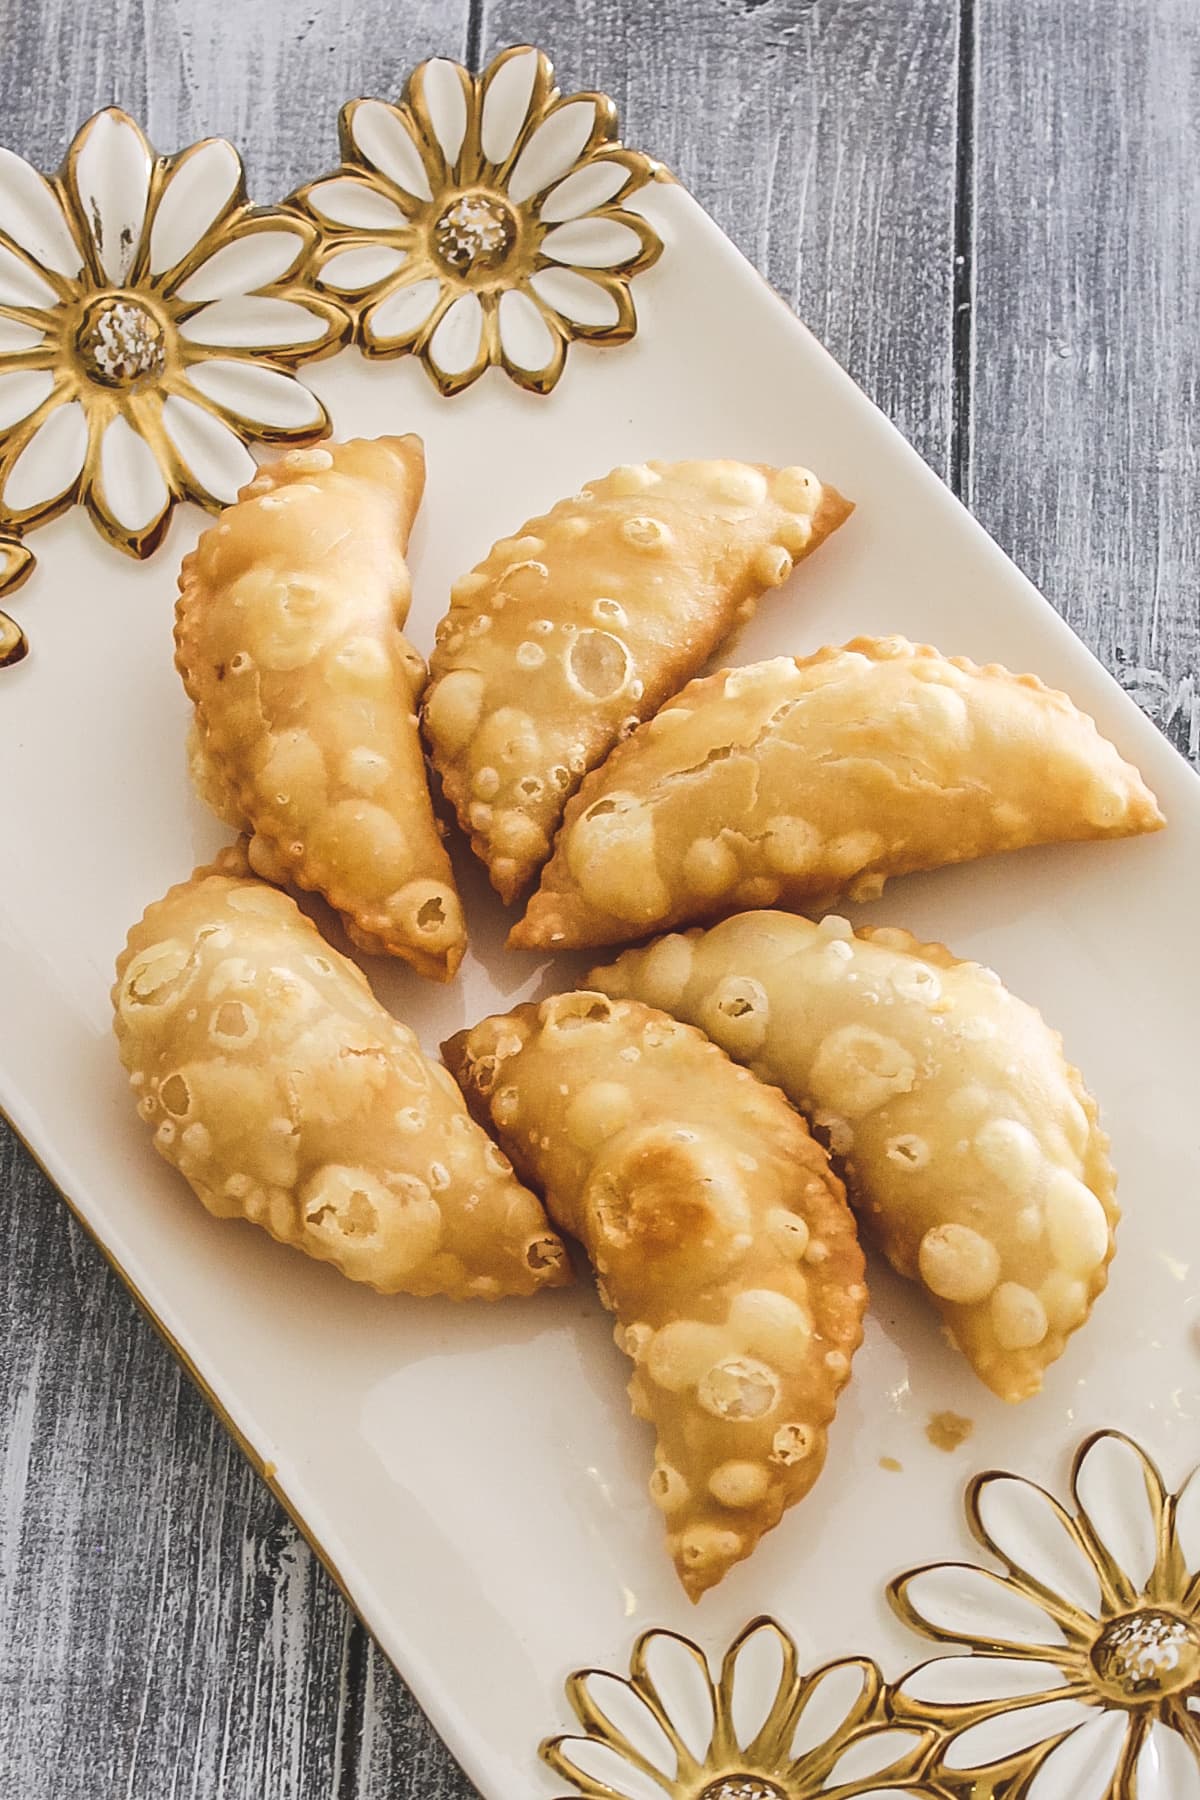
Maharashtrian Karanji. This recipe makes crispy and flaky (khuskhushit) outer cover with sweet coconut stuffing. A must-have sweet snack for festivals like Diwali and Ganesh Chaturthi.
❤️ You’ll Love This Karanji Because
- Karanji recipe requires 8 ingredients only. All of them are basic and easily available in the Indian pantry.
- This is the authentic recipe where the stuffing is made with dry (desiccated) coconut.
- I know karanji making process is time-consuming because the shaping part takes some time. But the time is totally worth it when your family loves it.
- The step-by-step photos will help beginners like you.
🧾 Ingredient Notes For Karanji Recipe
Here is the pic of ingredients used in making karanji. Total 8 ingredients (3 for outer covering + 5 for stuffing).
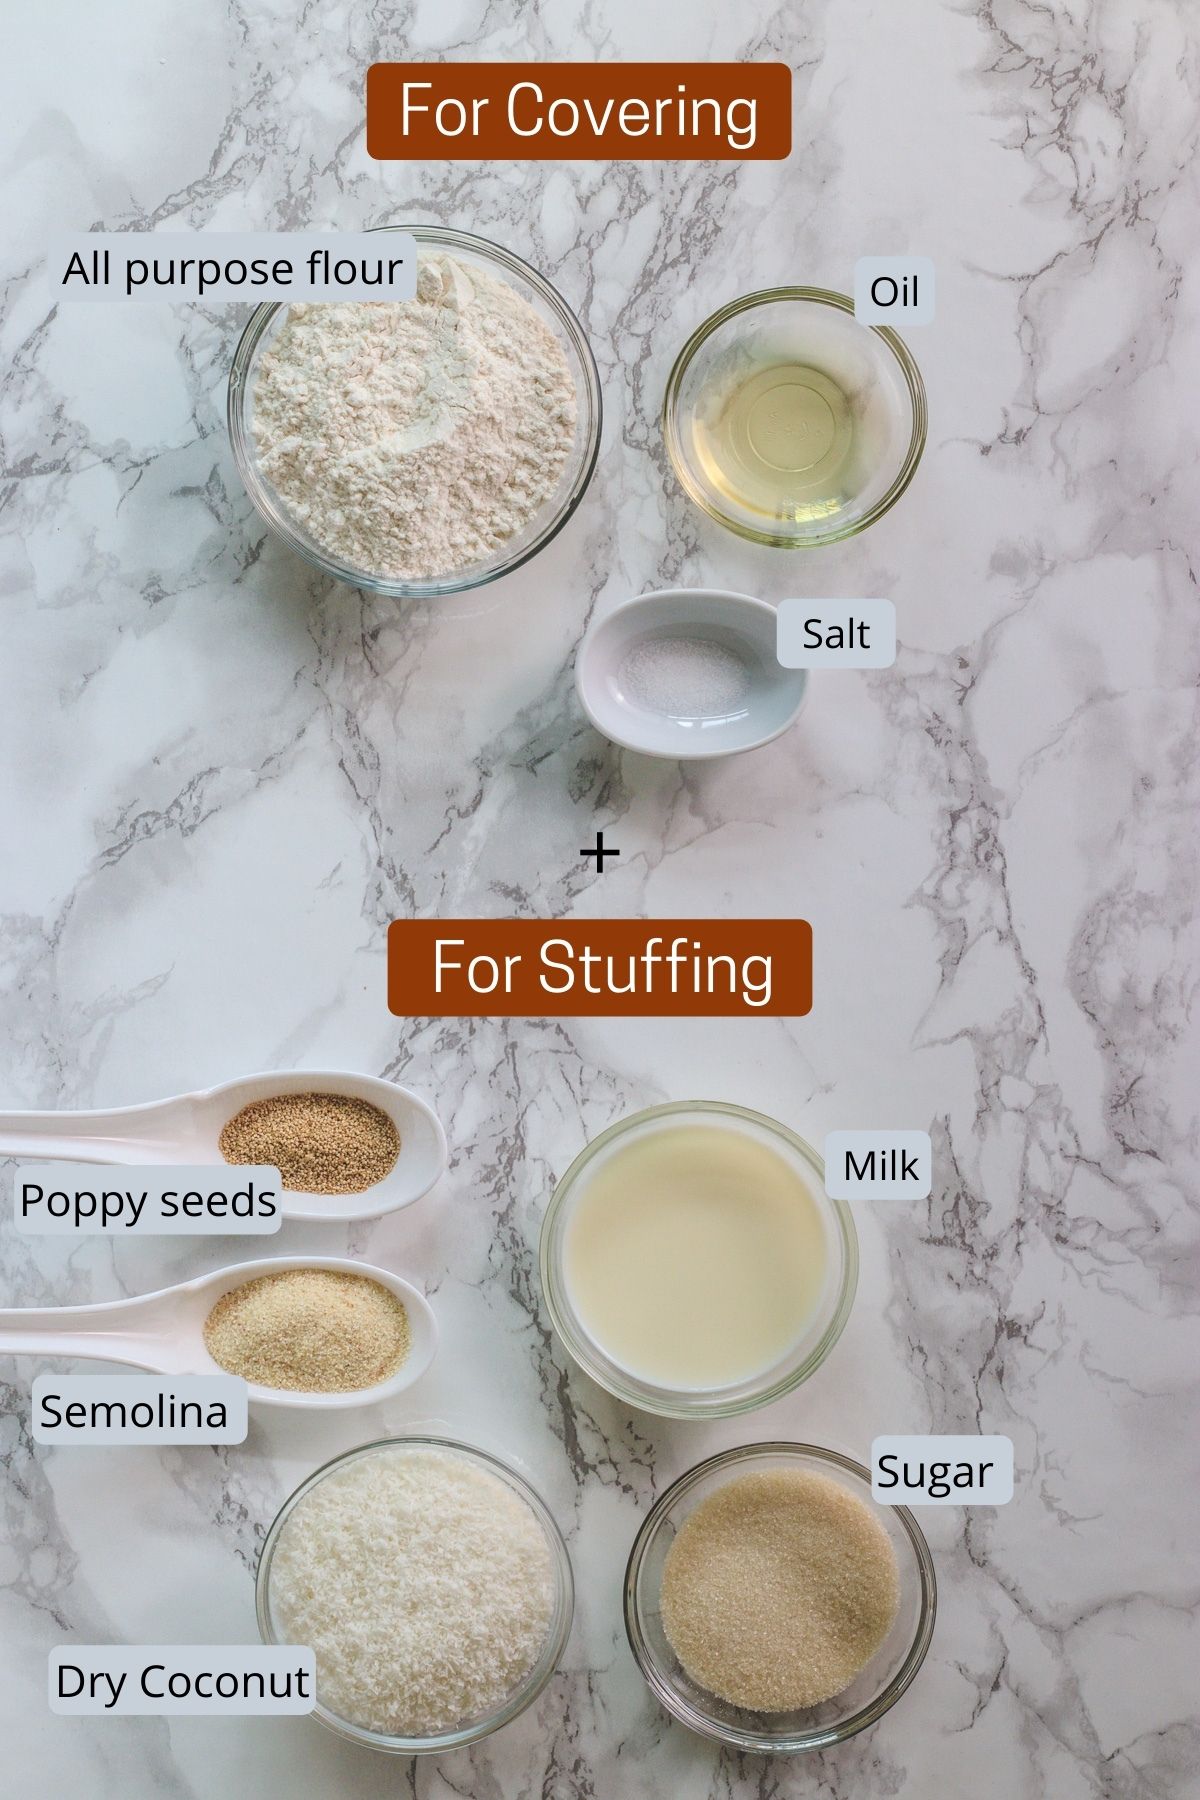
- All purpose flour (maida) – Since this is a festive snack and made very occasionally, so all purpose flour is used. You can use whole wheat flour (atta) to make it little on the healthier side.
- Dry coconut – yes, desiccated coconut is used. If the fresh used then shelf-life is reduced. Hence dry is used.
- Semolina and poppy seeds – These two are added at the end of the cooking process which absorbs the excess moisture. This helps to increase the shelf life.
- For a variation, you can flavor up the karanji stuffing with cardamom powder. Or you can also add ground almonds or cashews. I have kept it simple and authentic. This karanji recipe is from my friend’s mom.
👩🍳 How To Make Karanji? (Step By Step)
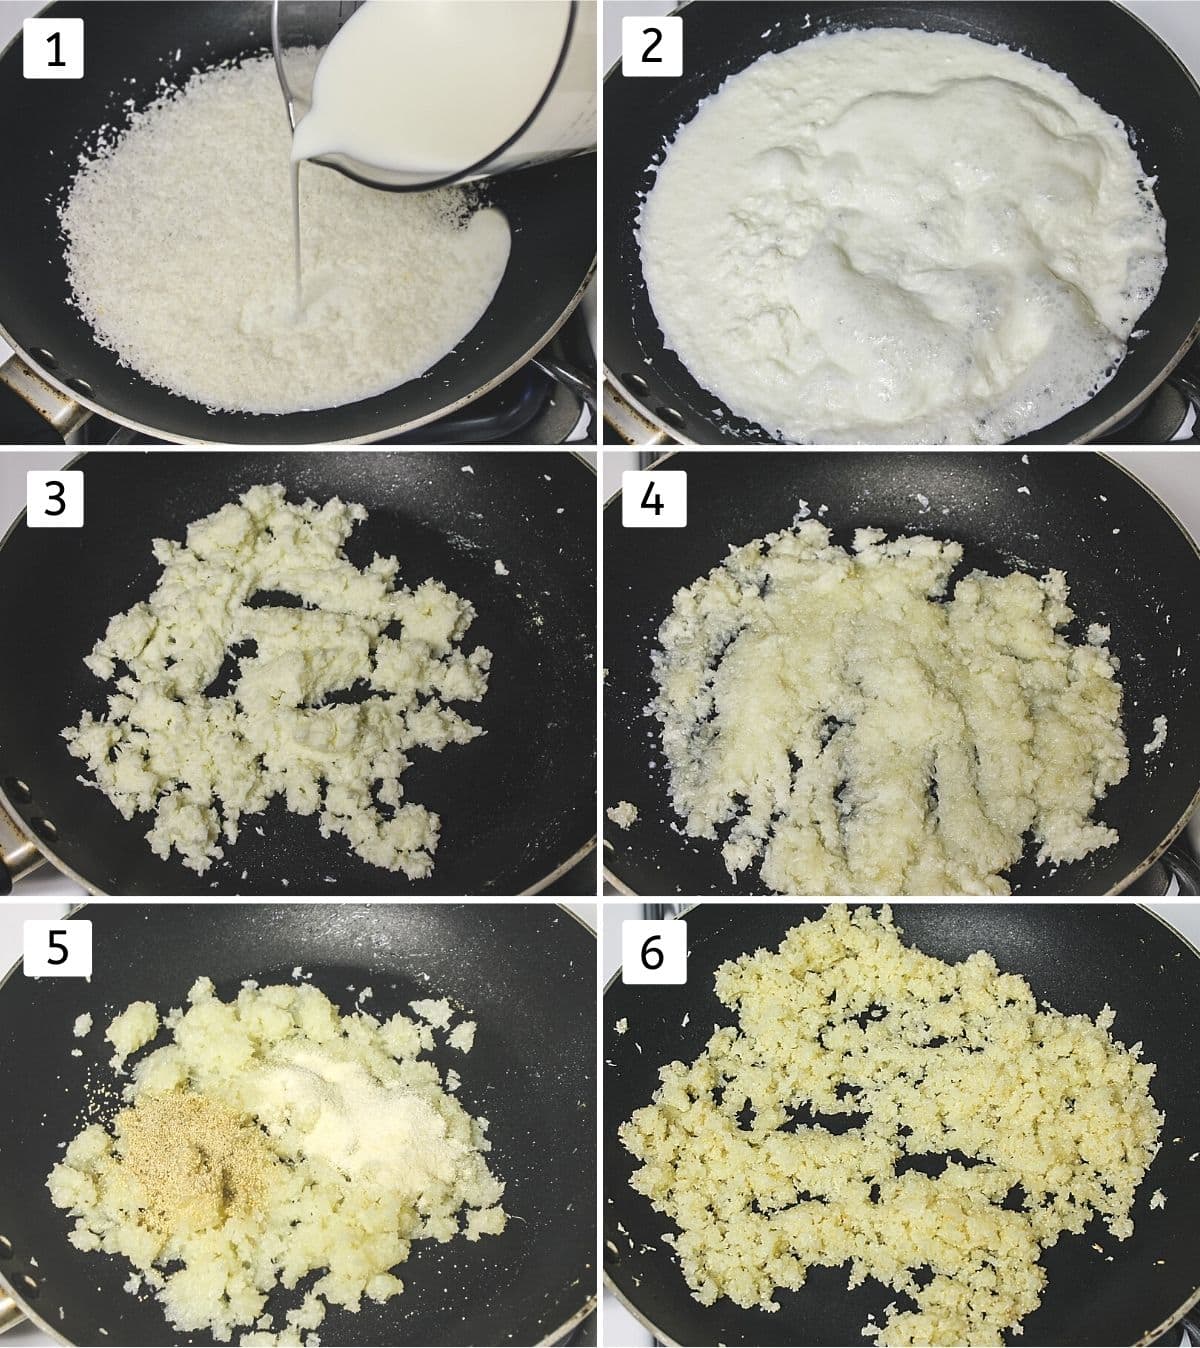
Make Stuffing For Karanji:
1) Take dry coconut and milk in a pan and turn the heat on medium.
2) Let it come to a simmer, stir every 2-3 minutes and cook.
3) Cook till all the milk dries out (no bubbles are forming on the side) It takes around 20 minutes.
4) Now add sugar. As it melts becomes runny and cook till it dries out again.
5) Now add semolina and poppy seeds.
6) Mix and cook for 2 minutes. Semolina will soak all the moisture and stuffing looks dry (but it has some moisture). Let it cool down completely.
Make Dough For Outer Layer:
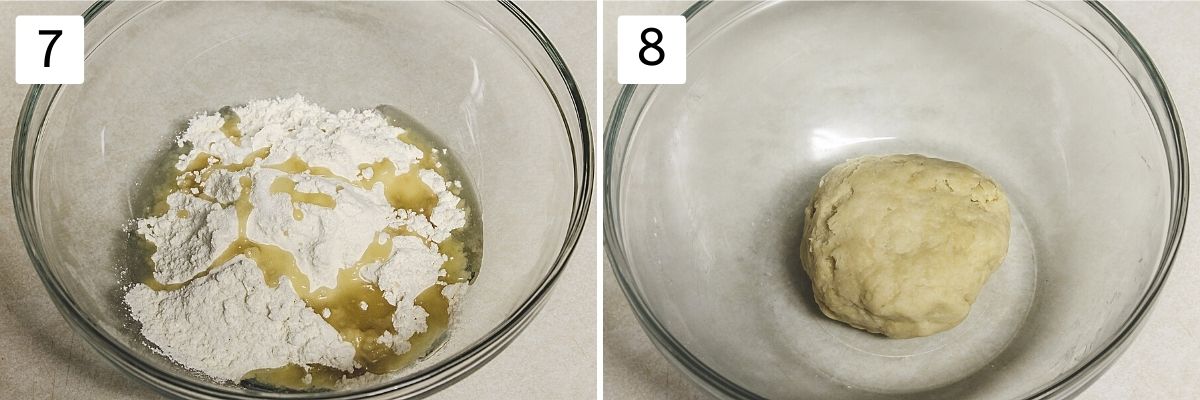
7) Take all purpose flour and salt in a bowl. Add oil. Mix with your fingertips and it looks like breadcrumbs.
8) Now start adding little water at a time and knead till you get a smooth yet stiff dough. Cover and let it rest for 15 minutes.
Shaping And Frying Karanji:
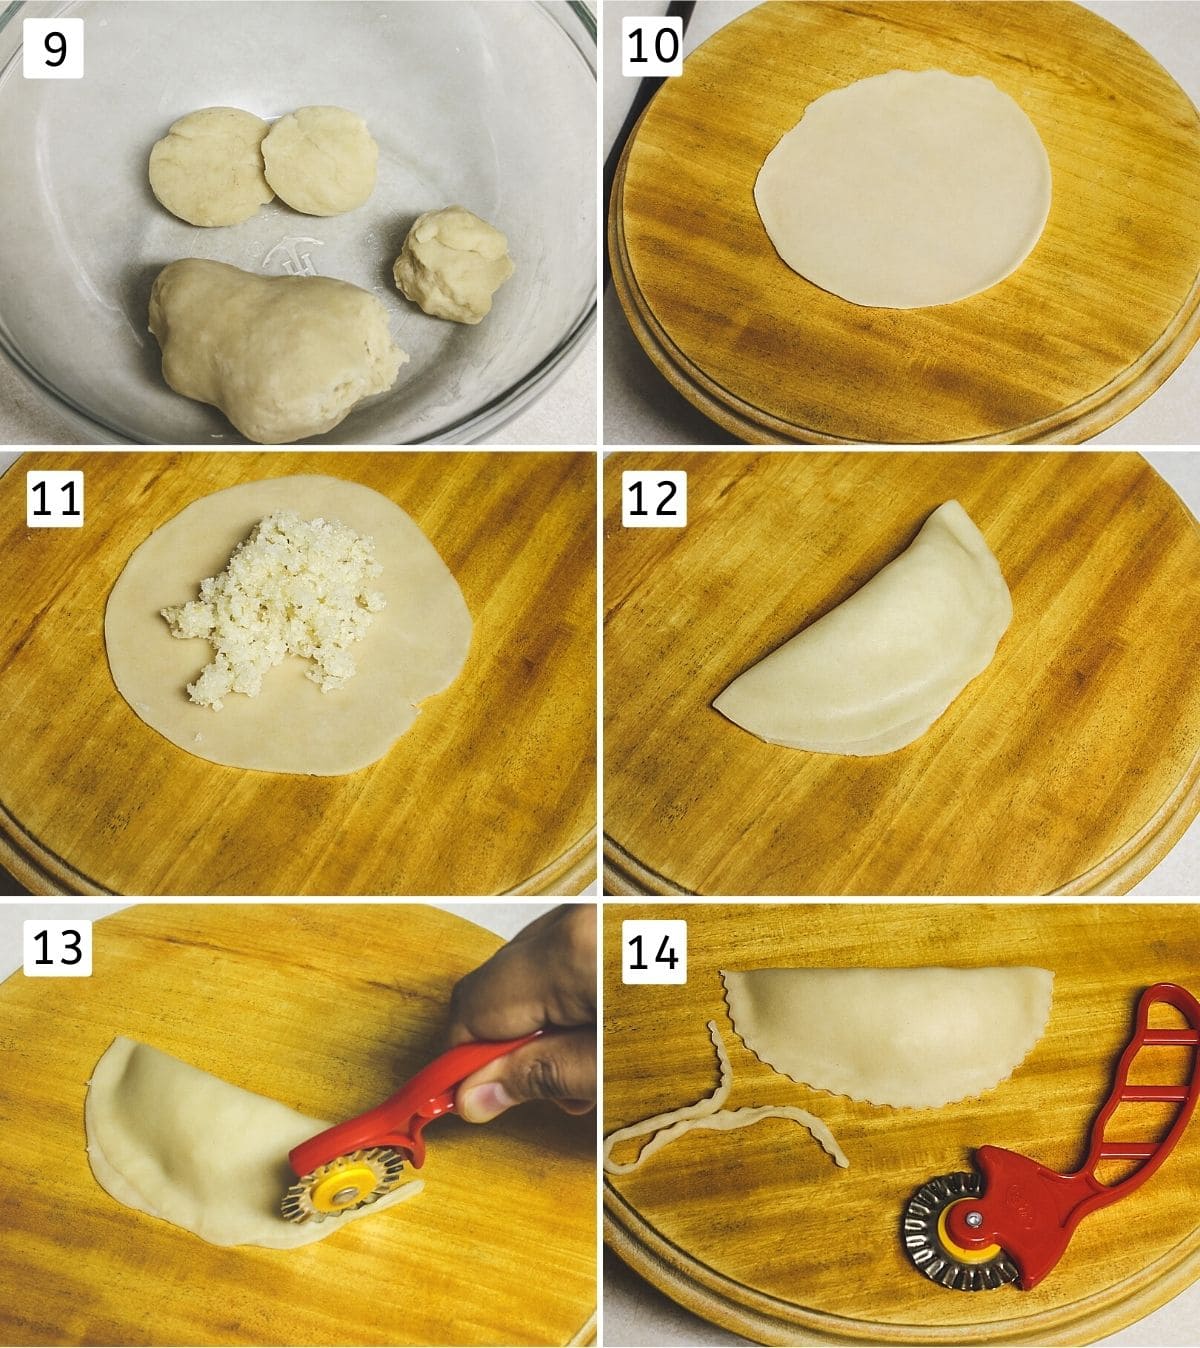
9) After resting time, again knead the dough 2-3 times to make it smooth. Divide into 20 equal portions, make a smooth ball and flatten between your palm.
10) Take one flattened disc and roll into a 4-inch diameter circle with the help of a rolling pin and rolling board. Roll all of them and keep them in a plate (spread in a plate, do not stack). Keep it covered with a clean kitchen towel.
11) Now take one rolled disc. Place 1 tablespoon of stuffing in the center. Apply water around the edges using a finger or pastry brush (this helps to seal the edges).
12) Fold into a half-moon shape and seal the edges by pressing with your finger. Take time and seal really well otherwise it will open up while frying and it becomes a huge mess.
13) Now using the designed cutter cut the edges. If you are expert enough, then you can make a design by hand by pleating the edges (like our moms do).
14) Similarly, shape all the karanji, keep them in a plate on a single layer and keep covered with a kitchen towel. If you have someone to help, this process can be done quickly. One person is rolling and another person is filling and shaping. So both the tasks will be done simultaneously.
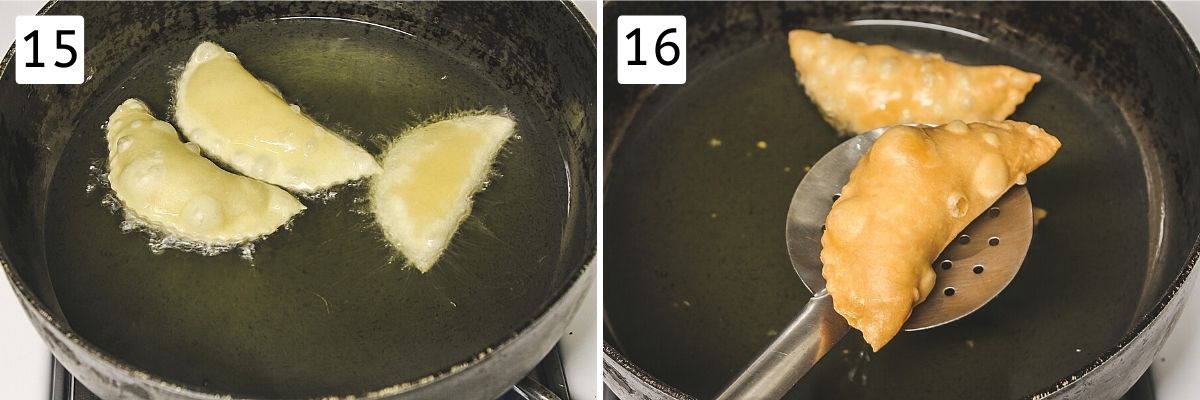
15) When you are about to finish shaping, heat the oil in kadai/pan for deep frying on medium heat. Once hot slide few karanji carefully in it.
16) Flip them and move around for even browning from both sides. When it is golden brown and crispy from both sides, remove it using slotted spatula and keep on a paper towel lined plate. Repeat frying for rest. Let karanji cool down completely before storing in the container.
💭 Expert Tips For Making Best Karanji
- Stuffing has to be dry otherwise it will soften the outer crispy layer after storing karanji in the container.
- Sealing the edges properly is very important. So use water to help the edges seal nicely.
- You can use gujia mould available in the market to shape karanji.
- Keep shaped karanji covered to avoid drying.
- You can double, triple the amount. Keep in mind that cooking time will be increased for stuffing as milk takes time to evaporate.
FAQs
Drop a tiny little portion of dough ball into the hot oil
– If it comes on top immediately meaning, oil is too hot
– If it stays at the bottom for longer and comes on top after a long time meaning, oil is not hot enough.
– If it comes on top after 2-3 seconds meaning, oil is perfect for frying.
There are few points to consider to make a crispy and flaky outer pastry.
– The dough has to be stiff (yet smooth). If your dough is soft like roti then crust becomes crispy but not flaky.
– The fat vs flour ratio has to right. So do not reduce the oil amount while kneading the dough.
– Do not fry into the really hot oil. The temp has to be medium hot.
Check Out Other Snacks Made During Festivals
PS Tried this karanji recipe at home? Please leave a star rating in the card below and/or a review in the comment section. I always appreciate your feedback! Plus, Subscribe to my newsletter and follow along on Pinterest, Instagram, and Facebook for all the latest updates.
Karanji Recipe (Maharashtrian)

US measuring cups are used (1 cup = 240 ml)
Ingredients
For Stuffing:
- 1 cup Desiccated coconut
- 1 cup Milk
- 6 tablespoons White granulated sugar
- 1 tablespoon Khas khas (White poppy seeds)
- 2 tablespoon Sooji (rava or semolina)
For Outer Crust:
- 1 ½ cup All purpose flour (Maida)
- 3 tablespoon Oil , + more for deep frying
- ⅛ teaspoon Salt
- Little less than ½ cup Water
Instructions
Making Stuffing:
- Take dry coconut and milk in a pan and turn the heat on medium
- Let it come to a simmer, stir every 2-3 minutes and cook. Cook till all the milk dries out (there is no bubbles forming on the side) It takes around 20 minutes.
- Now add sugar. As it melts becomes runny and cook till it dries out again.
- Now add semolina and poppy seeds. Mix and cook for 2 minutes. Let it cool down completely.
Kneading The Dough:
- Take all purpose flour and salt in a bowl. Add oil. Mix with your fingertips and it looks like breadcrumbs.
- Now start adding little water at a time and knead till you get a smooth yet stiff dough. Cover and let it rest for 15 minutes.
- After resting time, again knead the dough 2-3 times to make it smooth. Divide into 20 equal portions, make a smooth ball and flatten between your palm.
Shaping Karanji:
- Take one flattened disc and roll into a 4-inch diameter circle with the help of a rolling pin and rolling board. Roll all of them and keep them in a plate (spread in a plate, do not stack). Keep it covered with a clean kitchen towel.
- Now take one rolled disc. Place 1 tablespoon of stuffing in the center. Apply water around the edges using the finger or pastry brush (this helps to seal the edges).
- Fold into a half-moon shape and seal the edges by pressing with your finger. Take time and seal really well otherwise it will open up while frying and it becomes a huge mess.
- Now using the designed cutter cut the edges. If you are expert enough, then you can make the design by hand by pleating the edges (like our moms do).
- Similarly, shape all the karanji, keep them in a plate on a single layer and keep covered with a kitchen towel.
Frying Karanji:
- When you are about to finish shaping, heat the oil in kadai/pan for deep frying on medium heat. Once hot, slide few karanji carefully in it.
- Flip them and move around for even browning from both sides. When it is golden brown and crispy from both sides, remove it using slotted spatula and keep on paper towel lined plate. Repeat frying for rest.
- Let fried karanji cool down completely before storing it in the container.
Notes
- Stuffing has to be dry otherwise it will soften the outer crispy layer after storing.
- Sealing the edges properly is very important. So use water to help the edges seal nicely.
- You can use gujia mould available in the market to shape them.
- Keep shaped karanji covered to avoid drying.
- You can double, triple the karanji amount. Keep in mind that cooking time will be increased for stuffing as milk takes time to evaporate.
- If it comes on top immediately meaning, oil is too hot
- If it stays at the bottom for longer and comes on top after a long time meaning, oil is not hot enough.
- If it comes on top after 2-3 seconds meaning, oil is perfect for frying.
- The dough has to be stiff (yet smooth). If your dough is soft like roti then crust becomes crispy but not flaky.
- The fat vs flour ratio has to right. So do not reduce the oil amount while kneading the dough.
- Do not fry into the really hot oil. The temp has to be medium hot.
Hi
I tried making karanji today for the first time.they tasted yum and looked great but the covering was not crispy..it turned slightly soft n chewy on cooling. Any advice? Should I roll it out thinner or probably my dough was too soft?
to make it crispy and flaky outer layer, one need to pay attention to below.
– fat(oil or ghee) vs flour ratio should be right. If added fat it low then it becomes hard instead of flaky
– Dough should be tight, stiff. If the dough is soft then it becomes chewy and frying takes longer.
as per your comment, soft dough is the issue. Rolling it thinner will not help. Also fry on medium hot oil. If oil is too hot then it gets brown from outside too quickly and stays soft from inside.
These recipes are all so yummy….I love making these for my kids….Please keep posting more recipes.
Thank you Shaima. I am posting the new recipes regularly, keep checking the site for latest recipes.