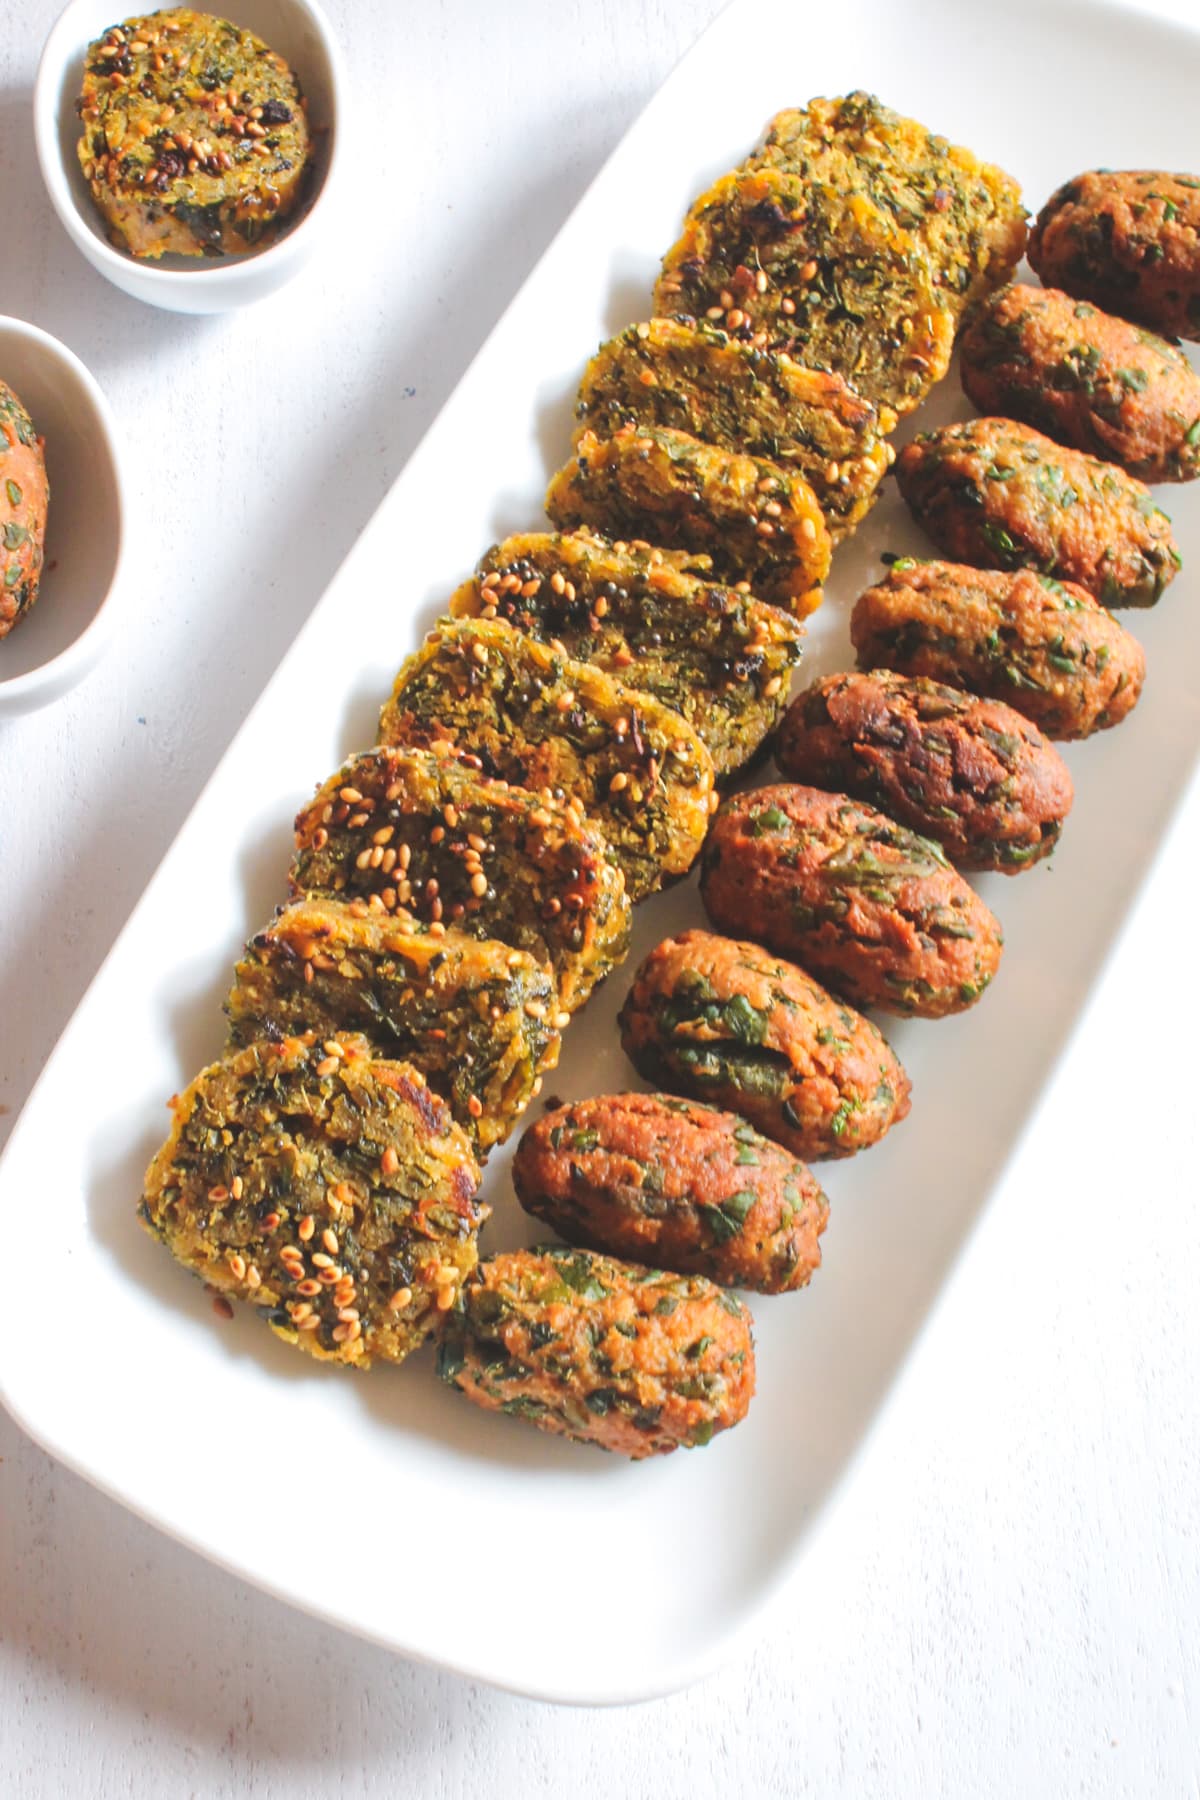
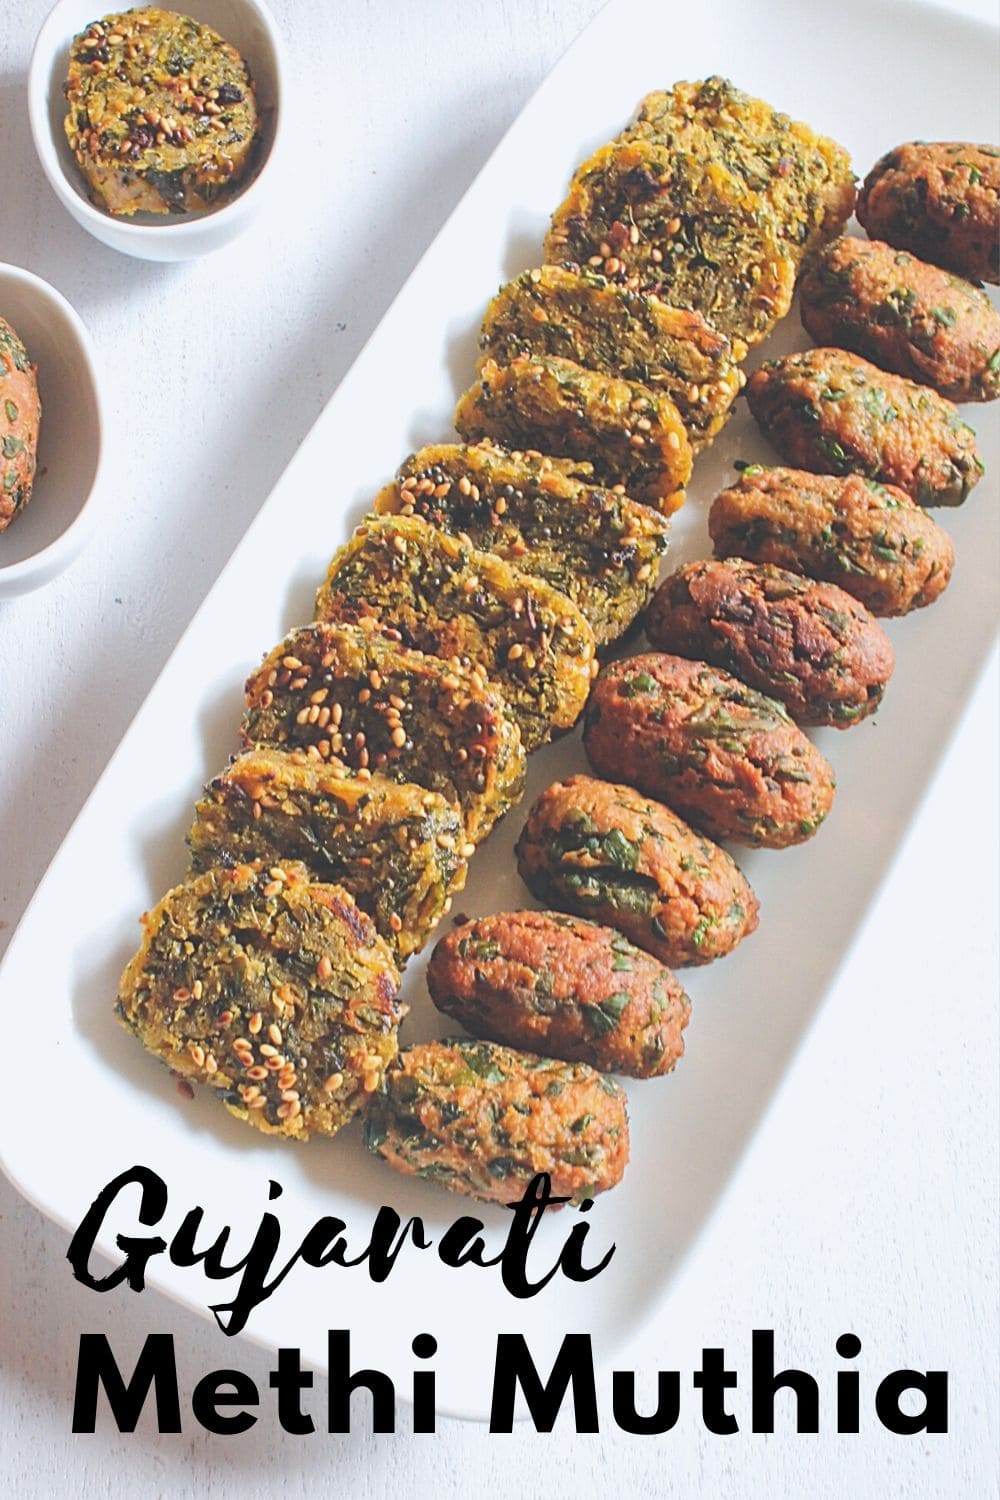
Methi muthia is a delicious tea-time snack from Gujarat. At home, we call it ‘methi na muthiya’ in the Gujarati language. Here I am sharing 3 methods - Steamed, Deep-fried, Air-Fryer.
Jump to:
❤️ About This Methi Muthia Recipe
Why is it called muthia? In the olden days, it is shaped using one fist and then steamed. In the Gujarati language, the fist is called muthi. Hence the name muthia.
But nowadays, to make it look good and presentable, we shape into the cylindrical log shape and no more use a fist to shape them.
Fenugreek leaves (methi) has a slightly bitter taste. And the muthia dough has a balance of sweet and tangy flavor. This sweet-tangy flavor goes perfect with the bitter flavor of methi.
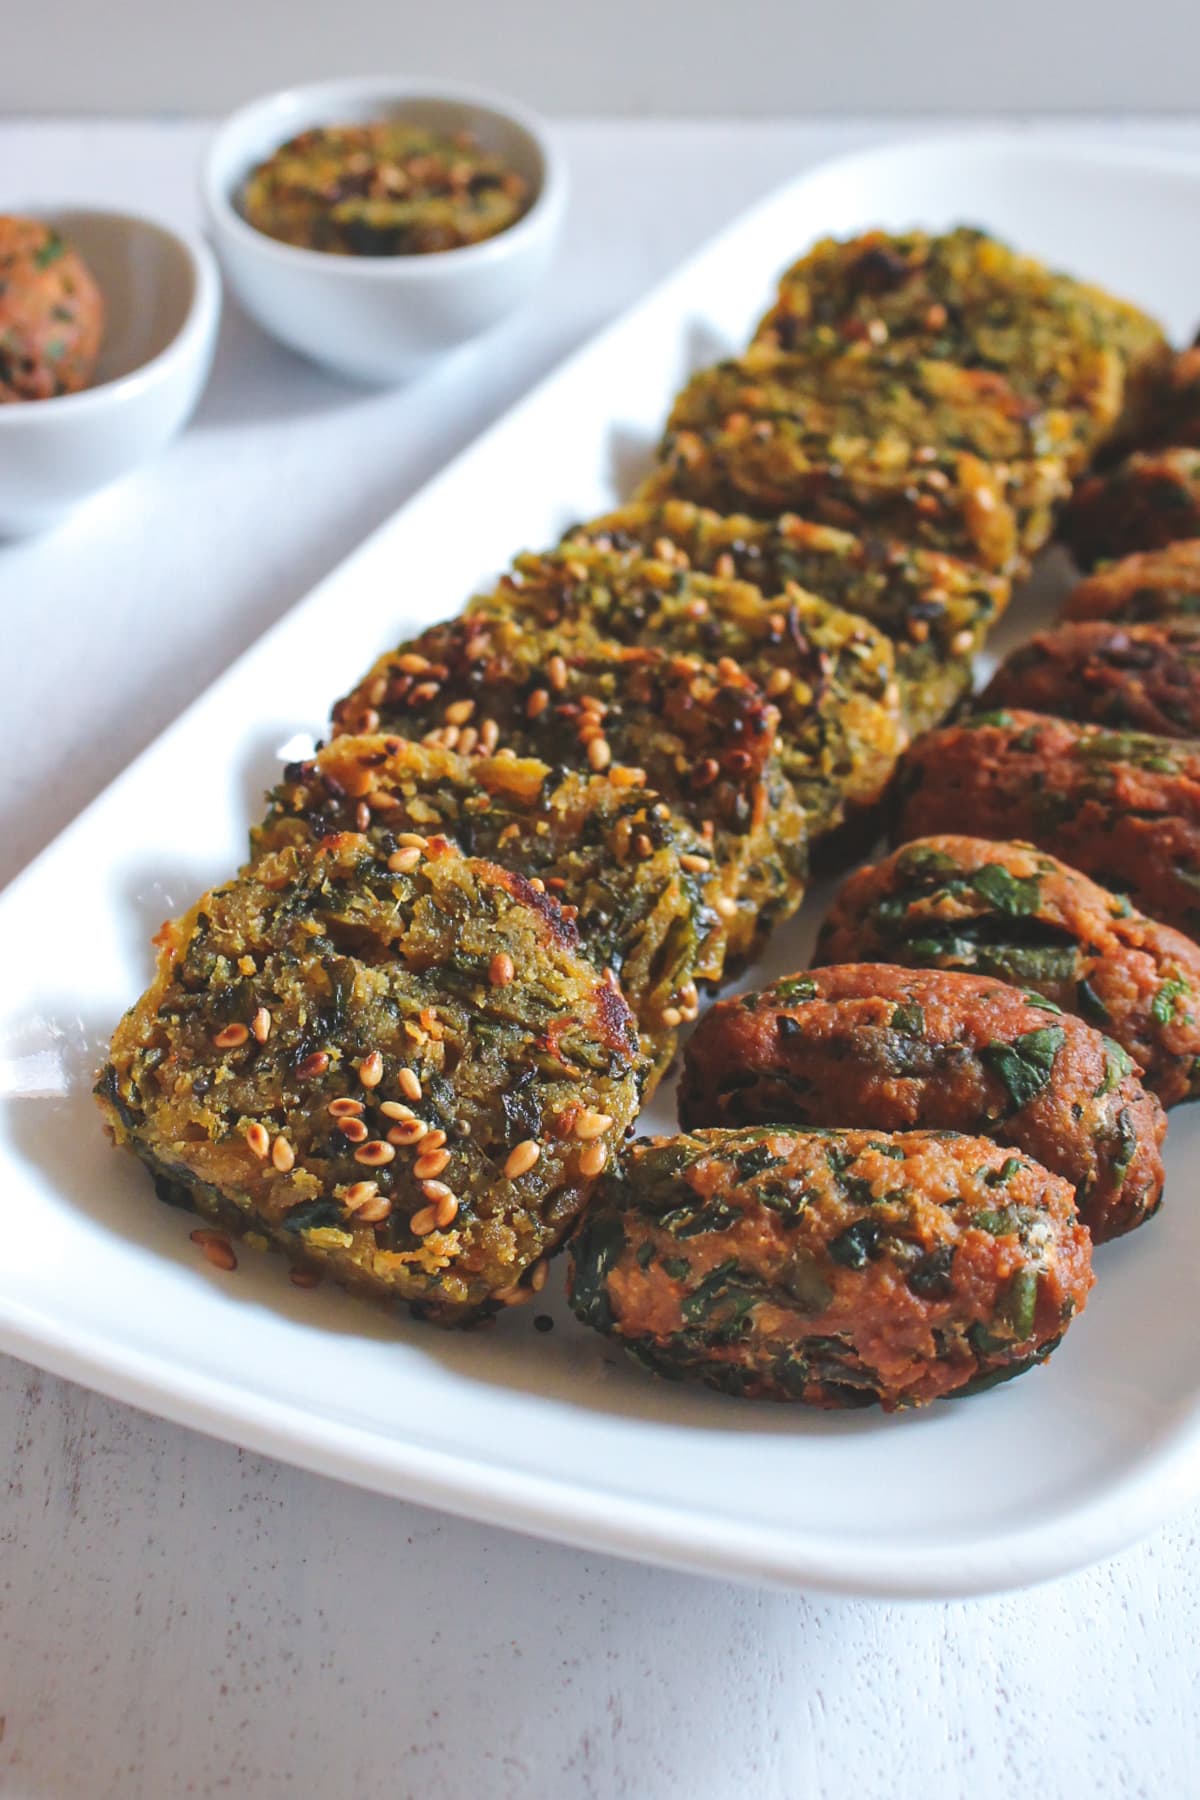
- Steamed version: This is mostly prepared for snacking. It tastes too good with a cup of hot tea (or coffee). It goes well with your choice of chutney or chunda.
- Fried methi muthia: This one is mostly made for making curry like undhiyu, tameta muthia nu shaak or papdi muthiya nu shaak. You can eat them as a snack, but I bet steamed one tastes better as a snack.
- Air Fryer Methi Muthia: These are just like the fried ones. Just to cut-down the oil amount and calories, you can air fry them instead of deep-frying. To my surprise, they came out super delicious with perfect texture - crisp and golden brown around the edges while soft and fluffy from the center (not dense at all).
🧾 Ingredient Notes
Here is the pic of the ingredients to make methi muthia dough. Plus, you’ll need oil (for deep-fried) or cooking oil spray (for air-fried). And for the steamed version, you’ll need these tempering ingredients (oil, mustard seeds, sesame seeds and hing).
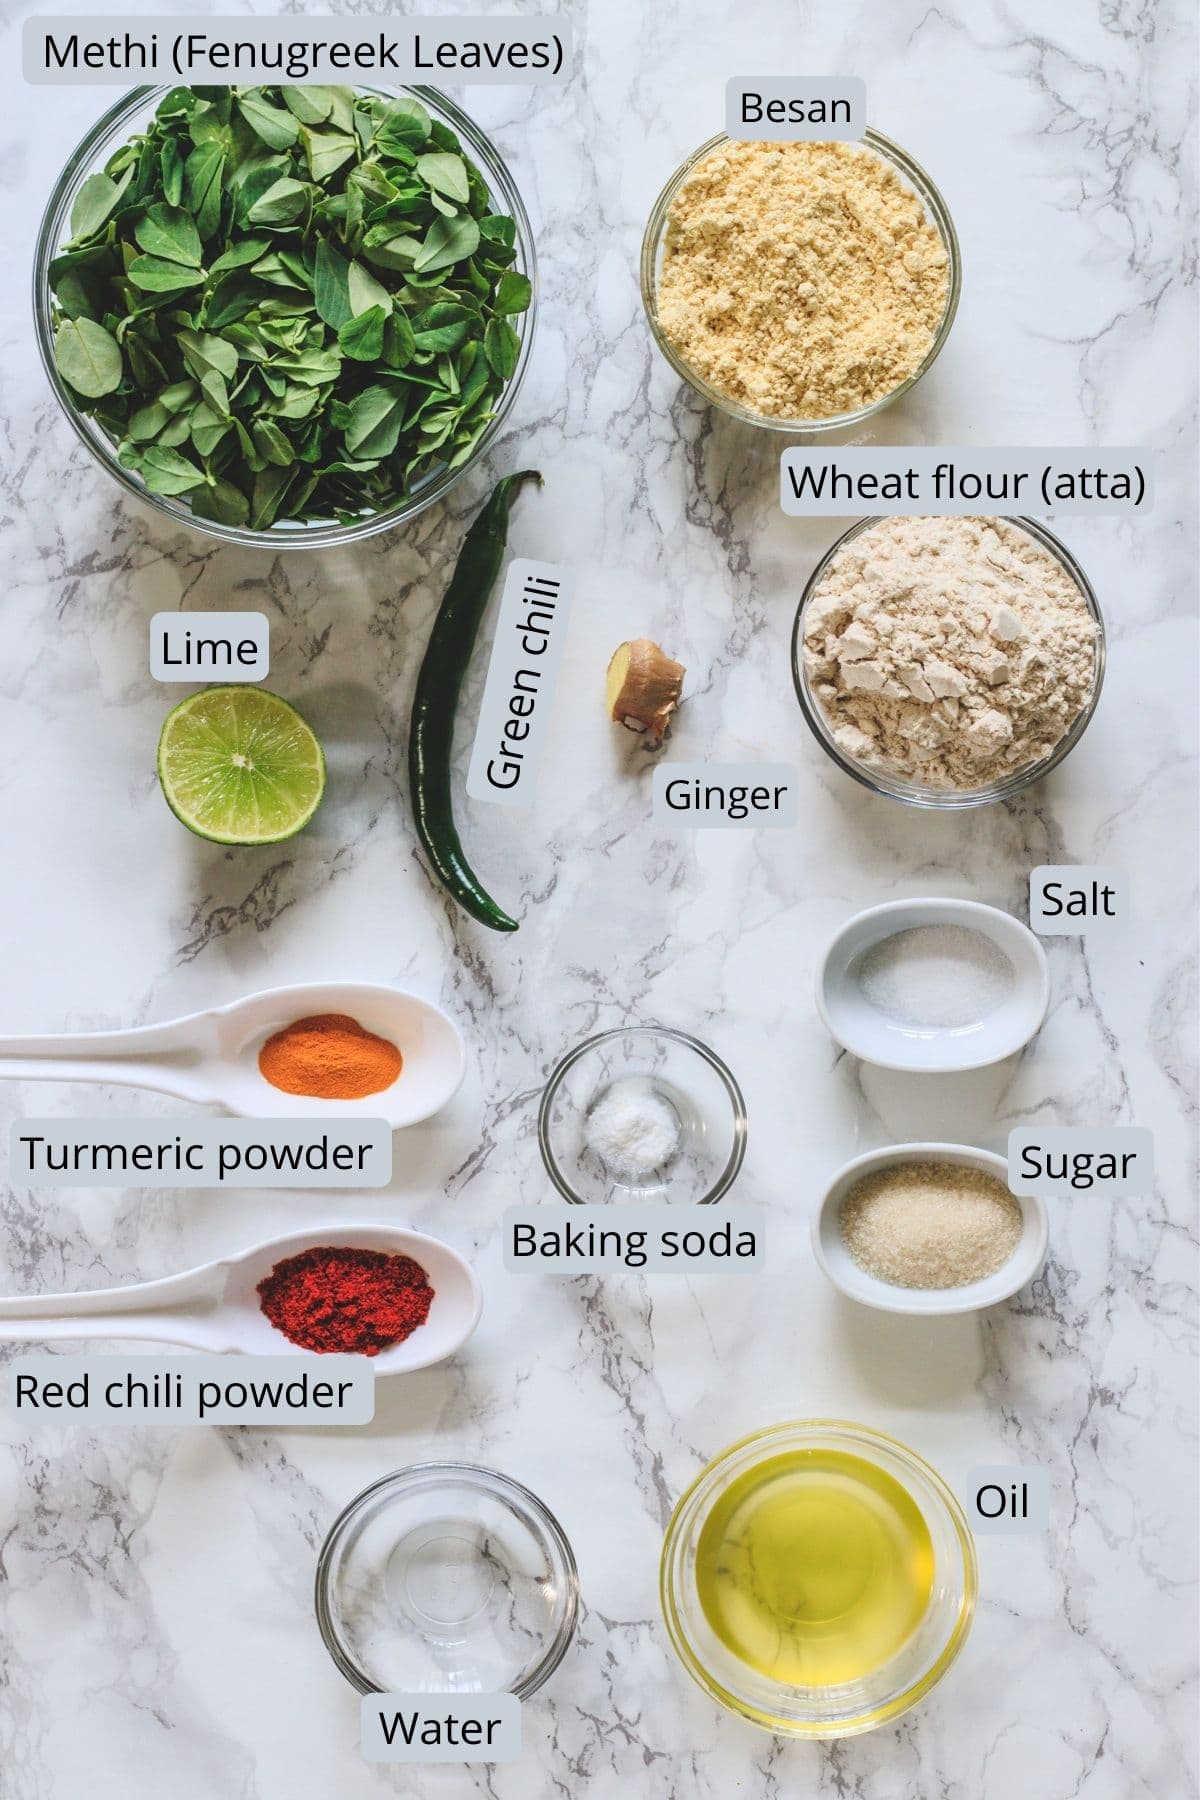
- Fenugreek leaves (methi): During the winter season (whenever possible), I prefer to but fresh methi leaves bundle. But when fresh is not available, I use a frozen bag. If using frozen, reduce the amount as it is pressed and compacted. I have given the amount detailed in the recipe card below.
- Sugar: The amount looks too much, but please do not skip or reduce. It gives a really nice taste. Trust me, it doesn’t taste sugary sweet. The addition of lime (lemon) juice will balance out the flavor.
- Baking soda: It makes a super soft and pillowy texture of methi muthia.
👩🍳 How To Make Methi Muthia Dough? (Pics)
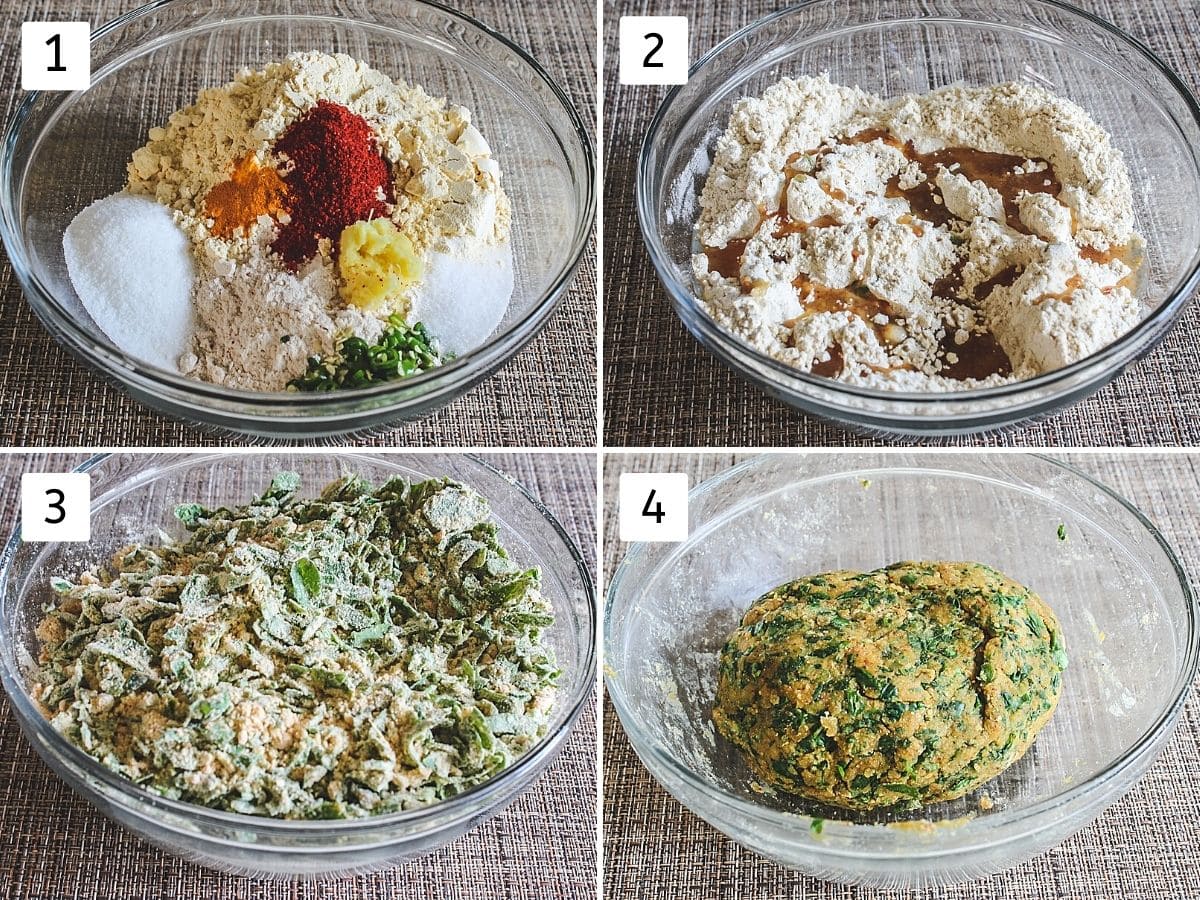
1) Take wheat flour, besan, spices (turmeric, red chili powder), salt, sugar, baking soda, ginger paste, green chilies in a bowl. Mix well.
2) Add oil and lemon juice. Mix well by rubbing between your fingers and thumb.
3) Add methi leaves and mix.
4) Now add little water at a time and knead into a smooth and soft dough. Don’t make it too soft otherwise, it becomes too sticky.
TIP: You may need more or less amount of water. It depends on how much water particles are left in your methi leaves after washing. It also depends on you’re using fresh or frozen leaves.
👩🍳 How To Steam Methi Muthia? (Pics)
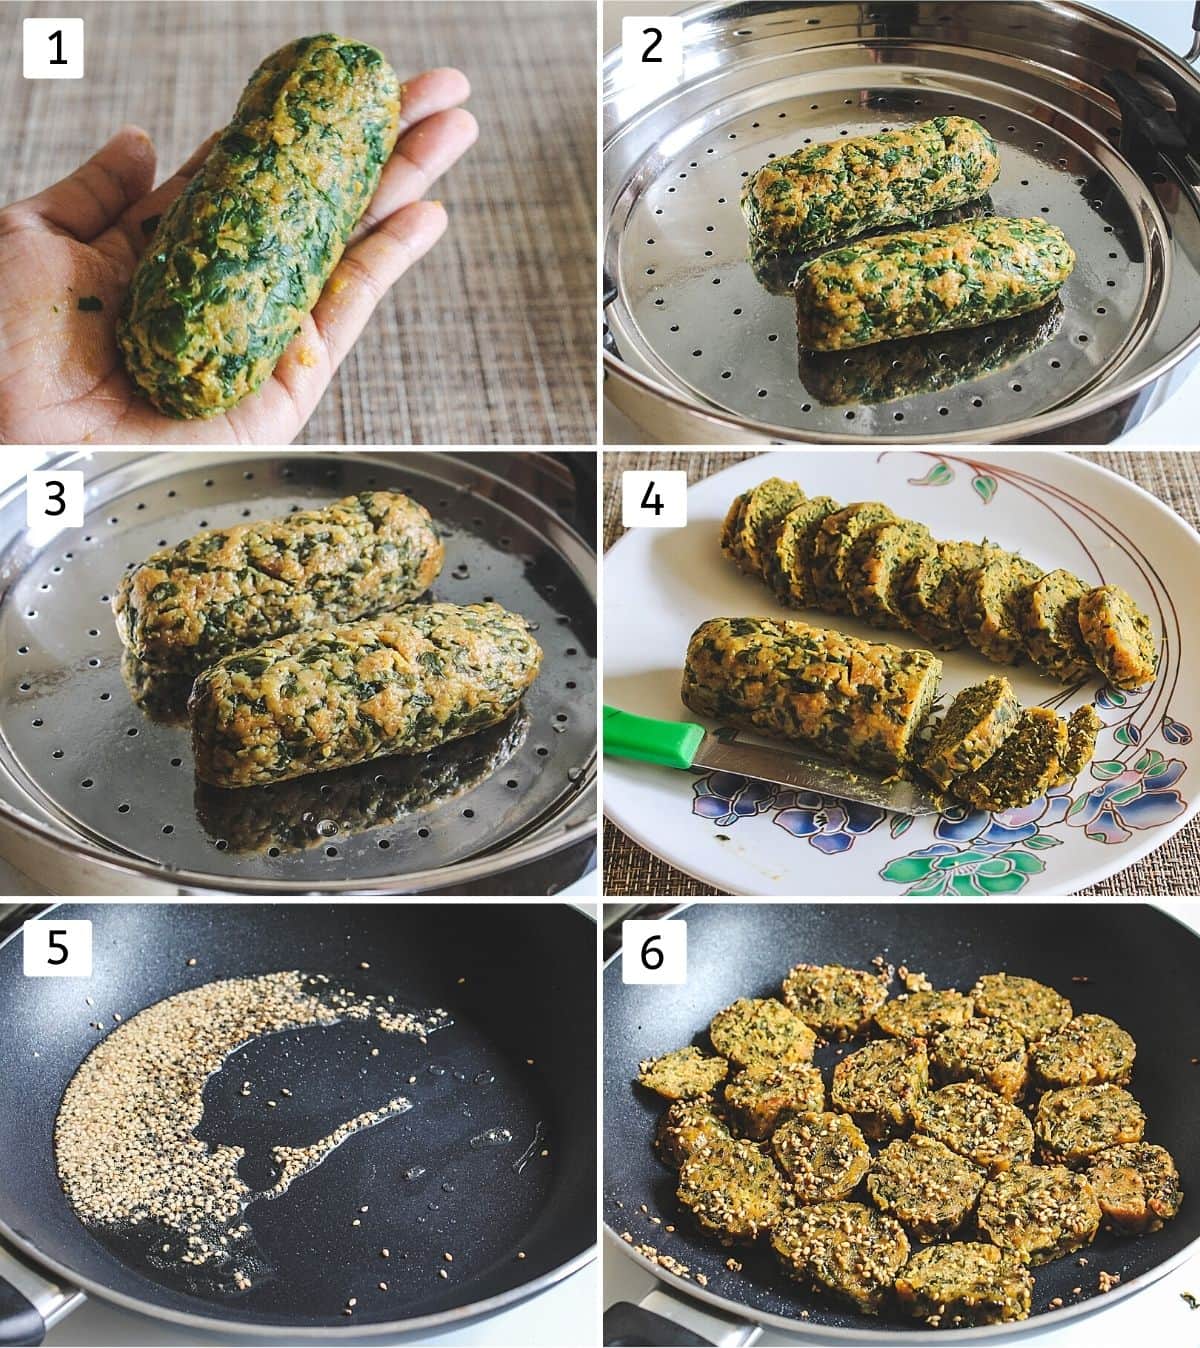
Prepare the steamer: Add about 1-1.5 inches of water to the steamer base. Let the water come to a simmer. Also, grease the steamer plate (which has holes in it) using oil. Also, grease your palms.
1) Divide the dough into two parts and make cylinder shaped log of 1-inch diameter. Arrange them on a greased tray keeping them a few inches apart. Give them some space to expand.
2) Once the water starts simmering, place the tray in the steamer. Cover it with the lid.
3) Steam for 18-20 minutes on medium heat. Check by inserting a knife (or a toothpick) in the middle and it should come out clean. The cooking time may vary depending on the thickness of your roll.
4) Remove it to a plate or cutting board, let it cool for 5 minutes. Then cut into thin slices.
5) To make a tempering, heat the oil in a pan or kadai on medium heat. Once hot add mustard seeds and let them splutter. Then add sesame seeds, as soon as they start to splutter add hing.
6) Immediately add sliced methi muthia, saute for few minutes. Then flip or toss them and cook another side as well. They should be slightly browned and crisp up.
👩🍳 How To Make Methi Muthia? (Deep-Fried)
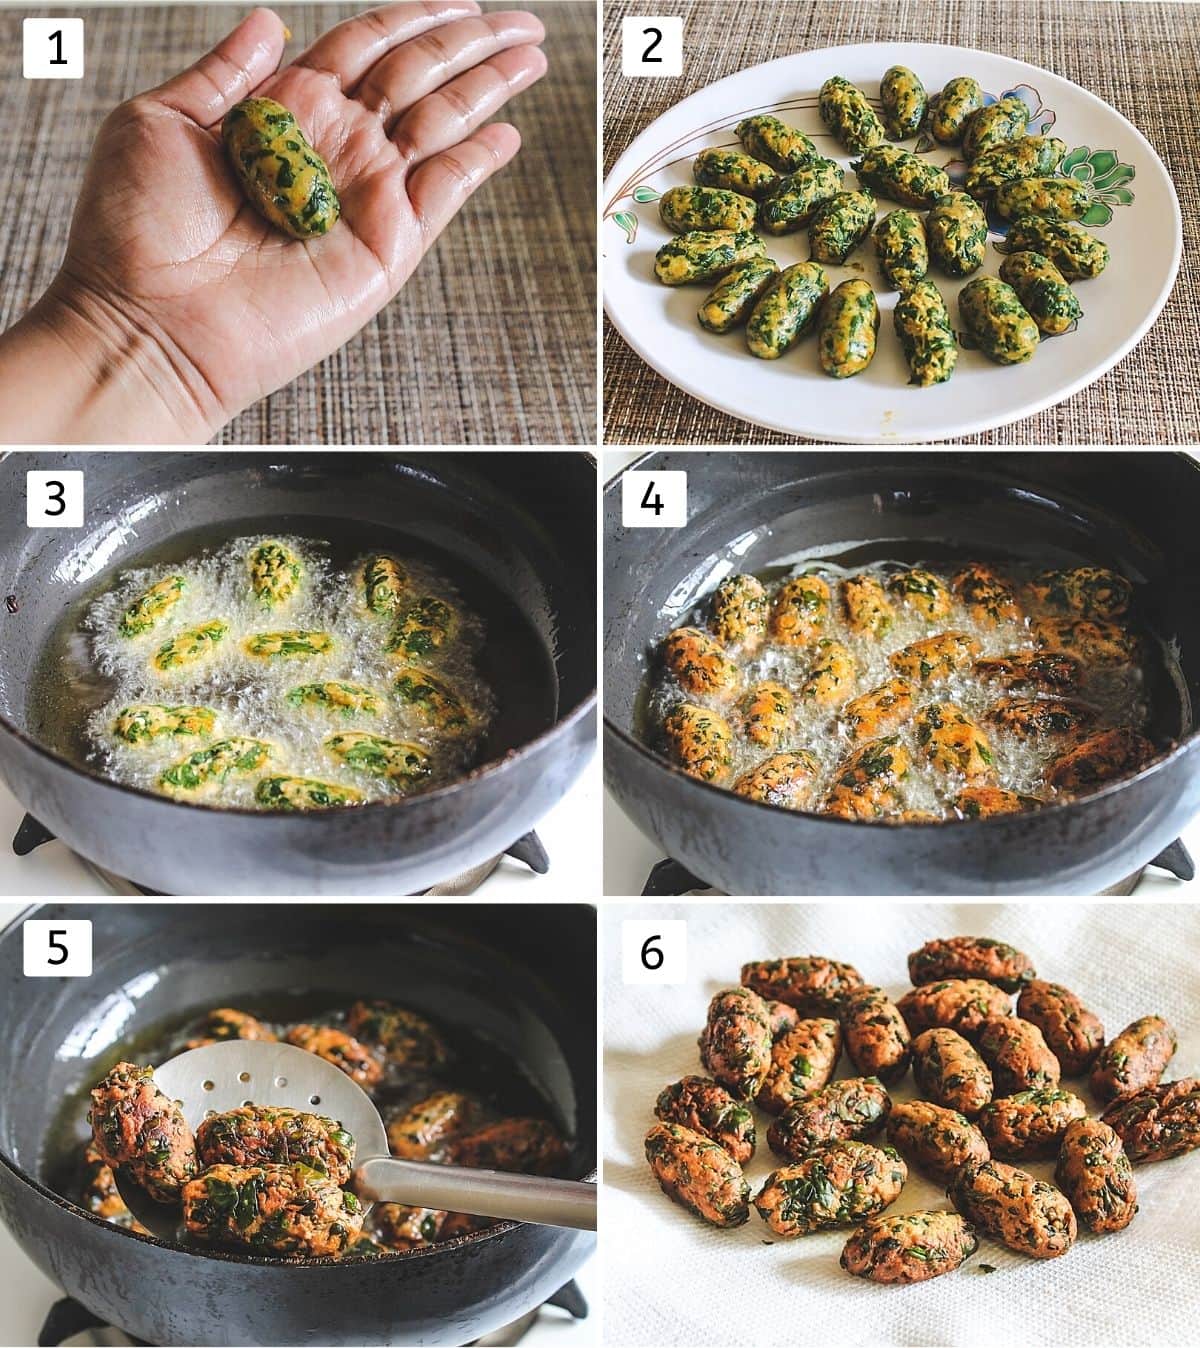
1) Grease your palm with oil and take about 2 teaspoons of portion, shape into small oval-shaped dumplings. During the half-way through of shaping process, the dough may start to stick. Wash the hands, grease again and shape.
2) Repeat the same and keep them on a plate in a single layer. Meantime, heat the oil in a pan on medium heat for deep frying.
3) Once the oil is hot, carefully drop muthias into it. You need to fry in batches.
4) Keep moving and frying until they are golden brown from all sides.
5) Now using a slotted spoon, drain the excess oil and remove them.
6) Keep on a paper-towel lined plate and fry the rest of them.
👩🍳 Air Fryer Methi Muthia Recipe (Pics)
Shape them as mentioned above in the fried method. Preheat your air fryer to 400°F (200°C) for 5 minutes.
FYI: I have Gourmia GAF575 Digital Air Fryer - 5QT.
1) Arrange the shaped methi muthia into the air fryer tray. Spray it lightly with cooking oil spray.
2) Air fry for 10 minutes. Halfway through open and give it a shake for even browning all the sides. This time may vary depending on the size of your muthiya.
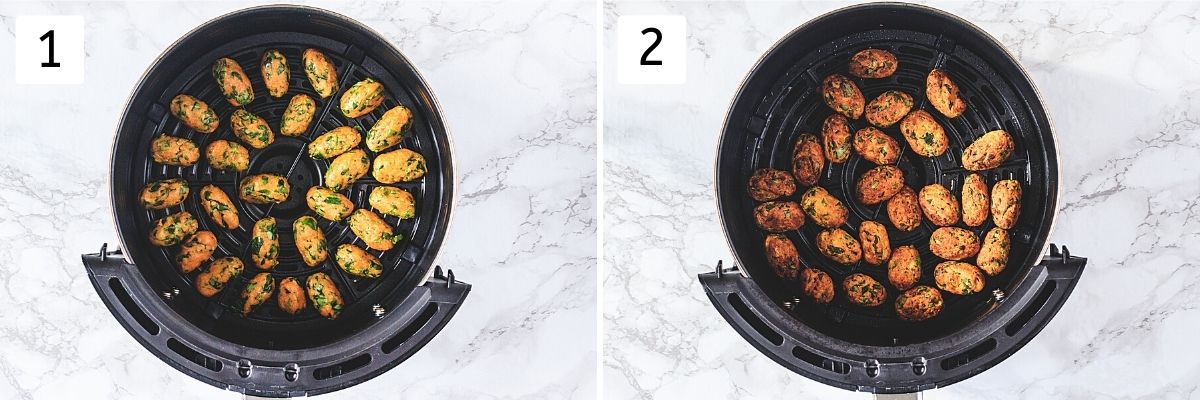
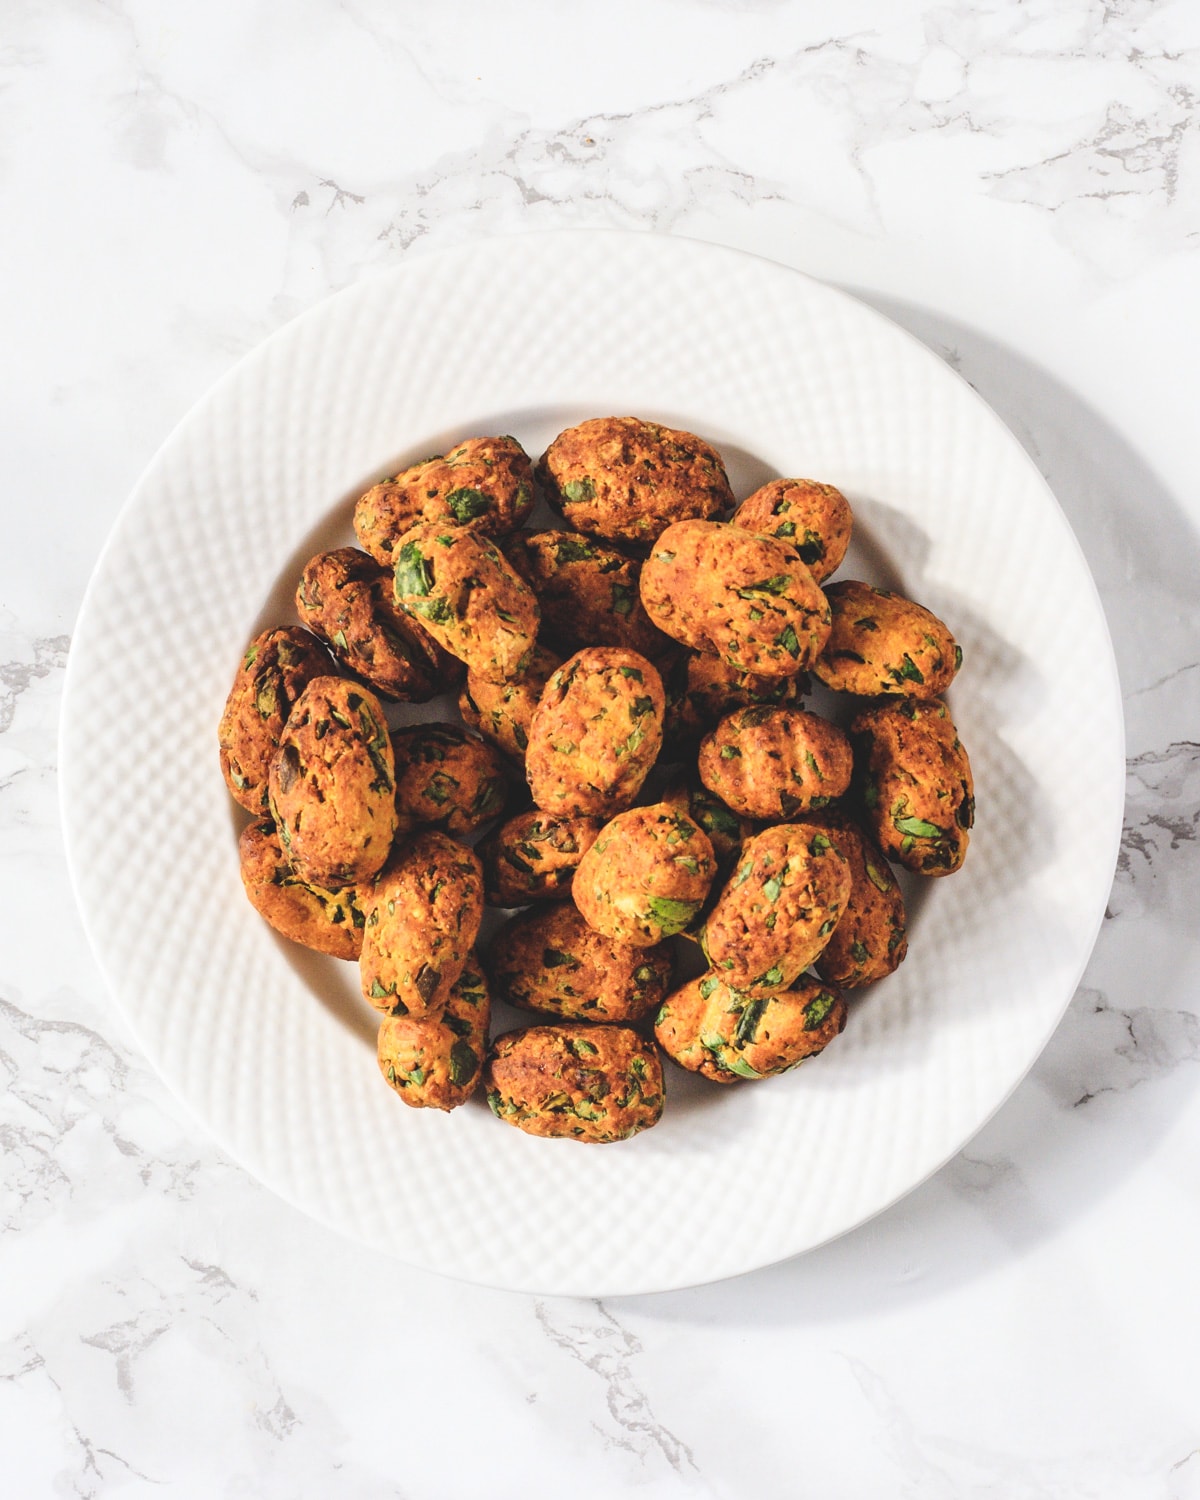
I am really happy with the air fryer methi muthia results. They were nicely golden brown and crispy with soft, pillowy from inside. These I have used in making undhiyu recipe.
💭 Expert Tips For Perfect Methi Muthia
- The dough should be smooth yet soft. But make sure not to make too soft that it becomes super sticky and hard to shape. By mistake, if that happens then add little more wheat flour and mix.
- Instead of wheat flour, you can add bajra flour or jowar flour to make it gluten-free.
- Use other leafy vegetables instead of methi leaves, e.g. kale, spinach, swiss chard (tough stems removed), collard greens, beet greens, mooli leaves, etc.
- To make it Jain, please skip ginger in the recipe.
Check out my other muthia recipe - Dudhi muthia.
🥣 Storage Instructions
- In the refrigerator: It stays good for 2-3 days in an airtight container. The fried and air-fried ones will lose their crispness. But when using in shaak (curry) crispness doesn’t matter, then you can make a day ahead and store in the refrigerator.
- In the freezer: It stays good for 2-3 months.
- For steamed version, I slice then and arrange on the cookie tray and freeze. Once frozen, transfer to the freezer-safe ziplock bag and store. When I am ready to eat, I make the tempering, add defrosted muthia, saute and enjoy them piping hot.
- For fried, air-fried versions, simply freeze in a ziplock bag. And use in the shaak (curry) as needed.
Check Out Other Methi Recipes
PS Tried this recipe? Please leave a star rating in the recipe card below and/or a review in the comment section. I always appreciate your feedback! Plus, Subscribe to my newsletter and follow along on Pinterest, Instagram, and Facebook for all the latest updates.
Recipe Card
Methi Muthia Recipe (Steamed, Fried, Air-Fryer)
Ingredients
- 2 cups Fenugreek leaves (Methi leaves) plucked, measured then washed {if using frozen, use only ¼ cup}
- ½ cup Whole wheat flour (Chapati atta)
- ½ cup Besan (gram flour)
- 1 Green chilies chopped finely
- 1 teaspoon Ginger paste or freshly grated or crushed
- ¼ teaspoon Turmeric powder
- 1 teaspoon Red chili powder
- ¼ teaspoon Baking soda
- Salt to taste
- 2 ½ teaspoons Sugar
- 2-3 teaspoon Lemon juice
- 3 tablespoons Oil
- 2-3 tablespoons Water or more or less
- Oil for deep-frying
- Cooking oil spray for air-frying
For Tempering (Steamed Version):
- 1 tablespoon Oil
- ¼ teaspoon Mustard seeds
- 1 teaspoon Sesame seeds
- ⅛ teaspoon Hing (Asafoetida)
Instructions
Making The Dough:
- Take wheat flour, besan, spices (turmeric, red chili powder), salt, sugar, baking soda, ginger paste, green chilies in a bowl. Mix well.
- Add oil and lemon juice. Mix well by rubbing between your fingers and thumb.
- Add methi leaves and mix.
- Now add little water at a time and knead into a smooth and soft dough. Don’t make it too soft otherwise, it becomes too sticky.
- TIP: You may need more or less amount of water. It depends on how much water particles are left in your methi leaves after washing. It also depends on you’re using fresh or frozen leaves.
Steaming:
- Prepare the steamer: Add about 1-1.5 inches of water to the steamer base. Let the water come to a simmer. Also, grease the steamer plate (which has holes in it) using oil. Also, grease your palms.
- Divide the dough into two parts and make cylinder shaped log of 1-inch diameter. Arrange them on a greased tray keeping them a few inches apart. Give them some space to expand.
- Once the water starts simmering, place the tray in the steamer. Cover it with the lid.
- Steam for 18-20 minutes on medium heat. Check by inserting a knife (or a toothpick) in the middle and it should come out clean. The cooking time may vary depending on the thickness of your roll.
- Remove it to a plate or cutting board, let it cool for 5 minutes. Then cut into thin slices.
- To make a tempering, heat the oil in a pan or kadai on medium heat. Once hot add mustard seeds and let them splutter.
- Then add sesame seeds, as soon as they start to splutter add hing.
- Immediately add sliced methi muthia, saute for few minutes. Then flip or toss them and cook another side as well. They should be slightly browned and crisp up.
Deep-Frying:
- Grease your palm with oil and take about 2 teaspoons of portion, shape into small oval-shaped dumplings. During the half-way through of shaping process, the dough may start to stick. Wash the hands, grease again and shape.
- Meantime, heat the oil in a pan on medium heat for deep frying.
- Once oil is hot, carefully drop muthias into it. You need to fry in batches. Keep moving and frying until they are golden brown from all sides.
- Now using a slotted spoon, drain the excess oil and remove them to a paper-towel lined plate and fry rest of them.
Air-Frying:
- Shape them as mentioned above in the fried method. Preheat your air fryer to 400°F (200°C) for 5 minutes. FYI: I have Gourmia GAF575 Digital Air Fryer - 5QT.
- Arrange the shaped methi muthia into the air fryer tray. Spray it lightly with cooking oil spray.
- Air fry for 10 minutes. Halfway through open and give it a shake for even browning all the sides. This time may vary depending on the size of your muthiya.
Notes
- The dough should be smooth yet soft. But make sure not to make too soft that it becomes super sticky and hard to shape. By mistake, if that happens then add little more wheat flour and mix.
- Instead of wheat flour, you can add bajra flour or jowar flour to make it gluten-free.
- Use other leafy vegetables instead of methi leaves, e.g. kale, spinach, swiss chard (tough stems removed), collard greens, beet greens, mooli leaves, etc.
- To make it Jain, please skip ginger in the recipe.
- See the freezing instruction above in the storage section.

Sam
Hi! We are going on a trip and won't have access to a fridge. Will these be ok in 60 degree Fahrenheit weather?
Thanks,
Kanan Patel
It stays good for a day at room temp.
Anita
I tried your recipe. It looked really good. I think there is some confusion in the measurements. You put 240ml as one cup. The recipe requires 2 cups of fresh methi which is a lot of methi compared to just half a cup (120ml) of besan flour and half a cup of wheat flour. It's impossible to make a dough with those measurements as the methi quantity is so much more than the flour. Can you check the measurements again please. I would really like to try it.
Kanan Patel
Measurements are correct. If you have read the notes next to ingredient then it mentions then leaves are plucked and then measured. Once measured methi leaves are washed and chopped. So when washed and chopped leaves are not measuring 2 cups instead it's around 2/3 cups only.