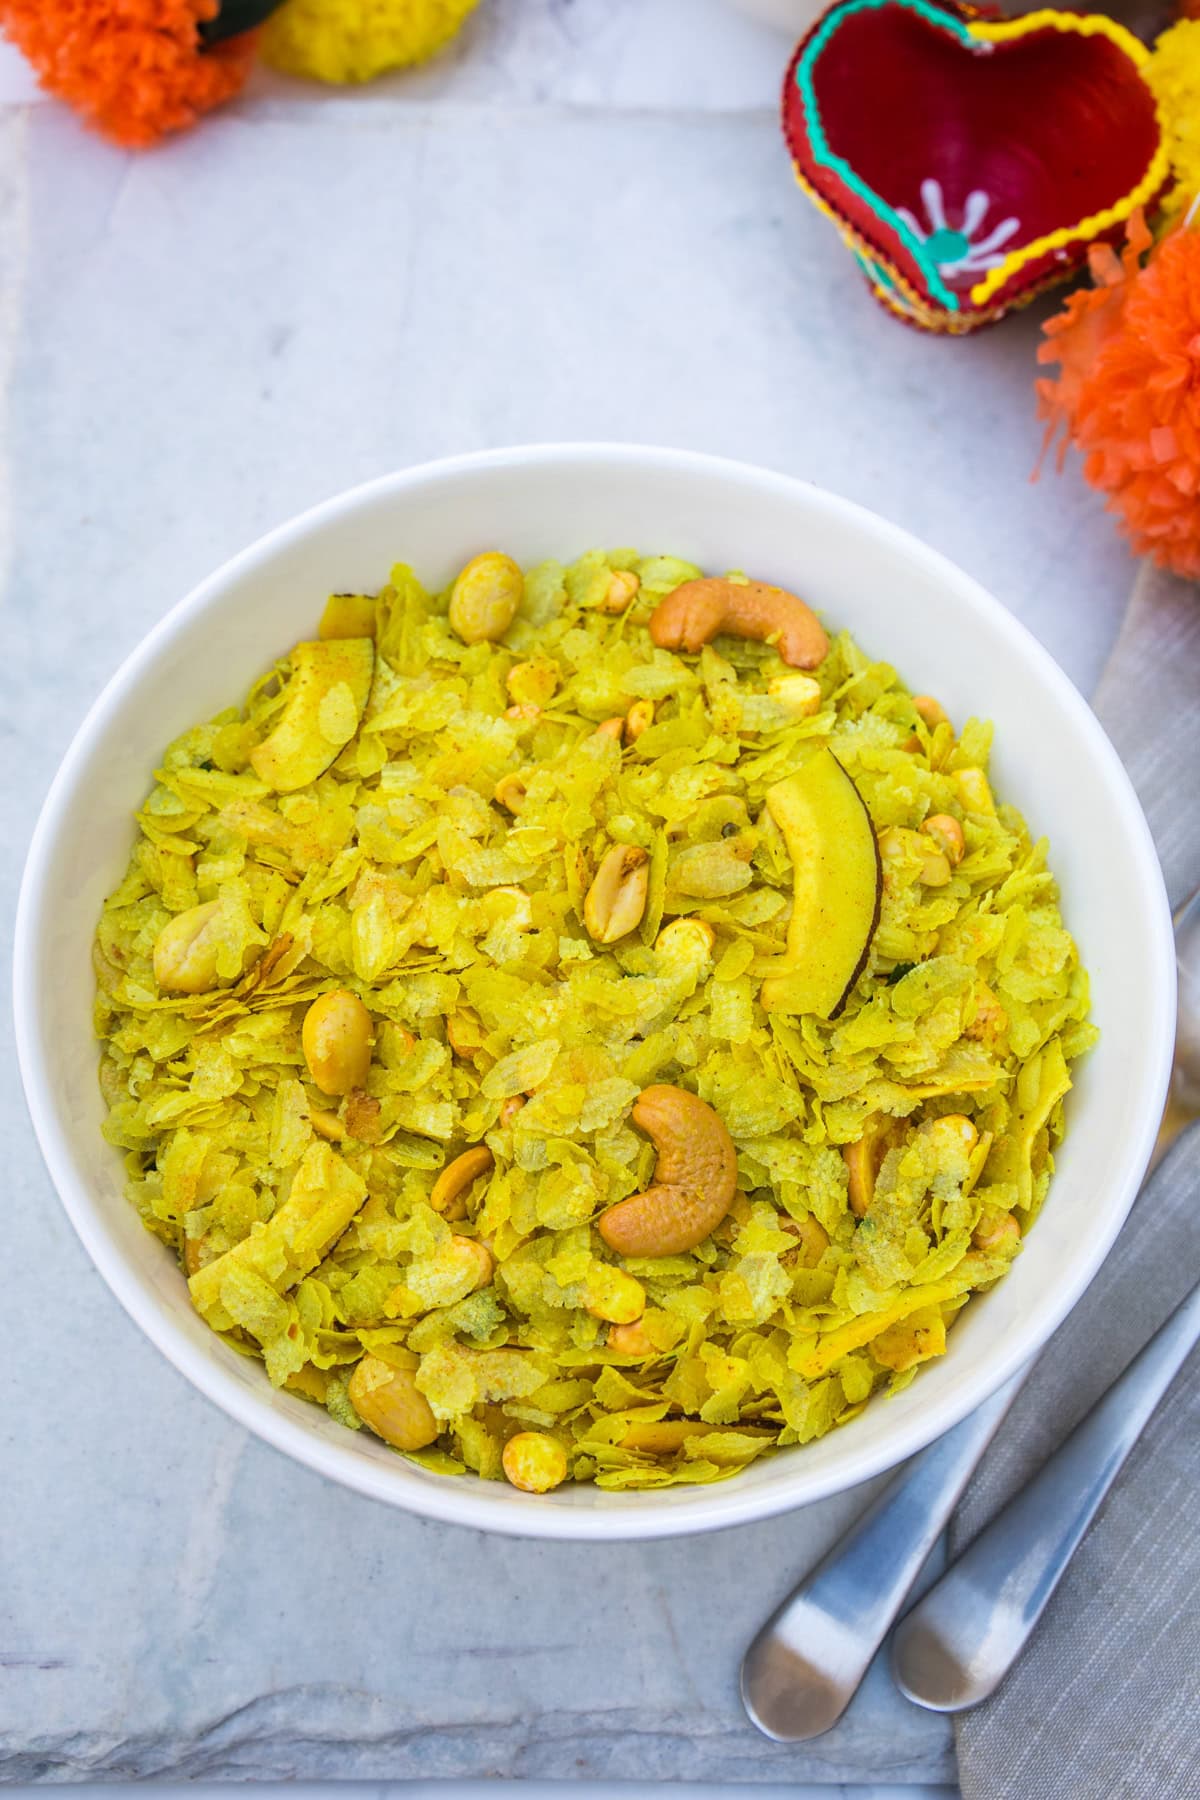
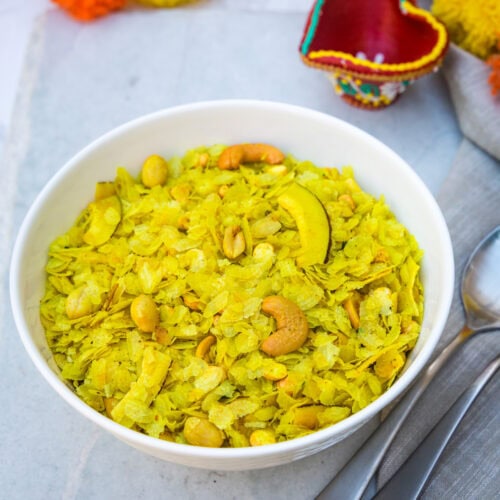
Roasted Poha Chivda Recipe (Using Thin Poha)
Making this roasted poha chivda is a breeze! Every Diwali, this chivda is a must-have in my kitchen. You can whip up this healthy treat in just 20 minutes, making it the perfect quick snack for the festive season!

What is Poha Chivda?
Poha chivda is a popular Indian snack made from flattened rice, also known as poha. This crunchy and savory mix often includes a variety of spices, nuts, and dried fruits. It’s a perfect tea-time snack and is commonly enjoyed during festivals, especially Diwali.
Two Versions Of Poha Chivda Recipe
- Roasted Poha Chivda: This is the lighter, healthier version I’m sharing today. It’s made with thin poha (nylon poha), which is roasted until crispy on the stovetop or in the oven. Once roasted, it’s mixed with nuts and spices for added flavor. This chivda uses very little oil, making it a perfect guilt-free snack.
- Texture and Flavor: Roasting makes the poha light and crispy. The flavor is mild for this roasted chivda.
- Best for: Health-conscious snackers or those who prefer a light snack during the festive season.
- Chiwda Namkeen (Fried Poha Chivda): This is a richer version made with regular poha that is deep-fried in oil. The fried poha is then mixed with spices, nuts, dried fruits, and curry leaves for a more intense, savory flavor.
Both versions are delicious, and each brings a unique texture and taste to the table. Roasted poha chivda is ideal for an every day, low-calorie snack, while chiwda namkeen is perfect for festive occasions when you want something a little more indulgent.
Ingredient Notes
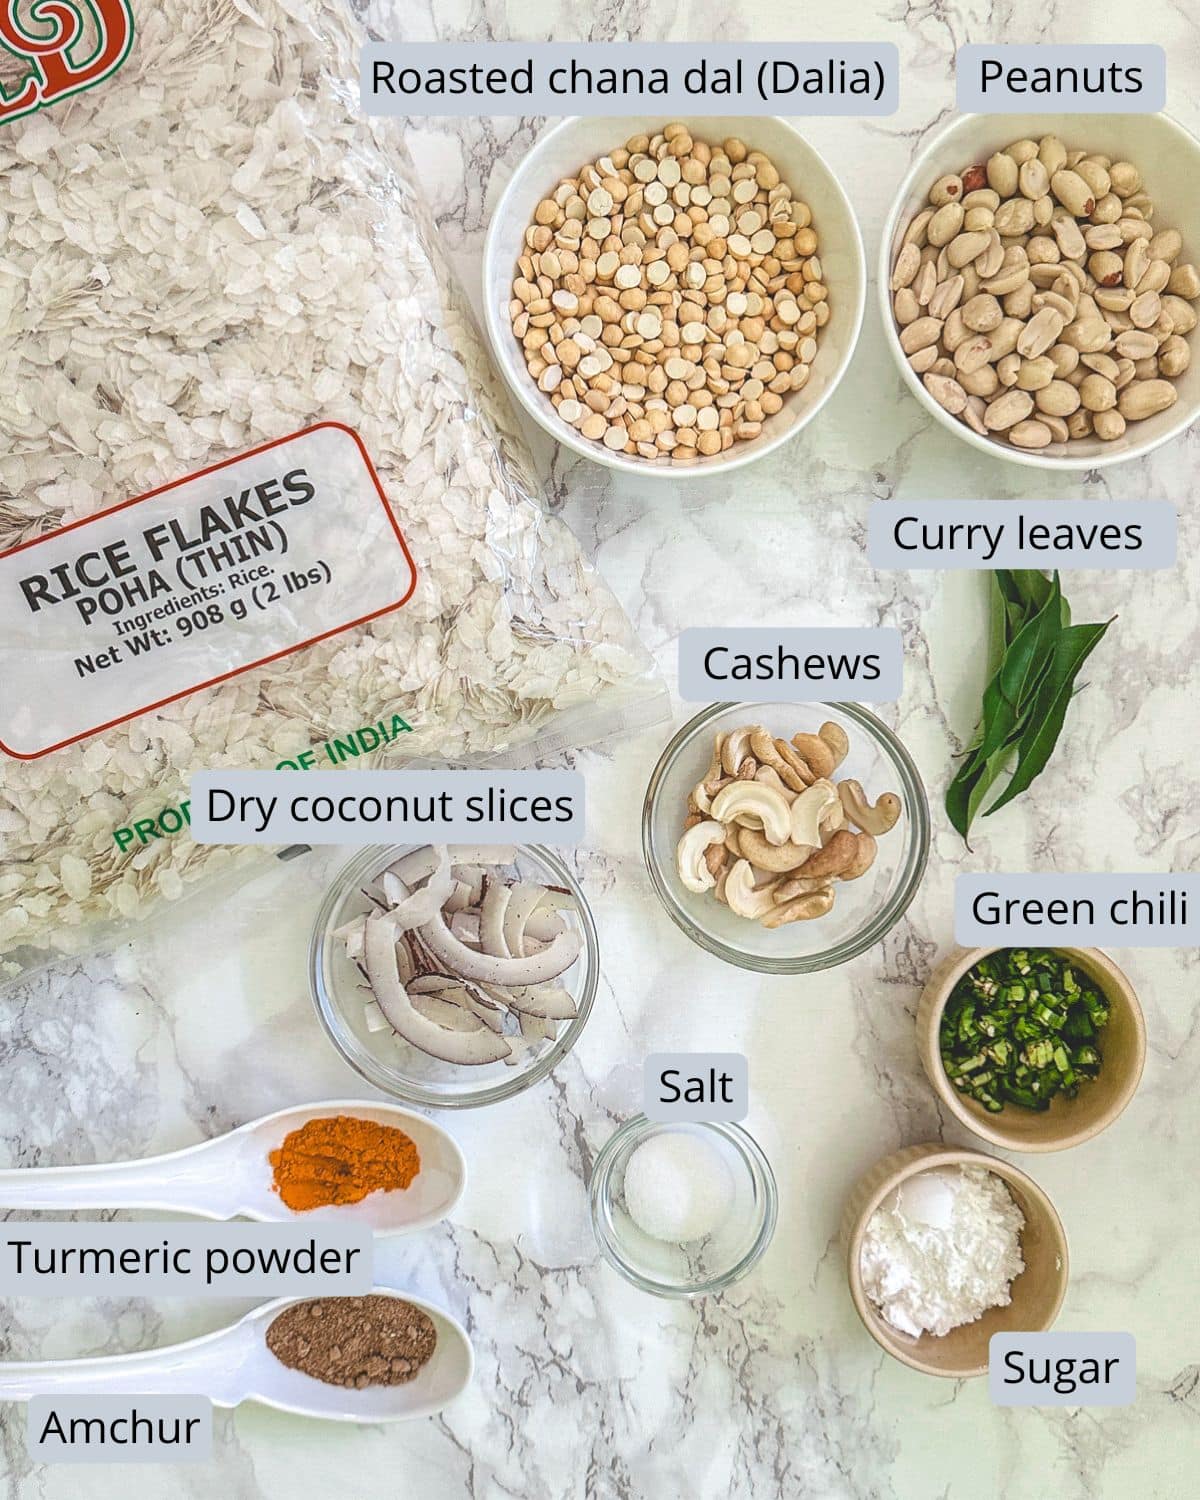
Here is the pic of the ingredients you’ll need to make roasted thin poha chivda recipe.
Note: Oil is not shown in the pic that used for roasting nuts and spices.
Step By Step Photo Instructions (With Tips)
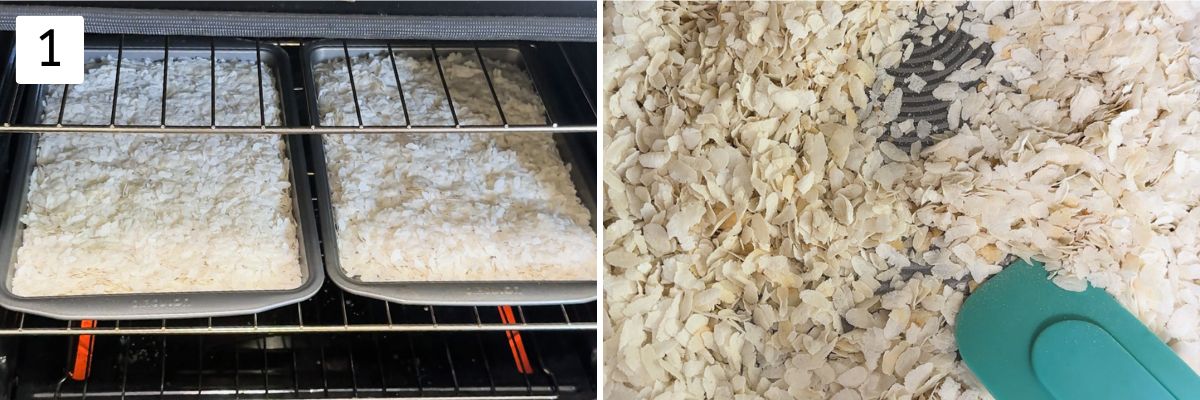
- Roasting Poha (Choose One Method)
- Oven: My preferred method. Preheat to 325°F. Spread poha in a single layer on a baking tray and roast for 10 minutes, stirring halfway.
- Stovetop: Use a wide pan on low heat, spreading poha in a thin layer. Dry roast until crispy, about 3-4 minutes, shaking the pan or stirring gently once or twice to avoid breaking the poha.
- Microwave: Place poha in a microwave-safe bowl and cook on high for 2-3 minutes, tossing once halfway through.
- Sun Dry: Spread poha on a tray or plate and place in direct sunlight for a couple of hours until it crisps up.
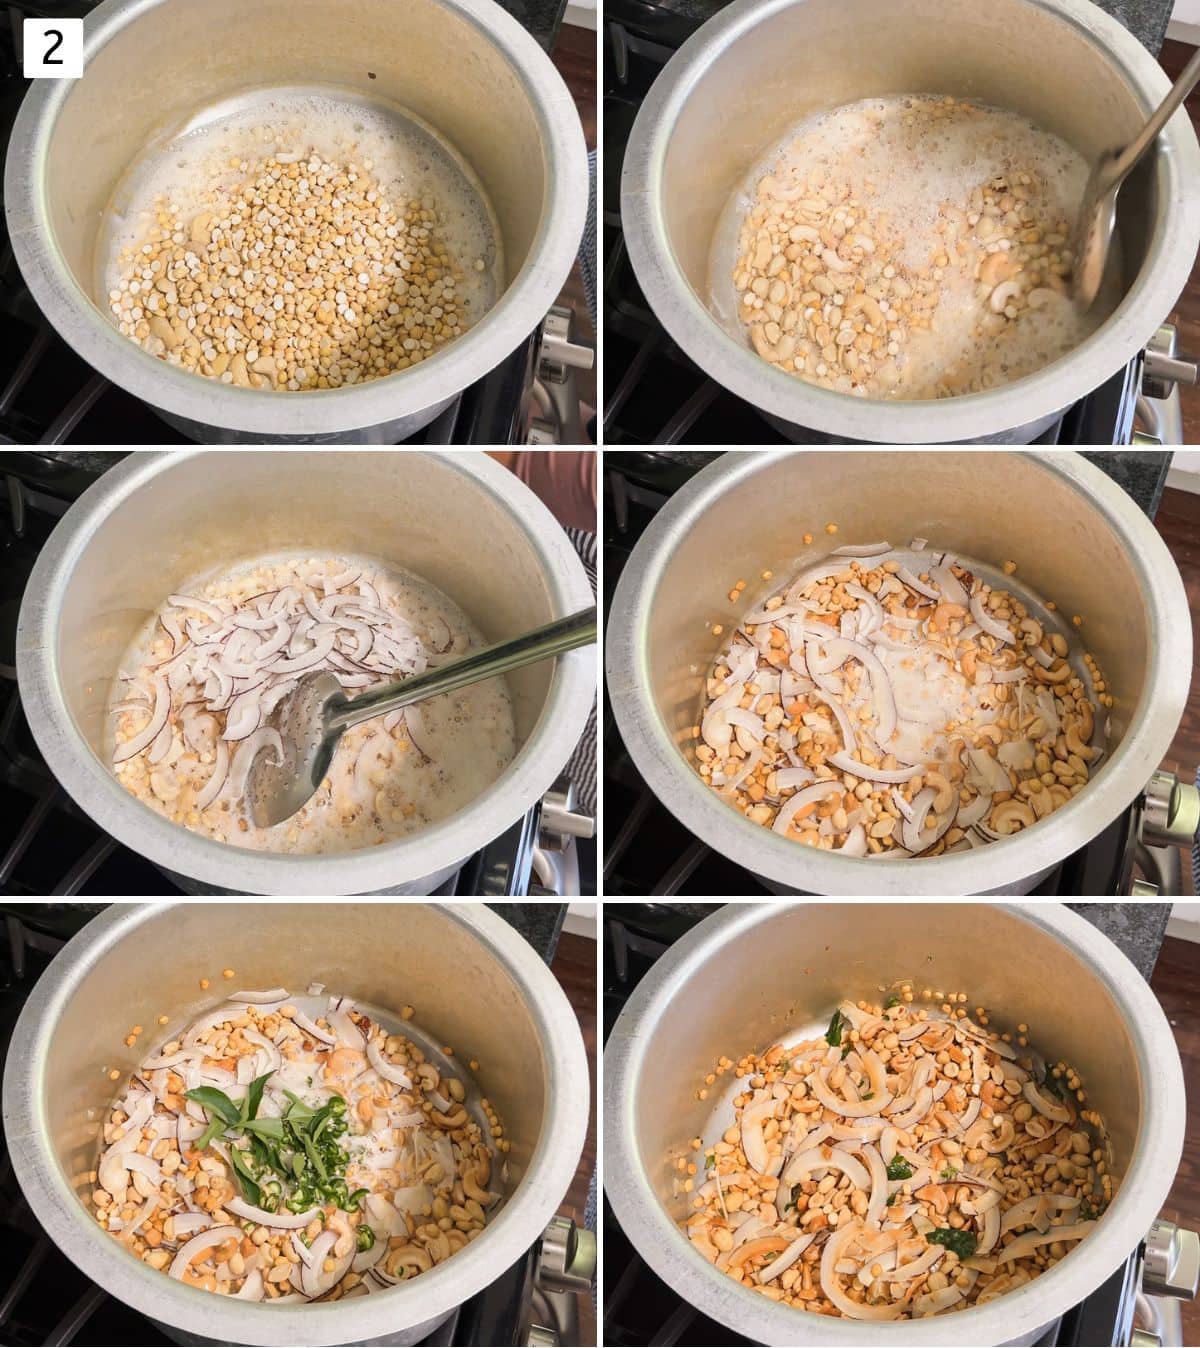
- Roasting the Nuts
- Heat oil in a large pan (patila).
- Add peanuts, dalia, and cashews, and fry until they’re lightly golden.
- Add sliced coconut and fry for another minute.
- Add green chilies and curry leaves, frying until the curry leaves are crisp and all the moisture evaporates. By this point, the nuts and coconut should be deep golden in color.
TIP: Fry the green chilies and curry leaves until they’re completely crisp and moisture-free. This step is key for extending the shelf life of the chivda and keeping it crunchy. Any leftover moisture can make the chivda soggy over time.
- Mixing Spices
- Quickly stir in the turmeric powder until well combined.
- Then add amchur and salt, and mix.
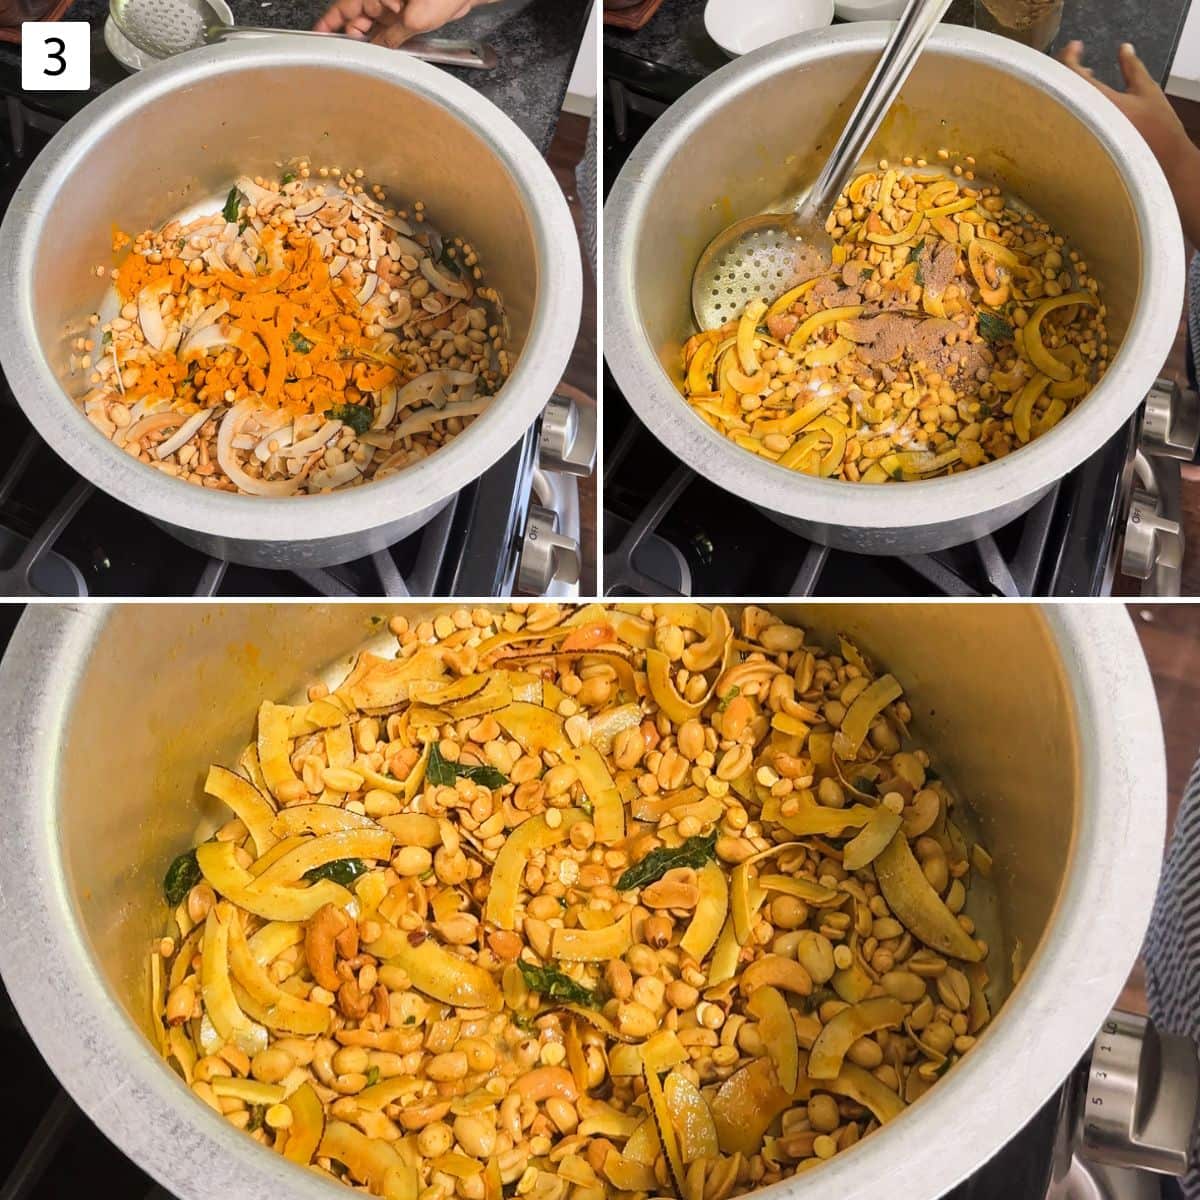
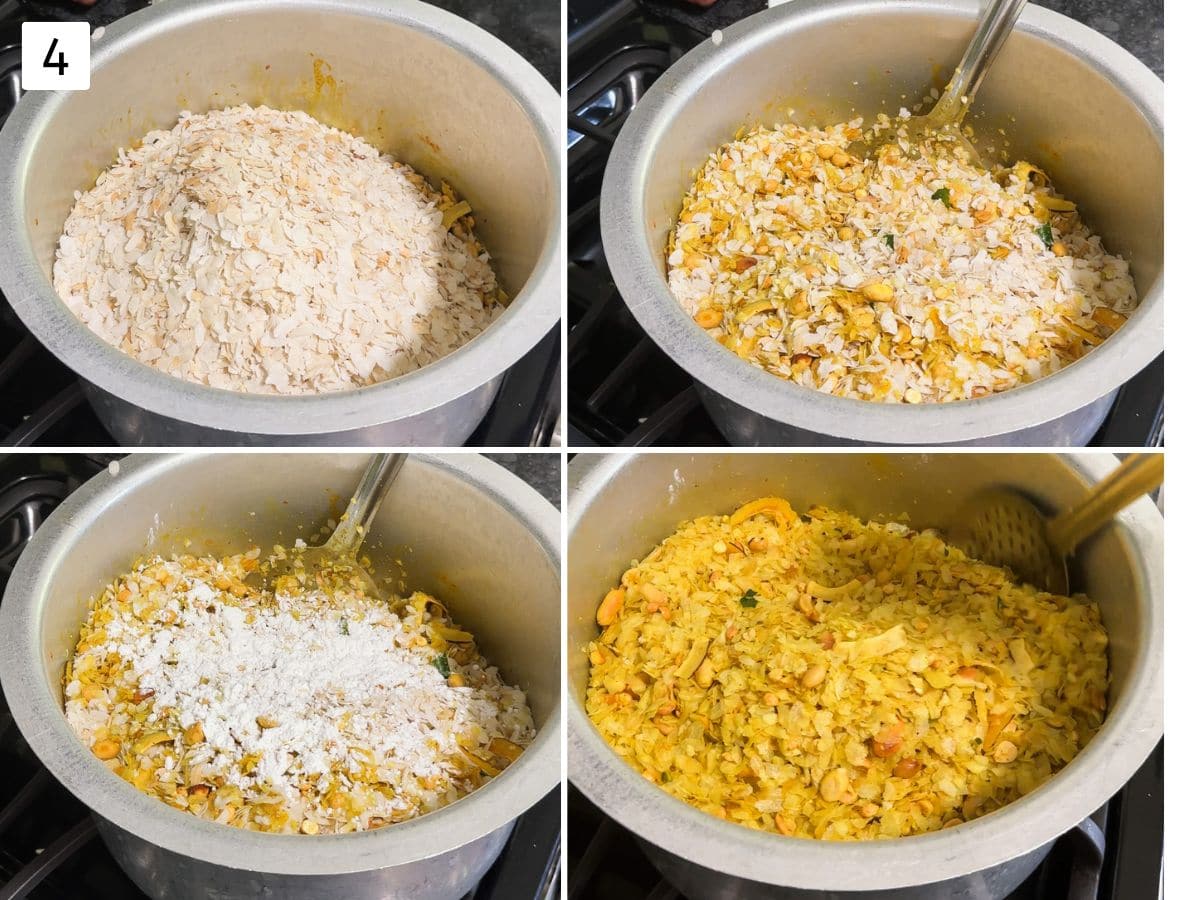
- Combine Poha & Sugar
- Add the roasted poha to the pan and gently mix right away.
- Midway, sprinkle in the powdered sugar.
- Carefully toss (avoid stirring) until the poha is evenly coated with the spices and nuts. Stirring too much can break the poha.
TIP: Avoid stirring too much, as it can break the poha. Instead, toss the mixture by gently shaking the pan (patila) to keep the poha intact.
Storage: Allow the chivda to cool completely before placing it in an airtight container. It will stay fresh for about 2-3 weeks.
Check Out Other Diwali Snacks
Did you try this recipe? I’d love to hear about it! Leave a review in the comment section below. If you’re sharing it on your Instagram then don’t forget to tag me @spice.up.the.curry
Follow me on all of the platforms below.
Roasted Poha Chivda Recipe (Using Thin Poha)
US measuring cups are used (1 cup = 240 ml)
Ingredients
- 5 cups Thin poha, ~300 grams
- ¼ cup Oil
- ½ cup Peanuts
- ½ cup Roasted chana dal (Fried gram or daria, dalia)
- ⅓ cup Cashew nuts, halved
- ½ cup Dried coconut slices
- 2 Green chilies, finely chopped
- 15 Curry leaves
- ½ teaspoon Turmeric powder
- ¾ teaspoon Salt, or to taste
- 1 tablespoon Powdered sugar
- ½ teaspoon Amchur powder (dried mango powder)
Instructions
Roasting Poha (Choose One Method)
- Oven: My preferred method. Preheat to 325°F. Spread poha in a single layer on a baking tray and roast for 10 minutes, stirring halfway.
- Stovetop: Use a wide pan on low heat, spreading poha in a thin layer. Dry roast until crispy, about 3-4 minutes, shaking the pan or stirring gently once or twice to avoid breaking the poha.
- Microwave: Place poha in a microwave-safe bowl and cook on high for 2-3 minutes, tossing once halfway through.
Making Poha Chivda:
- Heat oil in a large pan (patila).
- Add peanuts, dalia, and cashews, and fry until they’re lightly golden.
- Add sliced coconut and fry for another minute.
- Add green chilies and curry leaves, frying until the curry leaves are crisp and all the moisture evaporates. By this point, the nuts and coconut should be deep golden in color.
- Quickly stir in the turmeric powder until well combined.
- Then add amchur and salt, and mix.
- Add the roasted poha to the pan and gently mix right away.
- Midway, sprinkle in the powdered sugar.
- Carefully toss (avoid stirring) until the poha is evenly coated with the spices and nuts.
Notes
- Fry the green chilies and curry leaves until they’re completely crisp and moisture-free. This step is key for extending the shelf life of the chivda and keeping it crunchy. Any leftover moisture can make the chivda soggy over time.
- Avoid stirring too much, as it can break the poha. Instead, toss the mixture by gently shaking the pan (patila) to keep the poha intact.
- Scalable: You can double or triple this poha chivda recipe as needed.
Clear instructions. Easy to make. Really enjoyable outcome.
Language errors need to be corrected though.
Thank you. I will correct the errors.
I know this post is old but I just wanted to say thank you!
I JUST discovered poha and I LOVE it.
I went to an Indian foods market the other day and I bought enough bags of it to last for months 🙂
I will definitely try this recipe and also look through your other recipes to see what other great things I can make.
I’ve had to adopt a gluten free (and grain free – except for rice) diet and I’m always looking for great options to add to my meager list. 🙂
thanks again!
You’re welcome Debbie.
Recipes made with poha are quick and easy. I have shared many poha recipes you can check out here. Hope this helps.
Happy Cooking!!
very well Explained 🙂
thanks a lot Ma’m.
you’re welcome