Roti Recipe (Rotli / Phulka)
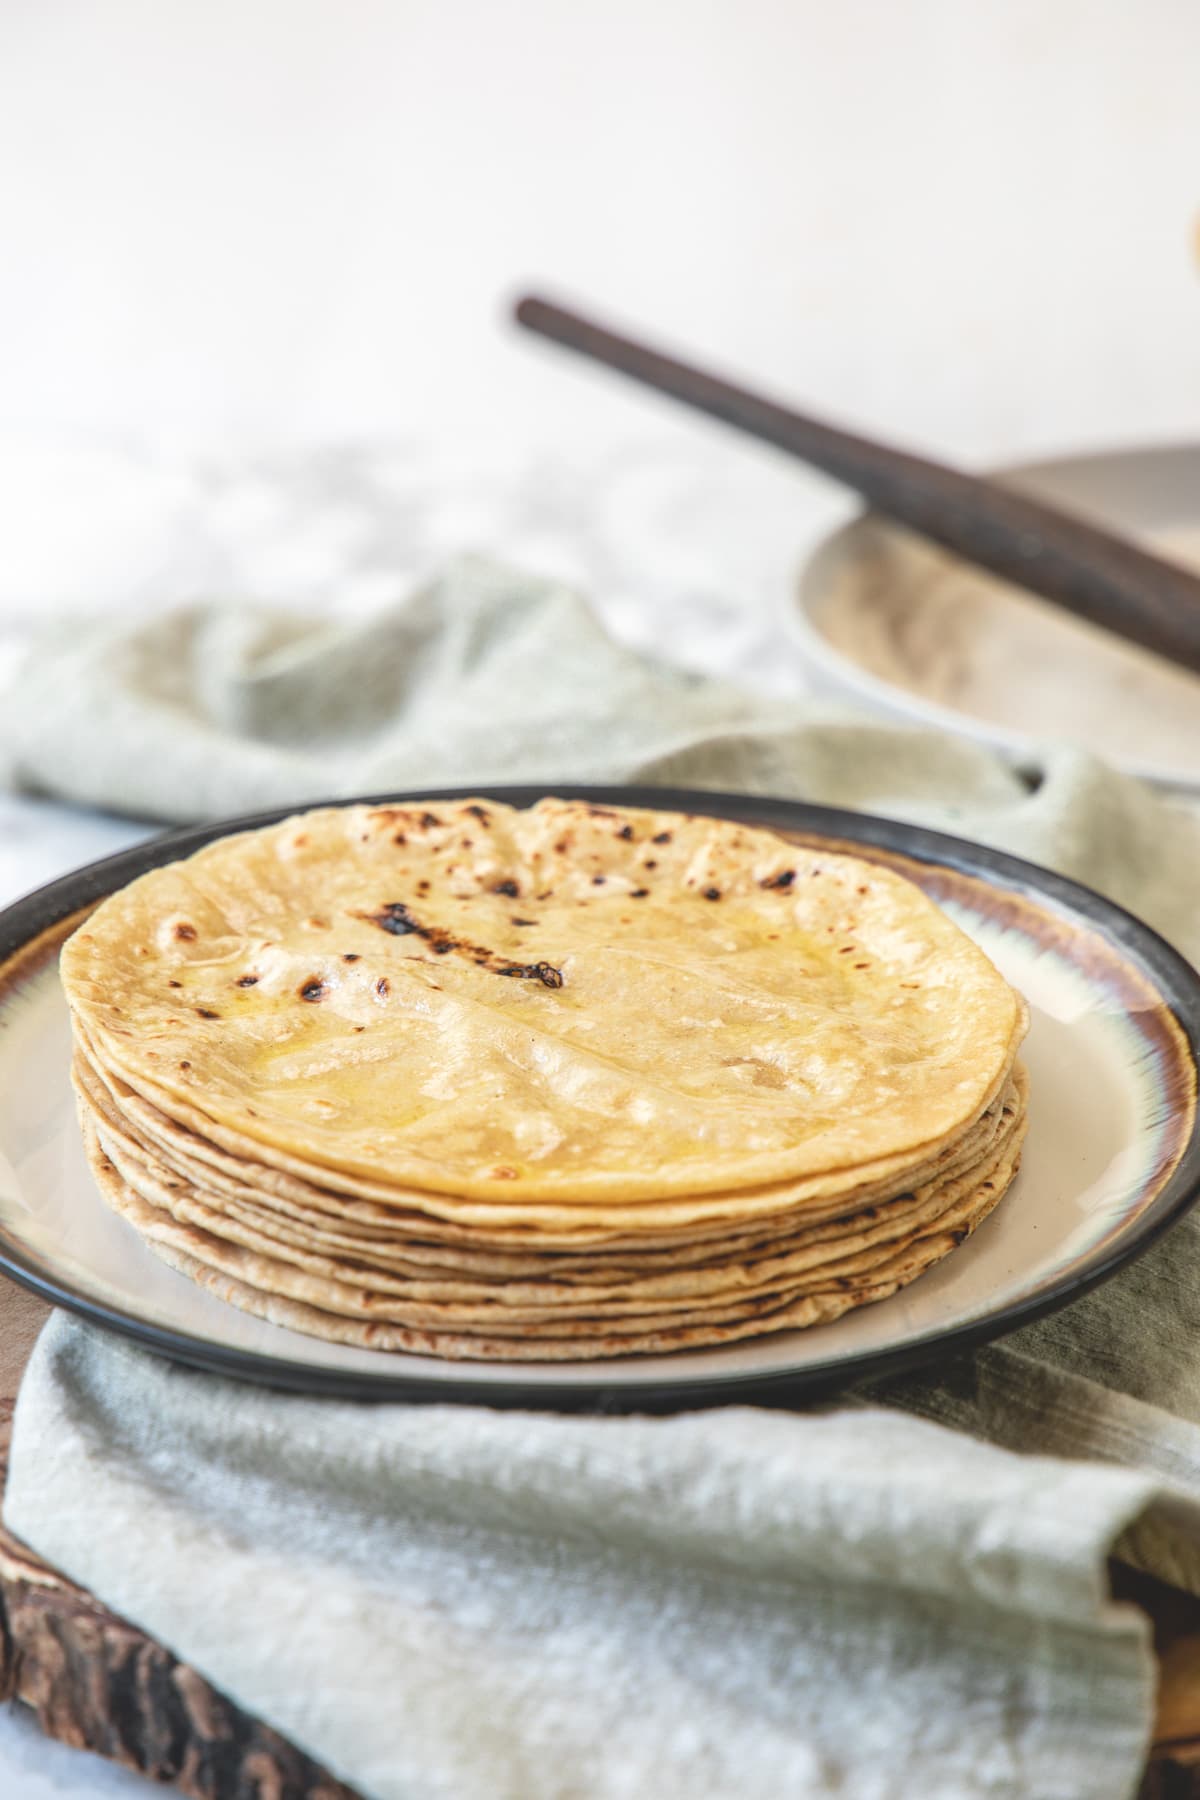
Learn how to make roti at home with this easy recipe. Also known as rotli (In Gujarati) or phulka roti. It is a staple Indian bread, made fresh every day in most Indian homes.
It requires only 3 ingredients (1 if you don’t count salt and water), plus a smear of ghee on top! Keep reading for tips and tricks to make perfectly soft roti every single time.
What is Roti?
Roti is a round flatbread made from stoneground wheat flour (aka gehu ka atta or chapati atta). The soft, smooth dough is made by adding water (and optional salt) to the wheat flour.
Then the dough is divided into small balls and rolled into a circle using a rolling pin (belan) and board (chakla).
This rolled bread is cooked on the tawa (skillet) lightly and then puffed up on the direct flame.
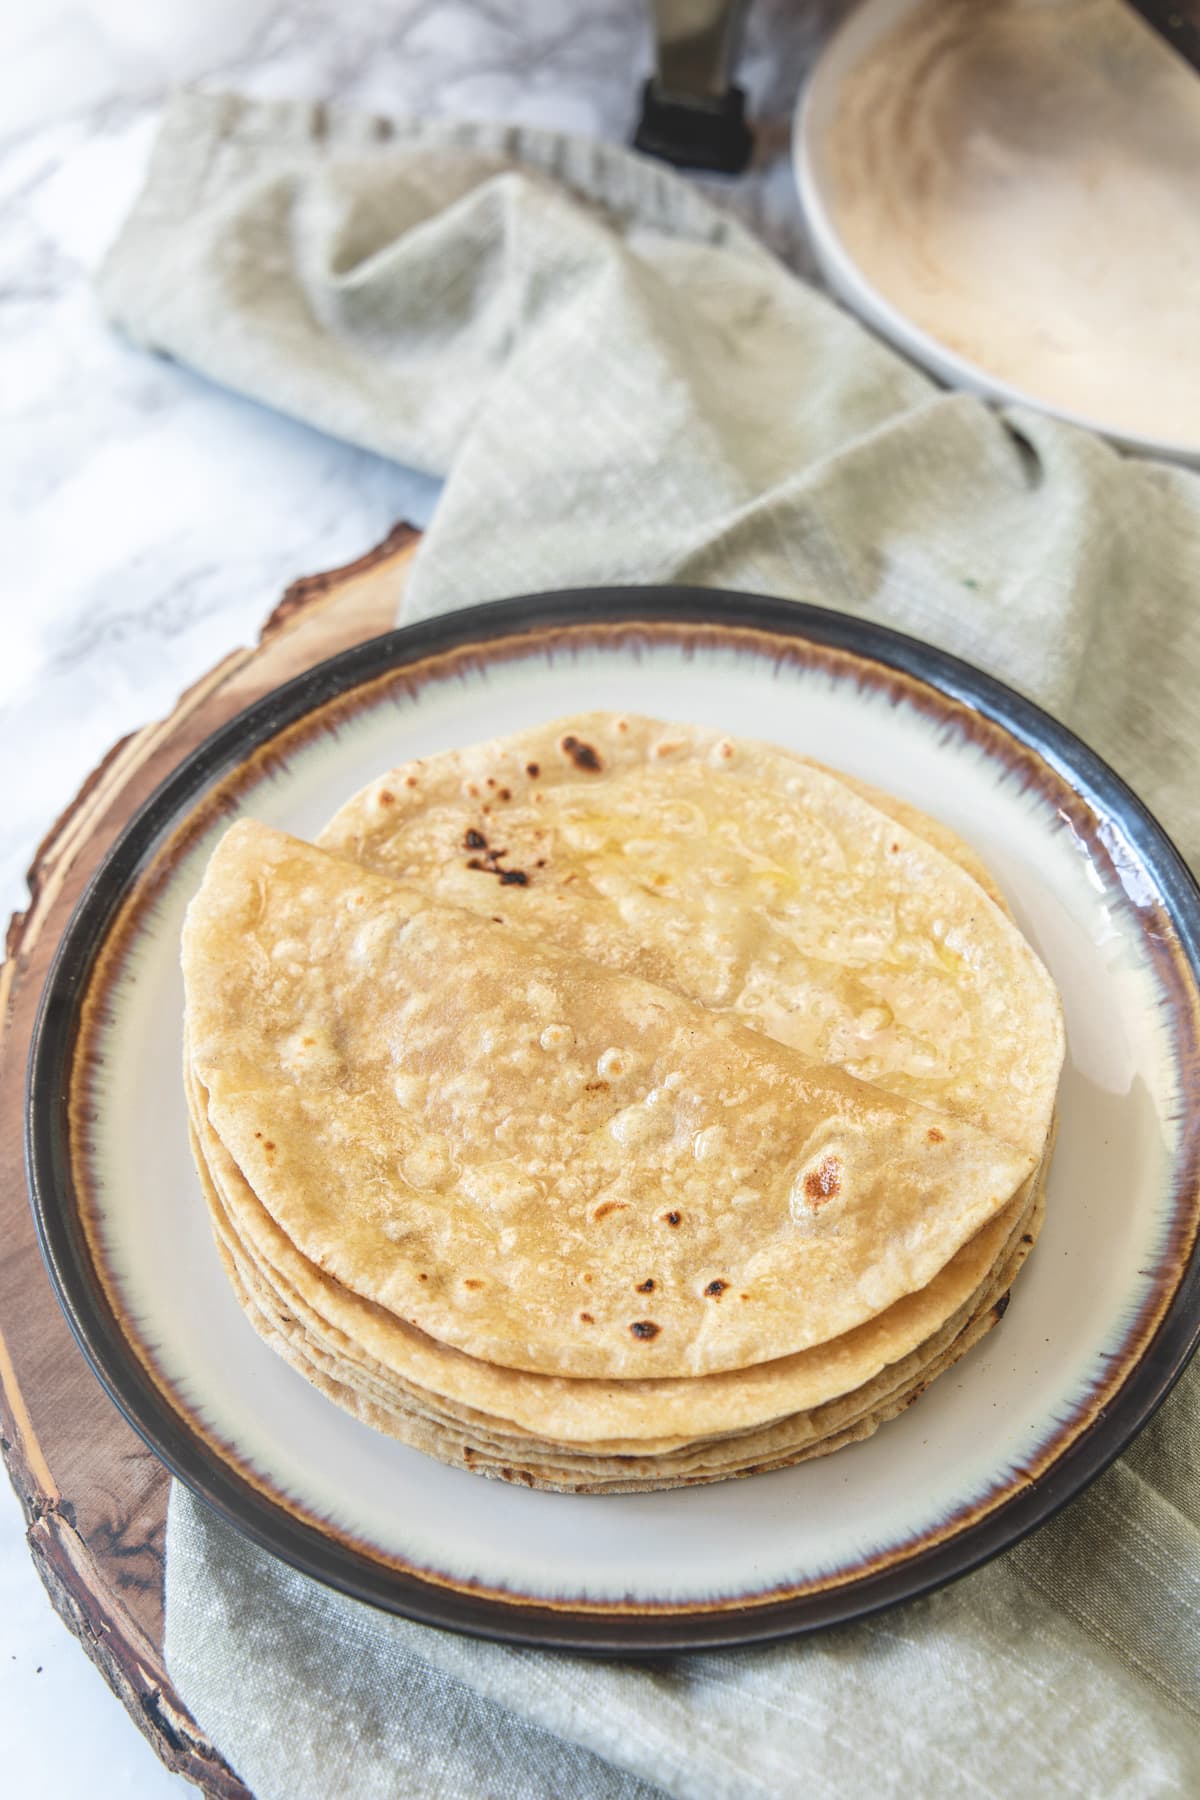
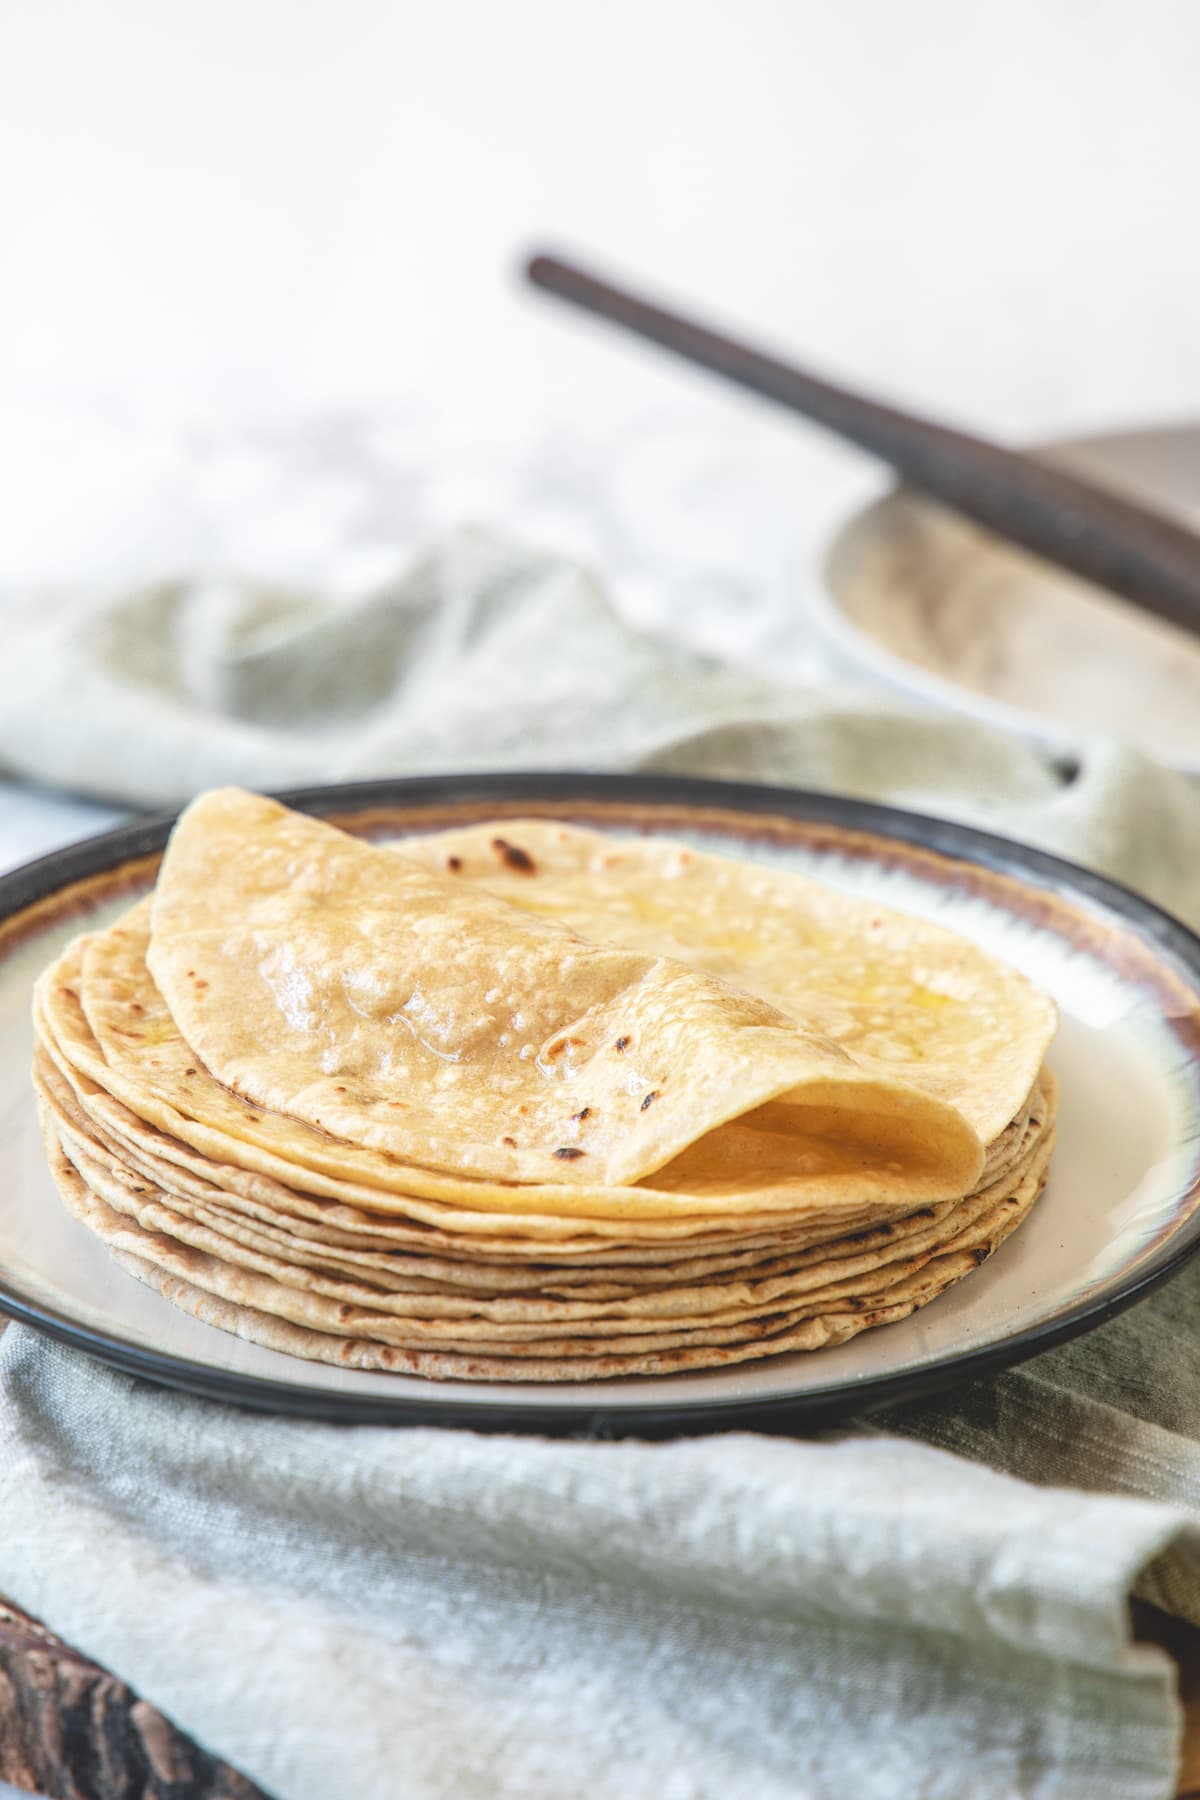
Roti is served hot with a smear of ghee on top. This roti goes well with any sabzi, curry, or dal.
Unlike paratha, this phulka roti is super healthy and easy to digest. Hence we make it almost every single day.
Roti, Rotli, Phulka Or Chapati?
Different parts of the country have different names. They are more or less the same thing.
For all, the dough is the same made from wheat flour, salt, and water.
There might be a difference in the thickness (like Gujarati rotli is super thin as you can see here while North Indian roti or chapati is on the slightly thicker side).
There might be a difference in cooking methods (like phulka, roti and rotli are cooked on tawa slightly and then puffed up on the direct flame. While chapati and sometimes thicker version of rotis are cooked only on tawa and puffed up on the tawa only by pressing lightly using a cloth). Sometimes oil is used while cooking chapati just like paratha.
🧾 Ingredient Notes
Here is the pic of the ingredients required to make soft rotis at home.
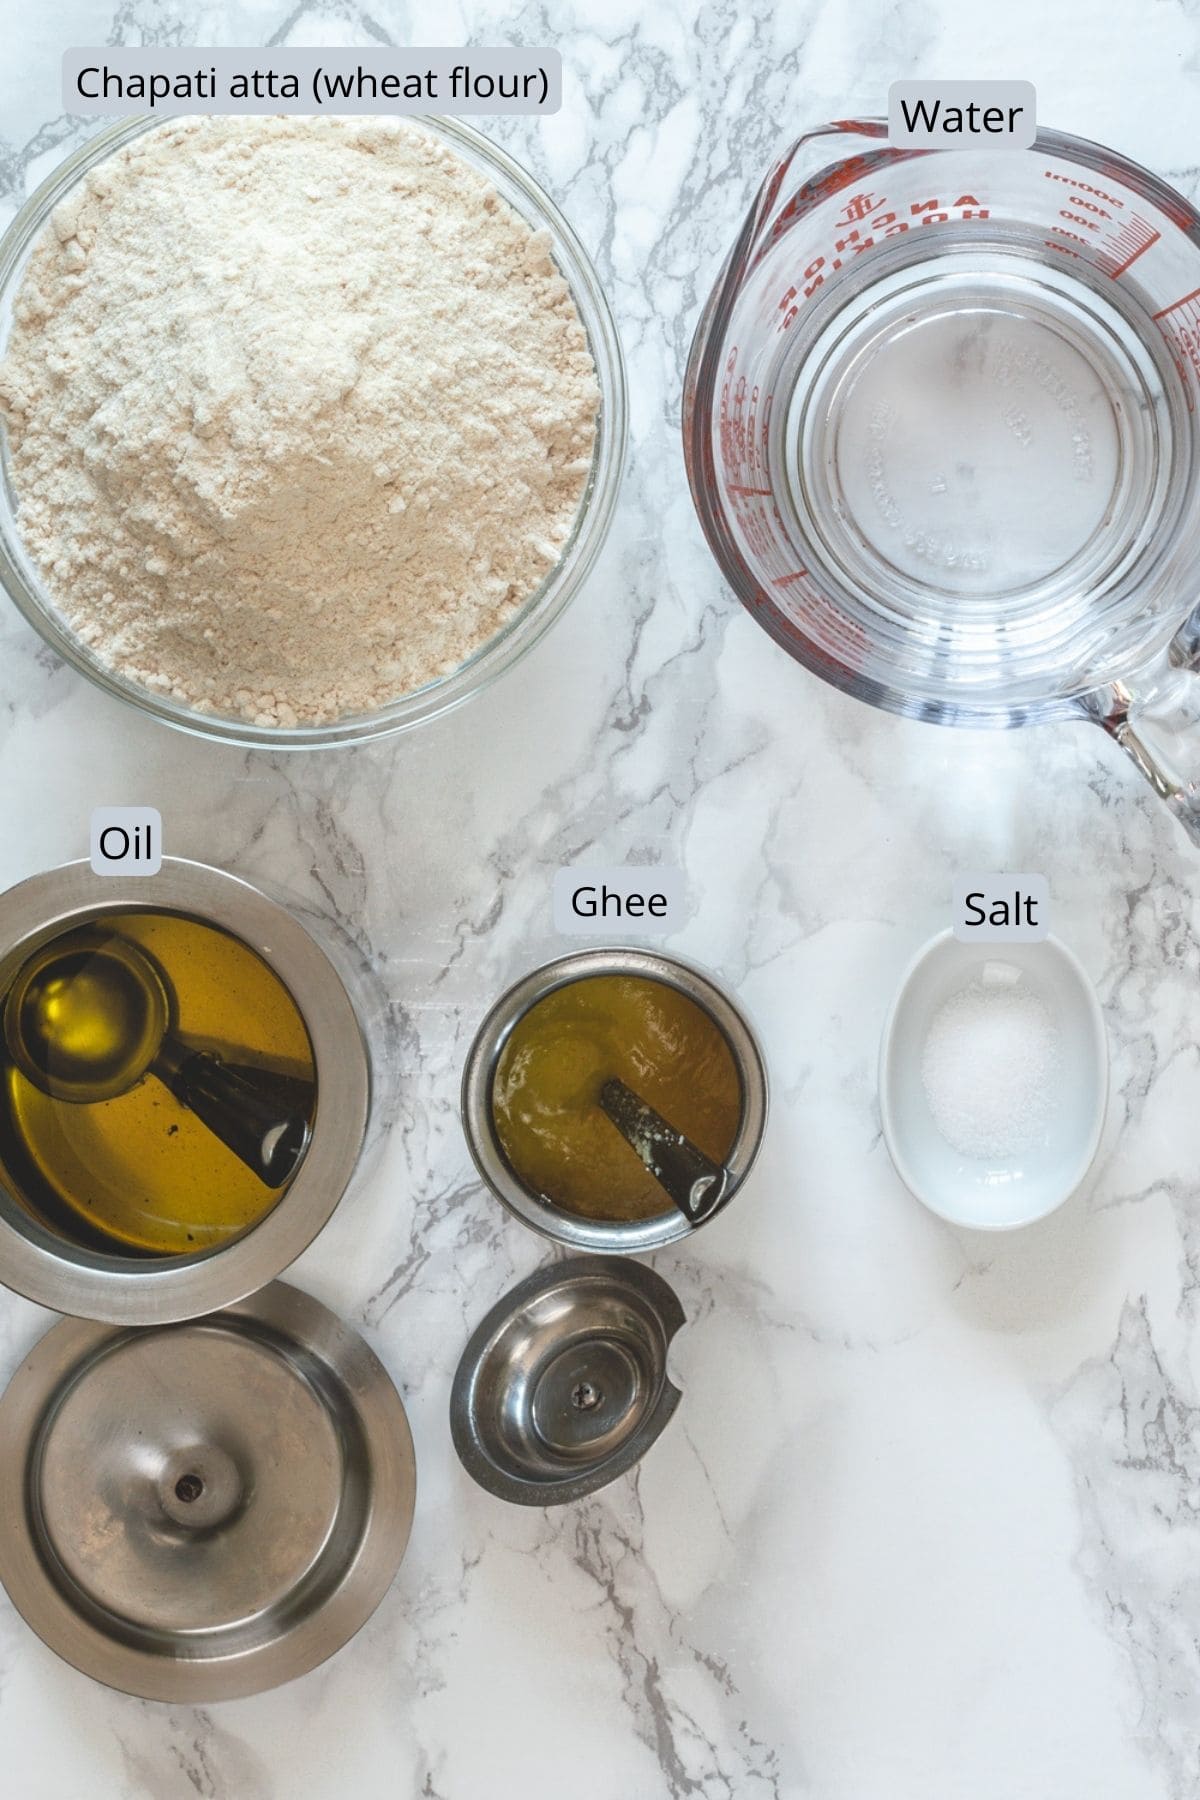
- Whole wheat flour (atta): This wheat flour is not the same wheat flour that we get in American grocery stores.
- Atta is made from semi-hard wheat variety aka durum wheat. This hard wheat is high in protein.
- The atta is made by stone grinding, this process imparts a unique taste to the roti or any bread made from the chapati atta. During the grinding process, the high temperature is produced by the friction of traditional stone/chakki. Because of this high temperature, the freshly ground atta has a toasty, nutty smell.
- So in India, my mom used to grind the atta at home using a stone mill (Ghanti). Many prefer to buy it from the nearby mill fresh every week.
- In the USA, we don’t get fresh chakki atta. I buy the chapati atta from the Indian grocery stores. I prefer sharbatti atta (e.g. Royal chakki atta) or 24 Mantra organic atta.
- Salt: It is optional. My in-laws’ side doesn’t add salt to their roti recipe. While mom adds salt to the dough.
- Water: Use room temperature or warm water to make the roti dough.
- Oil: A few drops of oil is used to smooth out the dough after kneading.
- Ghee: It is smeared over the hot phulka roti and served right away. It is optional and If you want to make vegan roti then skip it.
👩🍳 How To Make Roti Recipe? (Stepwise Photos)
Kneading The Dough:
- You can do this step by hand or use the kitchen aid stand mixer.
- If making a smaller batch then you must knead the dough by hand.
- To knead the roti dough in the stand mixer, you must use a minimum of 2 cups of flour (you can use more but cannot use less than 2 cups).
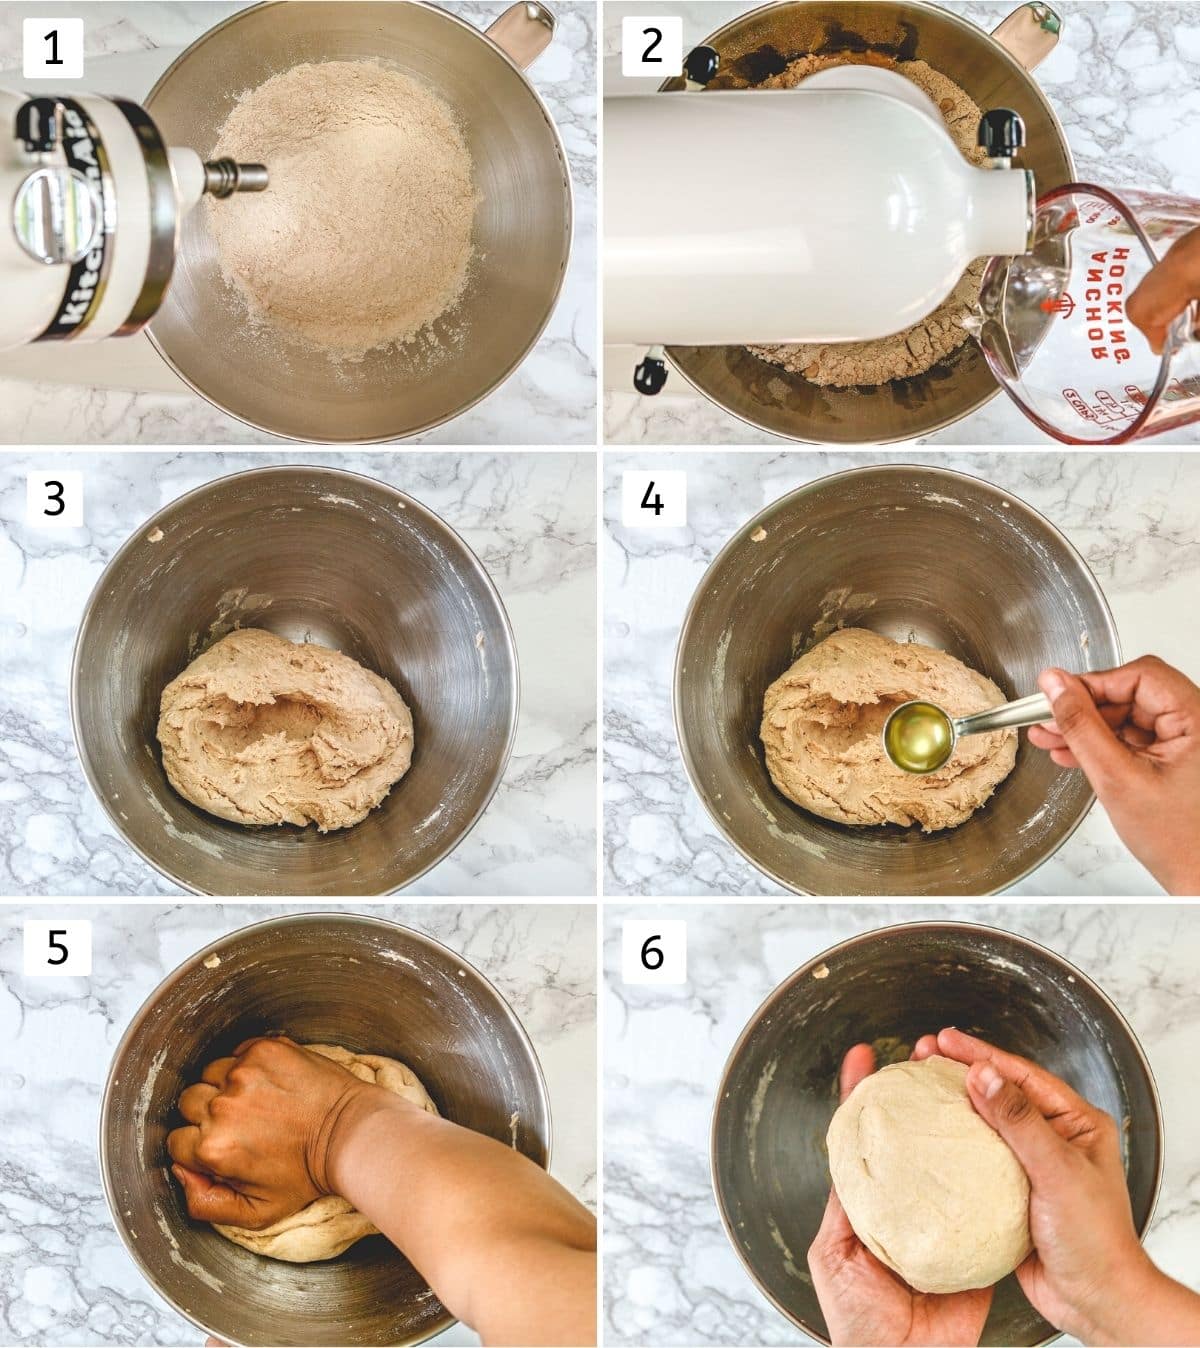
1) Take chapati atta and salt (if using) in a stand mixer bowl.
2) Use the dough hook and start running the mixer on low (stir mode). While the mixer is running pour the water slowly from the side.
3) Once you’ve poured all the water, increase the speed a little bit but still on low speed (no.2 or 4). Keep kneading until it forms a dough. You may need to stop the mixer and check if it needs more water or if it’s sticky then you may need a sprinkle of more flour. Adjust as needed and continue kneading.
4) Now drizzle half a teaspoon of oil over the dough.
5) Now knead it 2-3 times using the palm of your hand. This step is just to smooth out the dough and the layer of oil prevents the dough from drying during the resting period.
6) The dough should be smooth, soft and pliable. If it feels tight and hard meaning you’ve used less water. If the dough feels sticky meaning you’ve used more water.
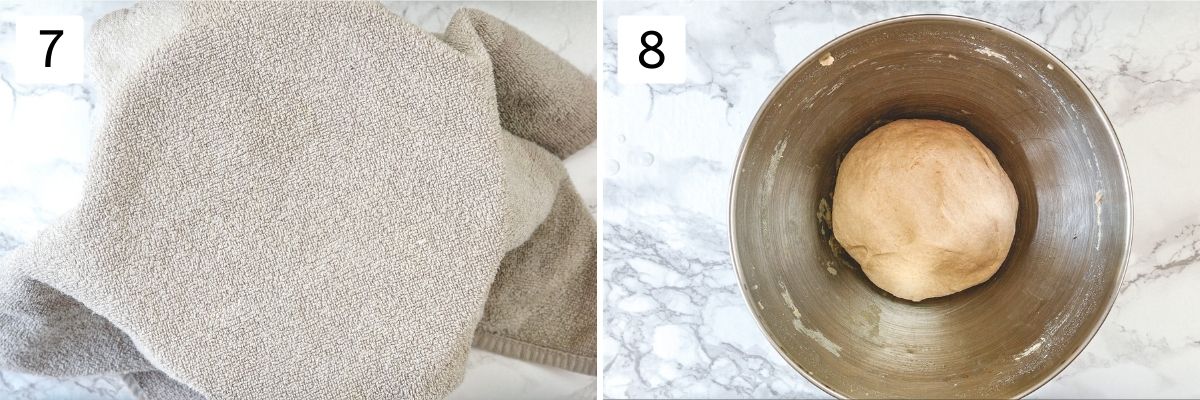
7) Cover the dough with a clean kitchen towel or a plate and let it rest for 10-15 minutes. This resting time can go up to 45 minutes.
8) If you have added salt then you’ll notice the tiny white spots on the dough after the resting period. Knead it once or twice to smooth it out.
NOTE: I am making Gujarati style rotli that are super thin. So I’ll get 20 rotli from 2 cups of flour. If you’re making thicker roti (North Indian style) then you’ll get around 12-15 rotis from 2 cups of flour.
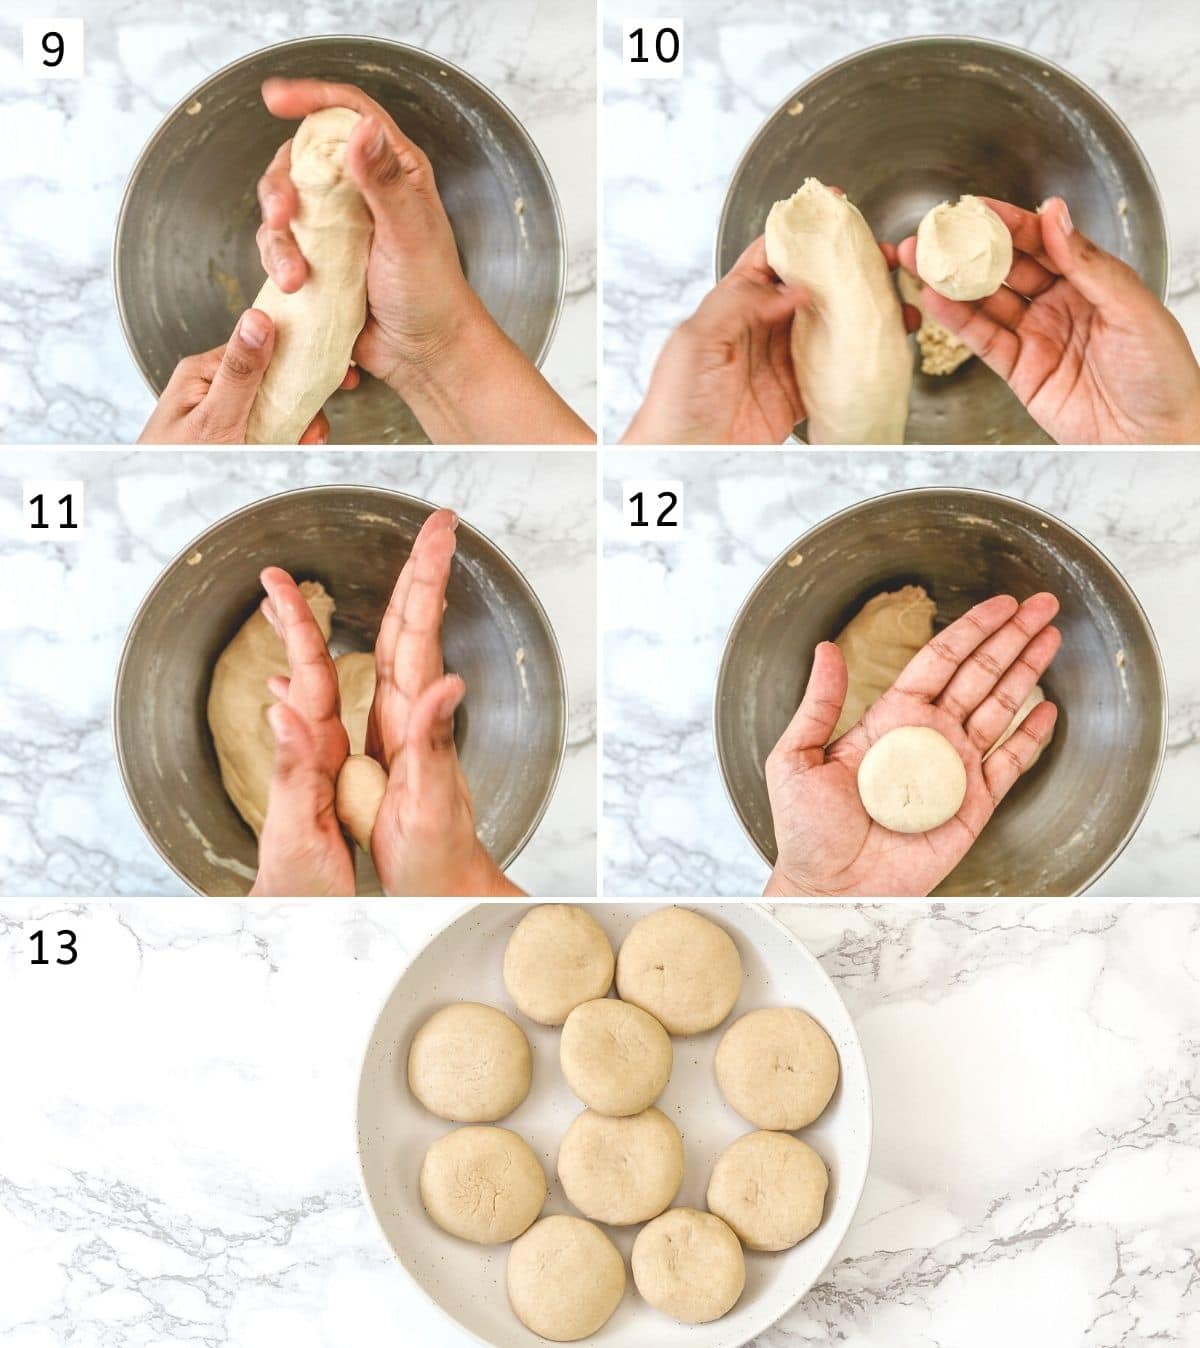
9) Divide the dough into two portions and roll the one portion into a cylinder shape.
10) Now start pinching the dough to make small balls.
11) Roll the dough ball between your palm to make a smooth and round ball.
12) Then press lightly between your palm to make a disc shape.
13) Repeat the same for the rest of the dough and arrange them on a plate. Keep this covered while you’re rolling and cooking the roti.
Rolling The Roti:
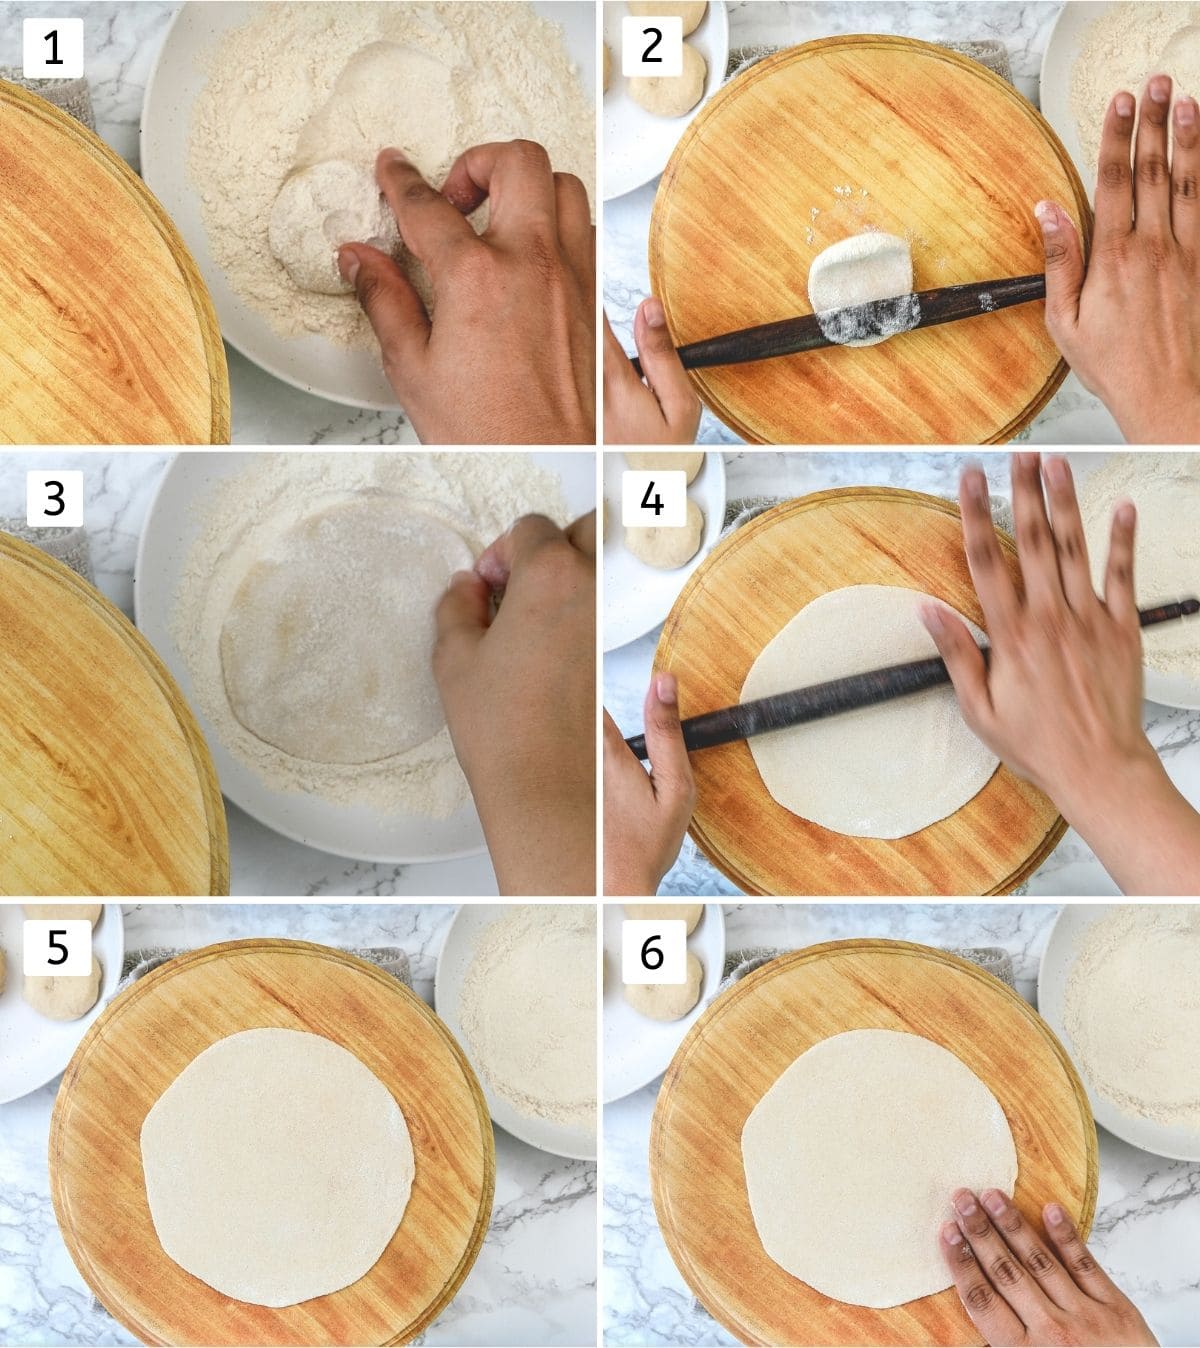
1) Take one flattened disc and dip and dust both sides into dry flour.
2) Start rolling into a round shape. As you roll, it should move in a circular motion. This comes from the practice, practice and practice. If your roti doesn’t move, no worries. You can lift or move it with your hand, so it doesn’t stick to the board.
3) Halfway through again dust both sides using dry flour. But make sure not to use too much flour otherwise it makes the dense roti. Plus, excess dry flour will burn and stick to the roti while cooking.
4) Roll the roti into a 6-inch diameter circle of even thickness.
5) It should not be too thick otherwise it takes longer to cook and results in a chewy texture.
5) If you’re a beginner then check the thickness. Run your fingers all over the roti and you’ll instantly feel if it has uneven thickness. If so roll it as needed to make an even thickness.
Cooking Roti On Tawa:
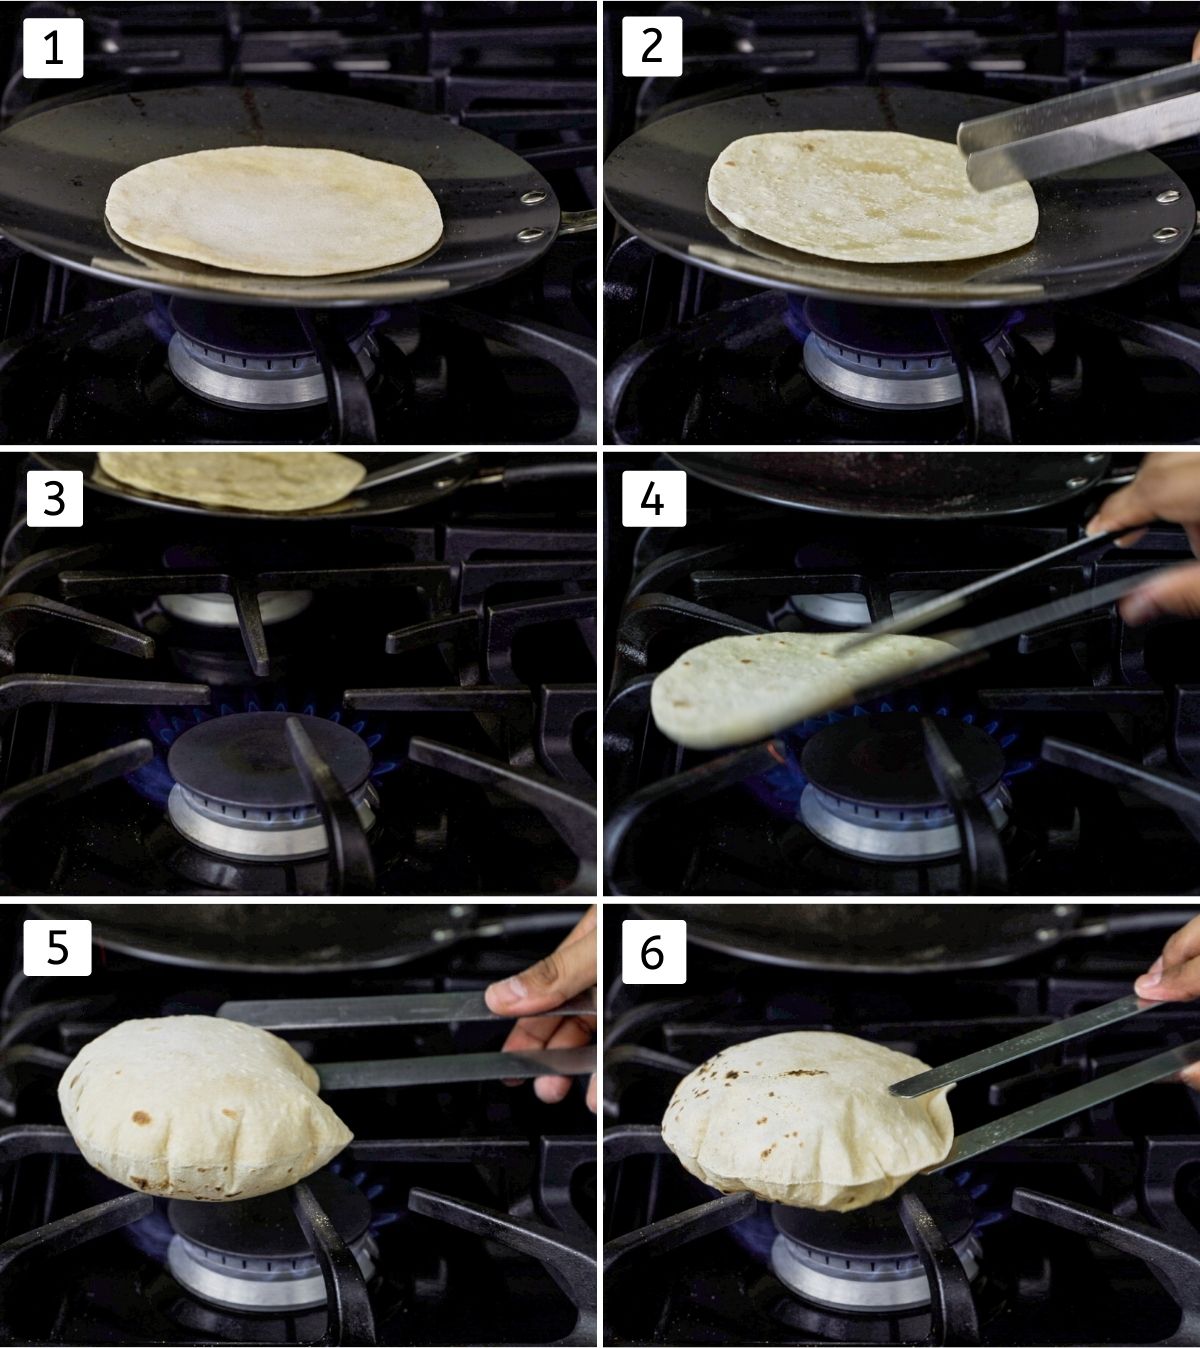
1) Heat the tawa (skillet) on medium-high heat. Once the tawa is hot place a rolled roti on it and within 30 seconds you’ll notice the bubbles on top.
2) Flip it using a pair of tongs and you’ll notice there are a few brown spots. As soon as you flip, those bubbles will get bigger. Now cook that side for 30 seconds only.
3) Lift the tawa and put it on the back burner or the side. Turn the heat on HIGH.
4) Place the roti directly on the flame (the top side should go down on the flame).
5) Immediately it will puff up.
6) As soon as it is puffed up, using the tongs hold the roti carefully from the edge and flip it. Cook the other side on the direct flame for very less time (2-3 seconds only). Be careful, sometimes it gets broken and the steam will come out. This steam may burn you, so be careful.
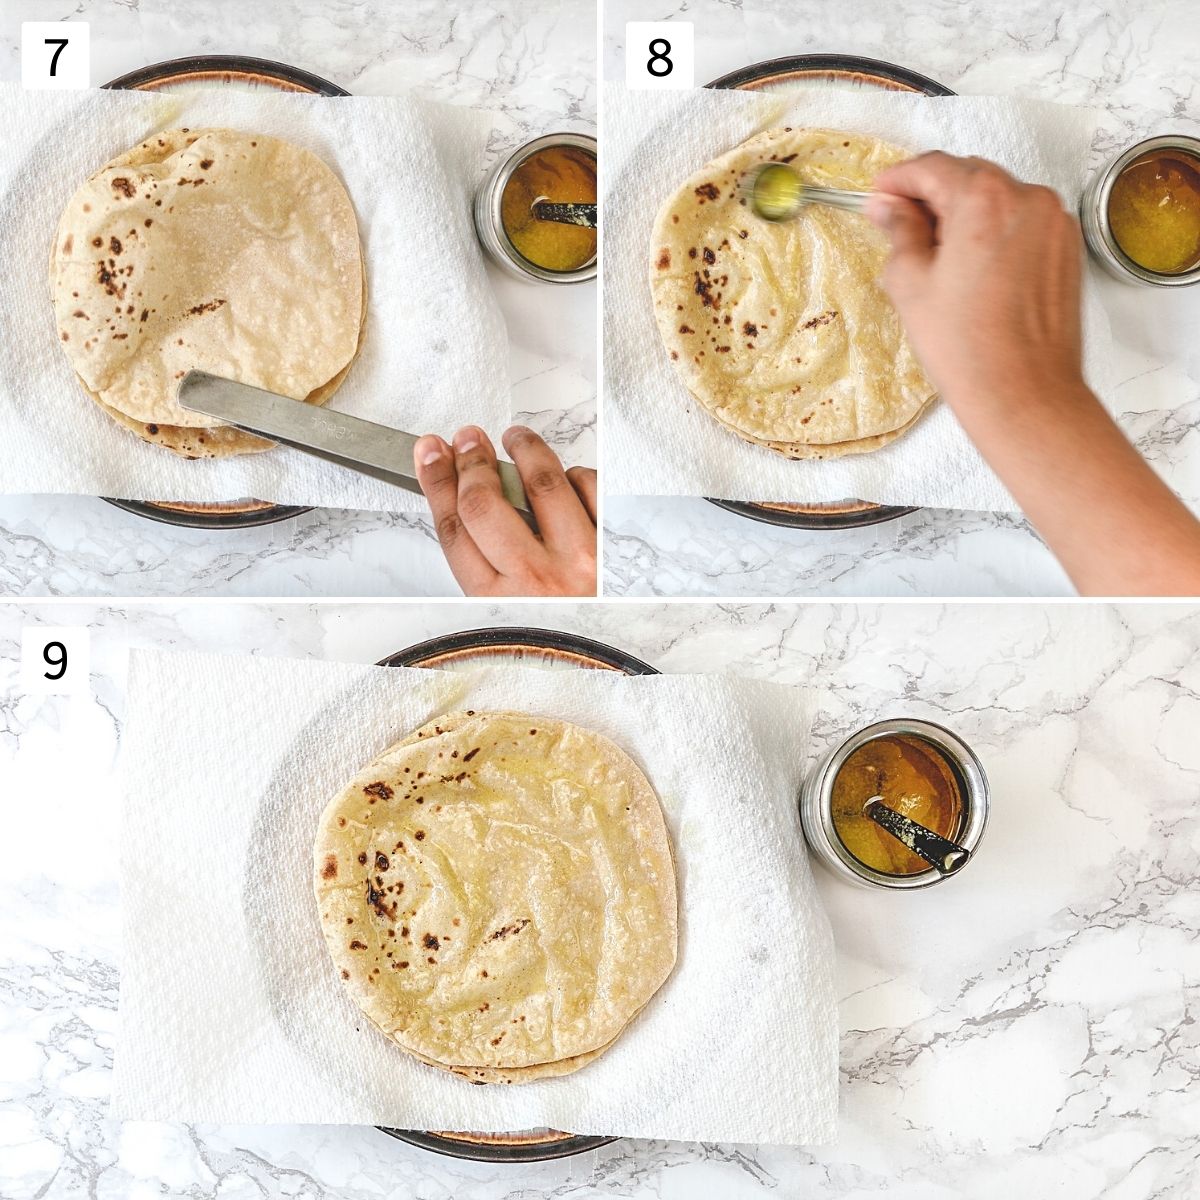
7) With the help of the tongs, place the cooked roti on the paper towel lined plate or insulated container. Always keep the cotton cloth or paper towel underneath, so all the moisture can be absorbed by the paper towel and phulka will stay softer without getting soggy.
8) Spread some ghee over it to keep it softer for a longer period of time.
9) Now lower the heat to medium-high and place the tawa back on the burner. And repeat the same for rest. Keep stacking the rotis until you’re done.
💭 Expert Tips To Make BEST Roti
Making perfectly soft and round roti is a skill that needs a lot of practice. The following tips will help you to get started as a beginner. Keep making it and you’ll keep getting better every time.
Roti Dough Tips:
- The warm water to knead the dough makes the soft rotis. Once you become a pro, it’s ok to use room temperature water.
- If kneading the dough by hand then add little water at a time and keep kneading the dough. If you dump all the water at once, you’ll get a sticky mess.
- How to knead once the dough comes together? Stretch the dough, use the palm of your hand, fold and repeat until you get a soft, pliable dough.
- The roti dough has to be smooth and soft (not loose and sticky, not stiff and hard).
- If the dough is sticky, add some more flour.
- If the dough is stiff, add 1 tablespoon of more water at a time and knead.
- Massaging and kneading the dough with a few drops of oil is important so you can roll the roti easily with smooth edges.
- Kneading the dough until it gets smooth (whether by hand or using a stand mixer) is necessary. So the gluten is formed and the roti gets soft.
- Resting the dough for at least 15 minutes is a must to get softer rotis.
Rolling Tips:
- Place a napkin underneath the rolling board (chakla) so it doesn’t move while rolling the roti.
- Make sure that the dough ball and flattened disc are smooth without any cracks. Since there are no cracks to begin with, you’ll get smooth edges as you roll the roti.
- Roll the roti to an even thickness to make it puff up fully. Apply even pressure while rolling.
- If it’s rolled unevenly then it may puff up partially and stays raw and un-puffed where it was thick.
- If it is rolled too thin like paper then it will become hard and crack like papad.
- If it is rolled too thick then it takes longer to cook and becomes chewy.
- Don’t use too much dry flour while rolling otherwise dry flour will get burn while cooking and will stick to the roti. If you have used more flour then you can dust off the excess before placing it on the tawa.
Cooking Tips:
- Tawa has to be hot enough before you place the roti on it. Otherwise, it takes longer to cook and becomes hard and chewy.
- Place the roti on the tawa flat. There should be no air bubble between rolled roti and tawa.
- When cooking on the direct flame, crank the heat to high in order to make it puff up quickly.
- Consider the cooking time given in the recipe instructions as a guideline. It may vary a few seconds here and there depending on how thin, or thick you have rolled it, the intensity of the flame and the thickness of the tawa. So experiment and practice make it best.
🥣 Storage & Reheating Rotli
- Roti stays good for a day at room temperature in an insulated or airtight container.
- Keep the paper towel at the bottom to avoid getting soggy.
Reheating in the microwave: I have made it in the morning and eating it for lunch I would not re-heat. Instead, I prefer the room temperature rotli. However, if it’s a day old then I would reheat in the microwave for a few seconds only and eat it right away before it gets dry and chewy.
Packing Roti for lunch
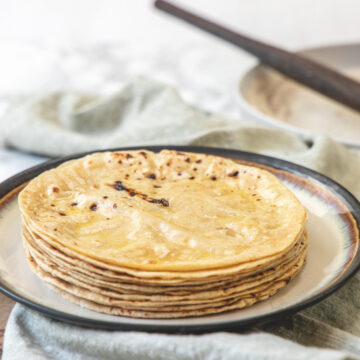
- As shown above, keep stacking the roti on the paper towel lined plate. Once you’re done making, place the stack of roti (along with the paper towel) in the round container.
- Let the roti cool down for 5-10 minutes by partially covering the container.
- Then place another paper towel on the top and close the container lid. Here the paper towel will absorb the excess moisture.
- Do not fold or roll the rotis. Keep them flat as it is and I would store them in a round flat to-go container that you get curry or dal from Indian restaurants.
Storing the Roti dough
- Wrap the dough in a plastic wrap and store in the refrigerator for up to 24 hours only. If I have to make the roti in the morning to pack in the lunch then I would knead the dough the night before and store it in the refrigerator. In the morning, bring the dough to room temperature before making rotis.
- In the freezer, the plastic-wrapped dough can be stored for up to 3 months. I usually knead a big batch using a kitchen aid stand mixer. Divide into the portions and freeze to use for the next 2 weeks.
- To thaw, keep it on the counter for an hour or keep it in the refrigerator for a few hours until it is defrosted.

Check Out Other Basic Indian Bread
Did you try this phulka roti recipe? I’d love to hear about it! Click here to leave a review.
Roti Recipe (Rotli / Phulka)
US measuring cups are used (1 cup = 240 ml)
Ingredients
- 2 cups Whole wheat flour (Chapati atta)
- Salt, to taste (Optional)
- 1 cup Water, warm preferably
- ½ teaspoon Oil, to drizzle and knead later
- Ghee (clarified butter), as needed to smear on top
Instructions
Kneading The Dough:
- You can do this step by hand or use the kitchen aid stand mixer. If making a smaller batch then you must knead the dough by hand.
- Take chapati atta and salt (if using) in a stand mixer bowl.
- Use the dough hook and start running the mixer on low (stir mode). While the mixer is running pour the water slowly from the side.
- Once you’ve poured all the water, increase the speed a little bit but still on low speed (no.2 or 4). Keep kneading until it forms a dough. You may need to stop the mixer and check if it needs more water or if it's sticky then you may need a sprinkle of more flour. Adjust as needed and continue kneading.
- Now drizzle half a teaspoon of oil over the dough. Knead it 2-3 times using the palm of your hand. This step is just to smooth out the dough and the layer of oil prevents the dough from drying during the resting period.
- The dough should be smooth, soft and pliable. If it feels tight and hard then add some water. If the dough feels sticky then some more flour
- Cover the dough with a clean kitchen towel or a plate and let it rest for 10-15 minutes. This resting time can go up to 45 minutes.
- If you have added salt then you’ll notice the tiny white spots on the dough after the resting period. Knead it once or twice to smooth it out.
- NOTE: I am making Gujarati style rotli that are super thin. So I’ll get 20 rotli from 2 cups of flour. If you’re making thicker roti (North Indian style) then you’ll get around 12-15 rotis from 2 cups of flour.
- Divide the dough into two portions and roll the one portion into a cylinder shape. Now start pinching the dough to make small balls.
- Roll the dough ball between your palm to make a smooth and round ball. Then press lightly between your palm to make a disc shape.
- Repeat the same for the rest of the dough and arrange them on a plate. Keep this covered while you’re rolling and cooking the roti.
Rolling The Roti:
- Take one flattened disc and dip and dust both sides into dry flour.
- Start rolling into a round shape. As you roll, it should move in a circular motion. This comes from the practice, practice and practice. If your roti doesn’t move, no worries. You can lift or move it with your hand, so it doesn’t stick to the board.
- Halfway through again dust both sides using dry flour. But make sure not to use too much flour otherwise it makes the dense roti. Plus, excess dry flour will burn and stick to the roti while cooking.
- Roll it into a 6-inch diameter circle of even thickness. It should not be too thick otherwise it takes longer to cook and results in a chewy texture.
- If you’re a beginner then check the thickness. Run your fingers all over the roti and you’ll instantly feel if it has uneven thickness. If so roll it as needed to make an even thickness.
Cooking Roti On Tawa:
- Heat the tawa (skillet) on medium-high heat. Once the tawa is hot place a rolled roti on it and within 30 seconds you’ll notice the bubbles on top.
- Flip it using a pair of tongs and you’ll notice there are a few brown spots. As soon as you flip, those bubbles will get bigger. Now cook that side for 30 seconds only.
- Lift the tawa and put it on the back burner or the side. Turn the heat on HIGH.
- Place the roti directly on the flame (the top side should go down on the flame).
- Immediately it will puff up. As soon as it is puffed up, using the tongs hold the roti carefully from the edge and flip it. Cook the other side on the direct flame for very less time (2-3 seconds only). Be careful, sometimes it gets broken and the steam will come out. This steam may burn you, so be careful.
- With the help of the tongs, place it on the paper towel lined plate or insulated container. Always keep the cotton cloth or paper towel underneath, so all the moisture can be absorbed by the paper towel and phulka will stay softer without getting soggy.
- Spread some ghee over it to keep it softer for a longer period of time.
- Now lower the heat to medium-high and place the tawa back on the burner. And repeat the same for rest. Keep stacking the rotis until you’re done.
The rotis are so soft and tasty. It took very less time in making these as I used Aashirvaad Whole Wheat Flour.
Glad that rotis came out good.