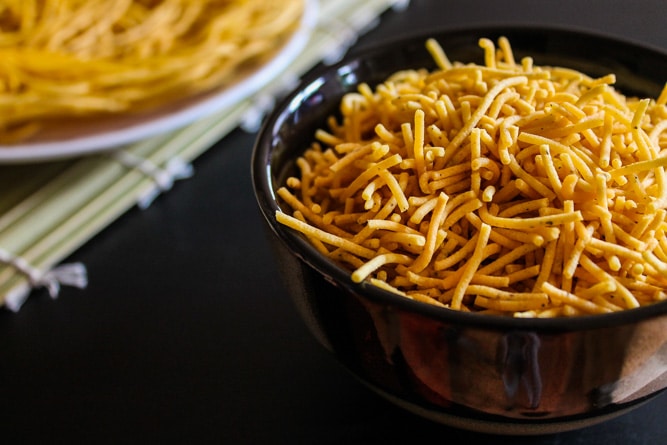
Sev Recipe (Homemade, Thin, Besan Sev)
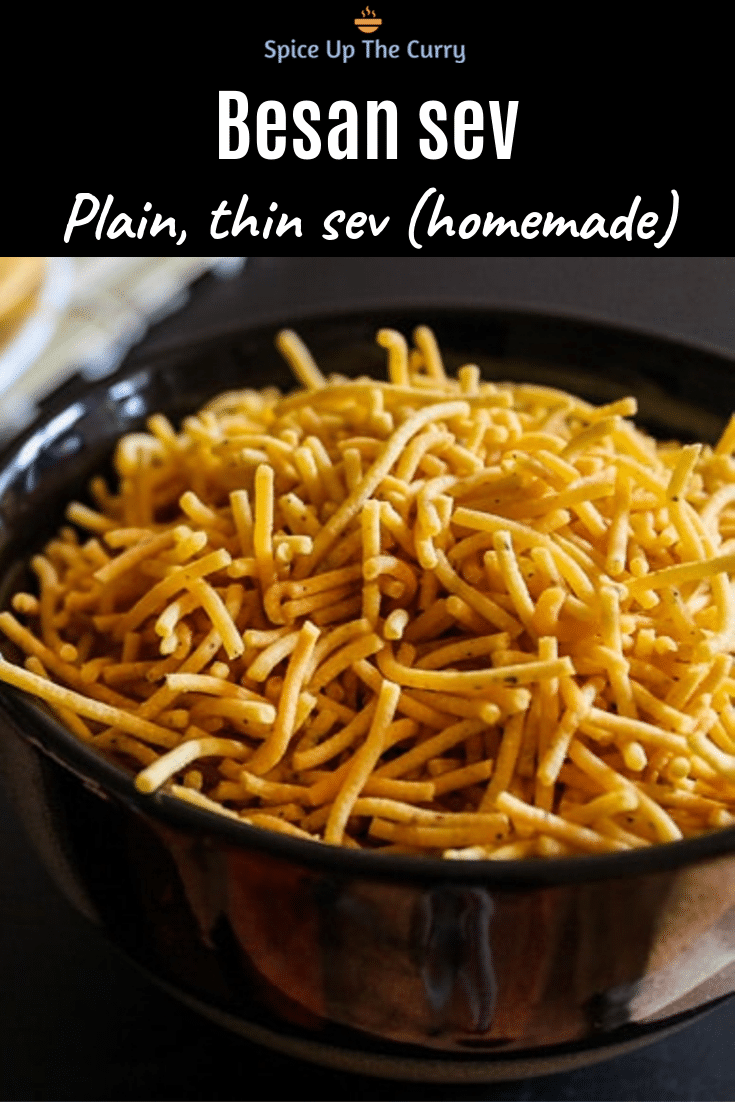
Homemade besan sev recipe! A crispy, savory snack made from besan (gram flour or chickpea flour). It is usually made during Diwali (Indian festival) to add in different chivda, mixture recipes. This can be used in many chaat recipes.

What is sev?
Sev is like thin, crunchy noodles made from chickpea flour. The batter-like dough is made from chickpea flour and is seasoned with salt, pepper and turmeric powder. Then pressed into the sev maker to form thin noddles. These noodles are directly formed into the hot oil and deep-fried till crisp.
The thickness of sev:
- Mostly the save maker comes with three different discs for the various sized thickness of sev.
- Very fine (thin sev or jini sev) – it is known as nylon sev. It is mainly used in chaat recipes like sev puri, radga patties. Use this same recipe with disc w/ very tiny small holes.
- Medium thickness – Same as shown in this recipe. This verity is mainly used while making chivda or any other Diwali namkeen mixtures.
- Thick sev – This is eaten as a snack as such or with a cup of tea or coffee. Here is the recipe – tikha gathiya.
Different flavors:
- Today I am sharing the plain sev recipe. But in the market, you will find many different flavored ones e.g.
- Aloo sev (also known as aloo bhujia)
- Palak sev
- Tomato sev
- Mint sev
You will need the sevai maker or press to prepare this snack. Making sev without sev maker is not possible.
How to make sev?
1) Take besan, black pepper powder, turmeric powder and salt in a bowl. Mix well.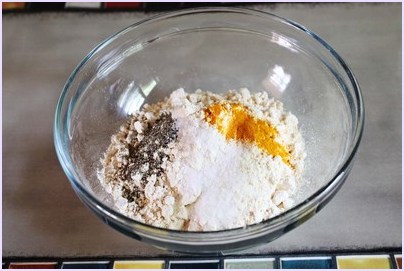
2) Add hot oil. Mix it well, it will have a crumbly texture.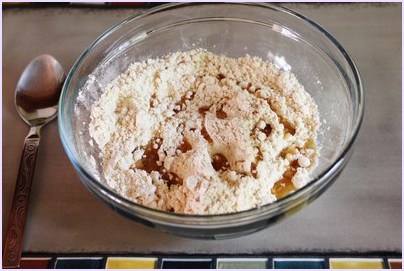
3) Then make the dough by adding little water at a time and make a soft, smooth dough. It is a very sticky dough, I just used a spoon to mix the dough in the beginning. Then at the end, I grease the hand with little oil then smooth out the dough (forgot to take this pic but you will see how the dough looks little later).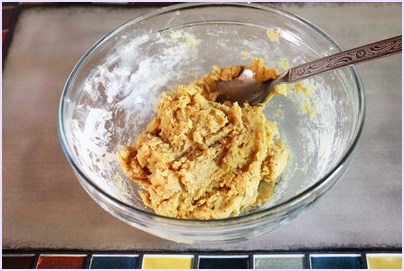
4) Now use your sev maker machine with a disk which has tiny small holes. Grease the inside of it with little oil. On the other side, heat the oil in a pan on medium heat for deep frying the sev.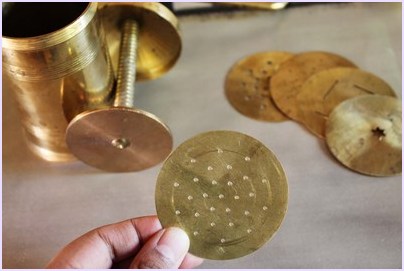
5) Now fill the container with prepared dough and close it tightly.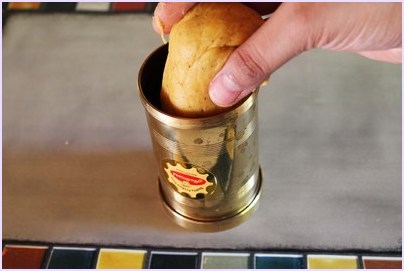
6) As you twist the handle sev will come out from the bottom holes.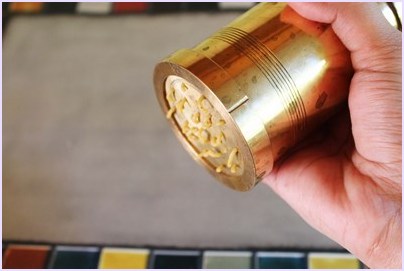
7) Now check the oil, it should be hot now. Drop a pinch of dough in the oil. If it comes on top immediately then the oil is too hot. If it comes on top after a long time then the oil is not hot enough. If it comes on top after 1-2 seconds, then the oil is ready to fry.
8) Now hold the machine over the pan, turn the handle and thin sev will come out. These are starting to fall into the hot oil. As it falls into the oil, slowly move the machine in a circular motion.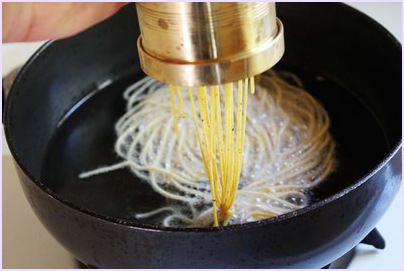
9) As you complete one circle, stop there and reverse the handle a bit to stop the sev from coming out.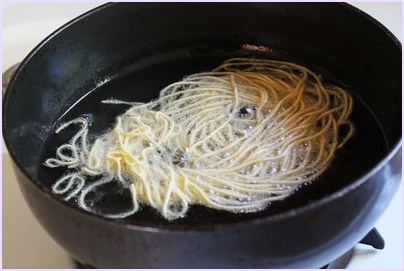
10) Fry both the sides till it becomes crispy. You will see it will stop bubbling, that time sev is ready. Remove it using a slotted spoon.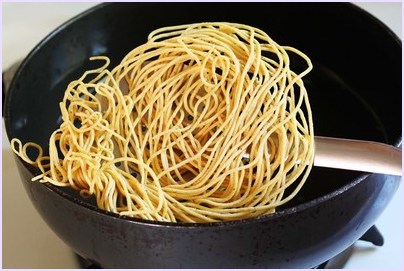
11) And place it on the paper towel-lined plate. And continue the same process for remaining dough.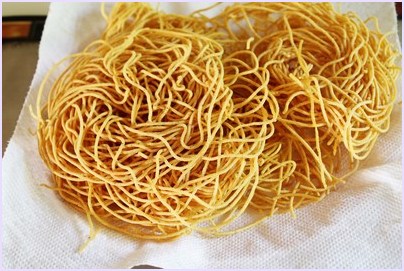
12) Let it cool completely, as it cools it will become crispier. Then break it and crush it lightly with your hand and sev is ready to serve.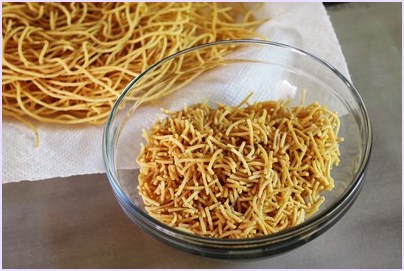
store them in an airtight container. It stays good for 2-3 weeks.
Serving Ideas:
- You can have it as a snack with a cup of tea/coffee.
- Use in making chaat like sev puri, sukha bhel, dahi puri. You can sprinkle over kachori chaat, ragda patties, aloo tikki chaat and so on.
- Many times I use in making sev tomato shaak.
- Add into vagharela mamra or add into cereal chivda.
Check out more Diwali snacks recipes
Namak pare // Methi mathri // Shakarpara // Chakli // Chiwda namkeen
Sev Recipe (Homemade, Thin, Besan Sev)
Ingredients
- 1 cup Besan (gram flour)
- ¼ teaspoon Black pepper powder
- Salt to taste
- ¼ teaspoon Turmeric powder
- 1 tablespoon Hot oil
- ⅓ cup Water
- Oil for frying
Instructions
Making the dough
- Take besan, black pepper powder, turmeric powder and salt in a bowl. Mix well.
- Add hot oil. Mix it well, it will have a crumbly texture.
- Then make the dough by adding little water at a time and make a soft, smooth dough. It is very sticky dough so you may need to grease your hand halfway through.
Making sev recipe:
- Now use your sev maker machine with a disk which has tiny small holes. Grease the inside of sev maker with little oil.
- On the other side, heat the oil in a pan on medium heat for deep frying.
- Now fill the container with prepared dough and close it tightly.
- As you twist the handle sev will come out from the bottom holes.
- Once the oil is hot, hold the machine over the pan, turn the handle and thin sev starting to fall into the hot oil. As it falls into the oil, slowly move the machine in a circular motion.
- As you complete one circle, stop there and reverse the handle a bit to stop coming out.
- Fry both the sides till it becomes crispy. You will see it will stop bubbling, meaning it is ready. Remove it using a slotted spoon.
- And place it on the paper towel-lined plate. And continue the same process for remaining dough.
- Let it cool completely, as it cools it will become crispier. Then break it and crush it lightly with your hand.
- Once cools completely you can store in an airtight container.
Let me tell you about my experience. This is not meant as a criticism of the recipe. It is a good backup for the times the local Indian/ethnic shop doesn’t have bhujia (or sev) on their shelves for your own version of Bombay mix. Otherwise, having to mess with deep-frying and the oil ending up coating everything isn’t really worth it, because the clean-up is a canine of female persuasion and not exactly something I’m looking forward to. Furthermore, you start with a 1 litre of oil and end up with a bit less than that of used oil which you can maybe re-use once or twice and then have the pleasure of somehow having to get rid of.
Anyway, I figured I’d make the 2x amount so it’d be worth the effort, i.e. 5 dl of chickpea flour. (Now I’d say you should make at minimum 4x the amount.) I went with 1 ml each of chili, black pepper, cardamon, cloves and ginger, all powdered. I spied that off the ingredients list of a bag of bhujia. The total amount (5 ml) matches the amount of spices in this recipe. I’d now also add turmeric on top of that but it’s not bad without it. I also added 1 ml of salt which certainly isn’t enough.
I must’ve lapped 3-5 tablespoons of oil on the flour before I got a texture that felt what I’d call crumbly. The finished sev ended up a bit greasy. Added a total of 1.5 dl water. The dough ended up a little loose, the kind that sticks everywhere except where you want it to, which may well be the idea so that you are actually able to push it through those little holes. It’s a messy dough to work with, though, exacerbated by having to oil your implements and coat the lump of dough with oil.
I’d bought a device sold as potato press, made in India with a strong resemblance to a sev maker but levers, no fancy screws. The dough fit there nicely, 3x would too, but 4x might be a stretch. The smallest holes (3 mm) gave me about 3.5-4 mm thick noodles. They ended dangling straight down in the oil in a tight and surprisingly numerous bunch, no nice swirls here, and I had to cut them loose from the press with a butter knife but it worked well enough. (I can see spending some quality time with a Dremel working on a cut of steel sheet or a bottom of a tin can could easily give me a replacement plate with smaller-diameter holes.)
Frying the sev was no problem. I poked the sticks of frying dough with a spoon somewhat to make sure they separated but even the bits that were stuck together fried well. I used cheap rapeseed oil for frying and for the dough. My experience was that the sev is fried if you start getting the feeling it’s fried. Waiting for the bubbles to stop gets you brown noodles and when you start getting those brown hues, it’s somewhat burnt already. Still edible, but a bit burnt.
I also still wonder if you could somehow get away with not using hot oil in the dough and still getting the soft crisp, like maybe frying for a bit shorter time or in a slightly cooler oil. I find it a little unnerving having a pot of oil heating up next to me and having to get some of that in the dough and ending up being there with very doughey hands. I’d rather be able to take my time with the dough without having to worry about the oil.
Why do youneed hot oil to make the dough?
It makes sev soft yet crispy.
What would happen if you made the dough with room-temperature oil? I don’t really understand the significance here.
Do you know the difference between light & crispy VS hard & crispy?
That’s the significance of hot oil here.
Add hot oil to get light yet crispy texture.
Add room temp oil to get hard and crispy texture. You can feel the hard crispness to the roof of your mouth.
Interesting. Now I wonder why that is.
One more stupid question: is there a handy way to heat up a tablespoon of oil?
You need to work simultaneously, While making dough, Keep the oil to heat for frying and take a tablespoon of oil from that, add into the dough, work quickly and start frying sev.