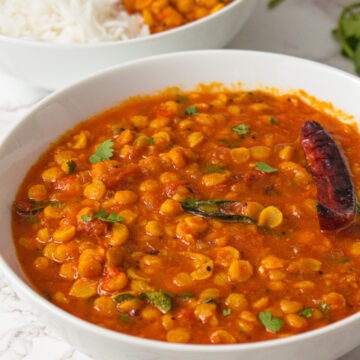
Chana Dal (Instant Pot)
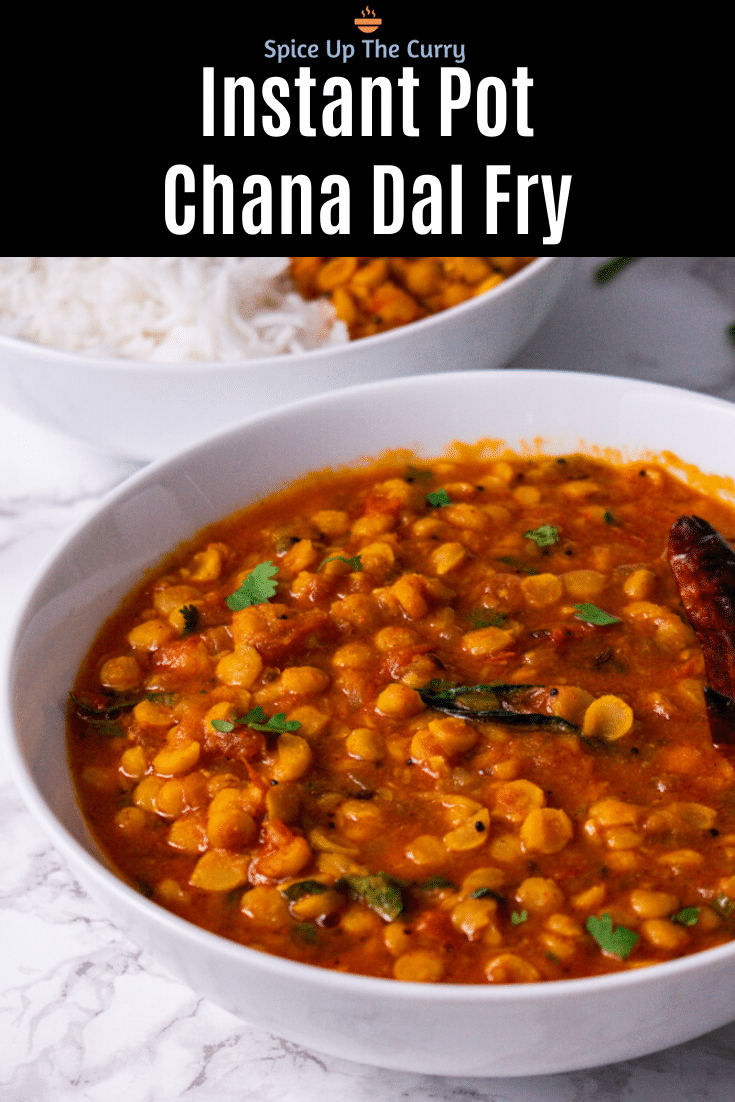
Punjabi chana dal recipe, just like my mom made growing up! This hearty, protein-packed, comforting dal is made with split Bengal gram, onion, tomato, and a few Indian spices. It’s easy to make and perfect for a healthy dinner when served with rice.
❤️ You’ll Love This Chana Dal Recipe
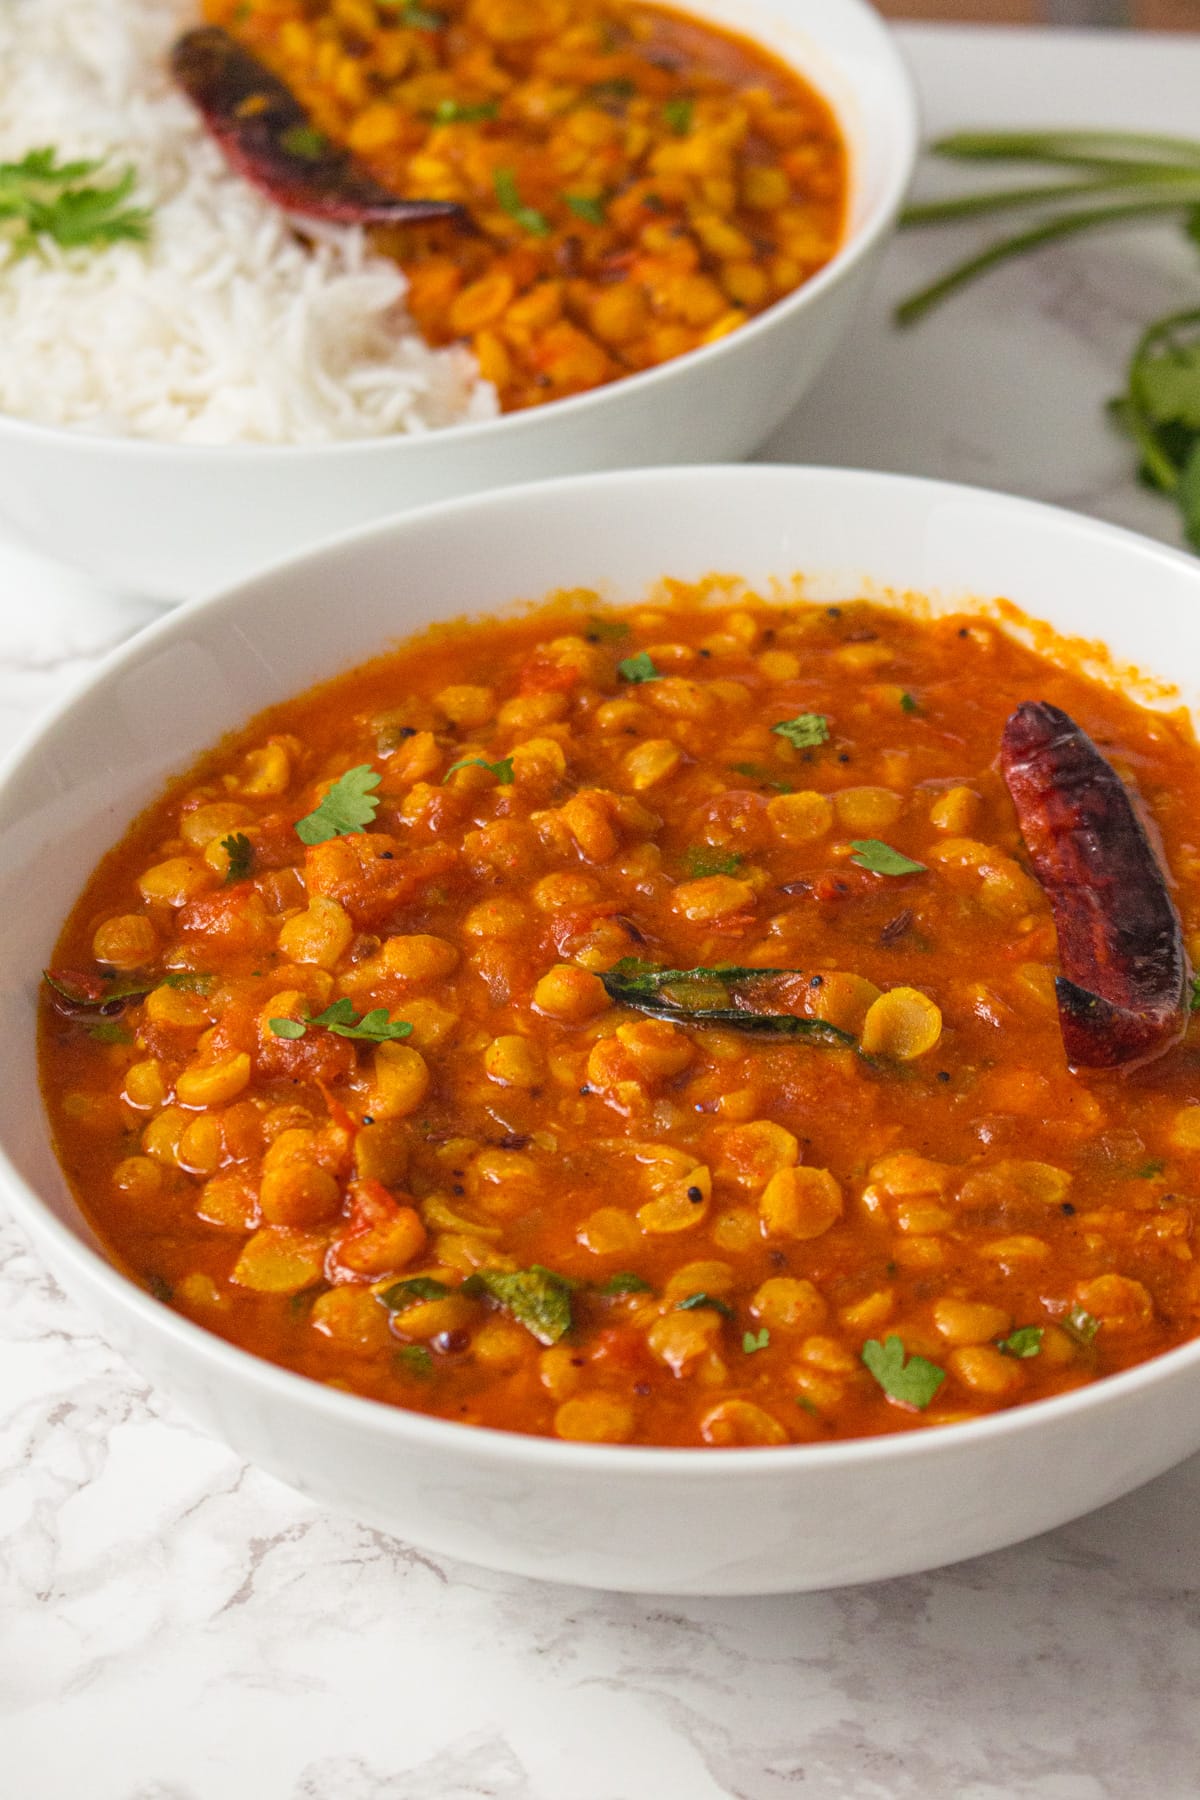
Healthy & comforting meal: This makes a cozy homestyle meal when served with piping hot instant pot basmati rice or pulao with a side of papad, kachumber salad, or mango pickle.
Leftover dal makes a great lunch box. Pack some rice and salad in a separate container and reheat in the microwave right before having lunch.
Freezer friendly: make a big batch of this instant pot chana dal recipe and freeze it in individual portions for later.
Simple to make: The method of making chana dal recipe is super simple, make typical Punjabi onion tomato masala, add dal, water, and pressure cook. Once done, make tempering and mix in garam masala and lime juice. Super simple, even beginners can make it easily.
This can be made on a stovetop pressure cooker as well. See the details in the recipe card below.
🧾 Ingredient Notes
Here is a pic of the ingredients you’ll need to make a delicious chana dal recipe. All of them are easy to find in Indian kitchens.
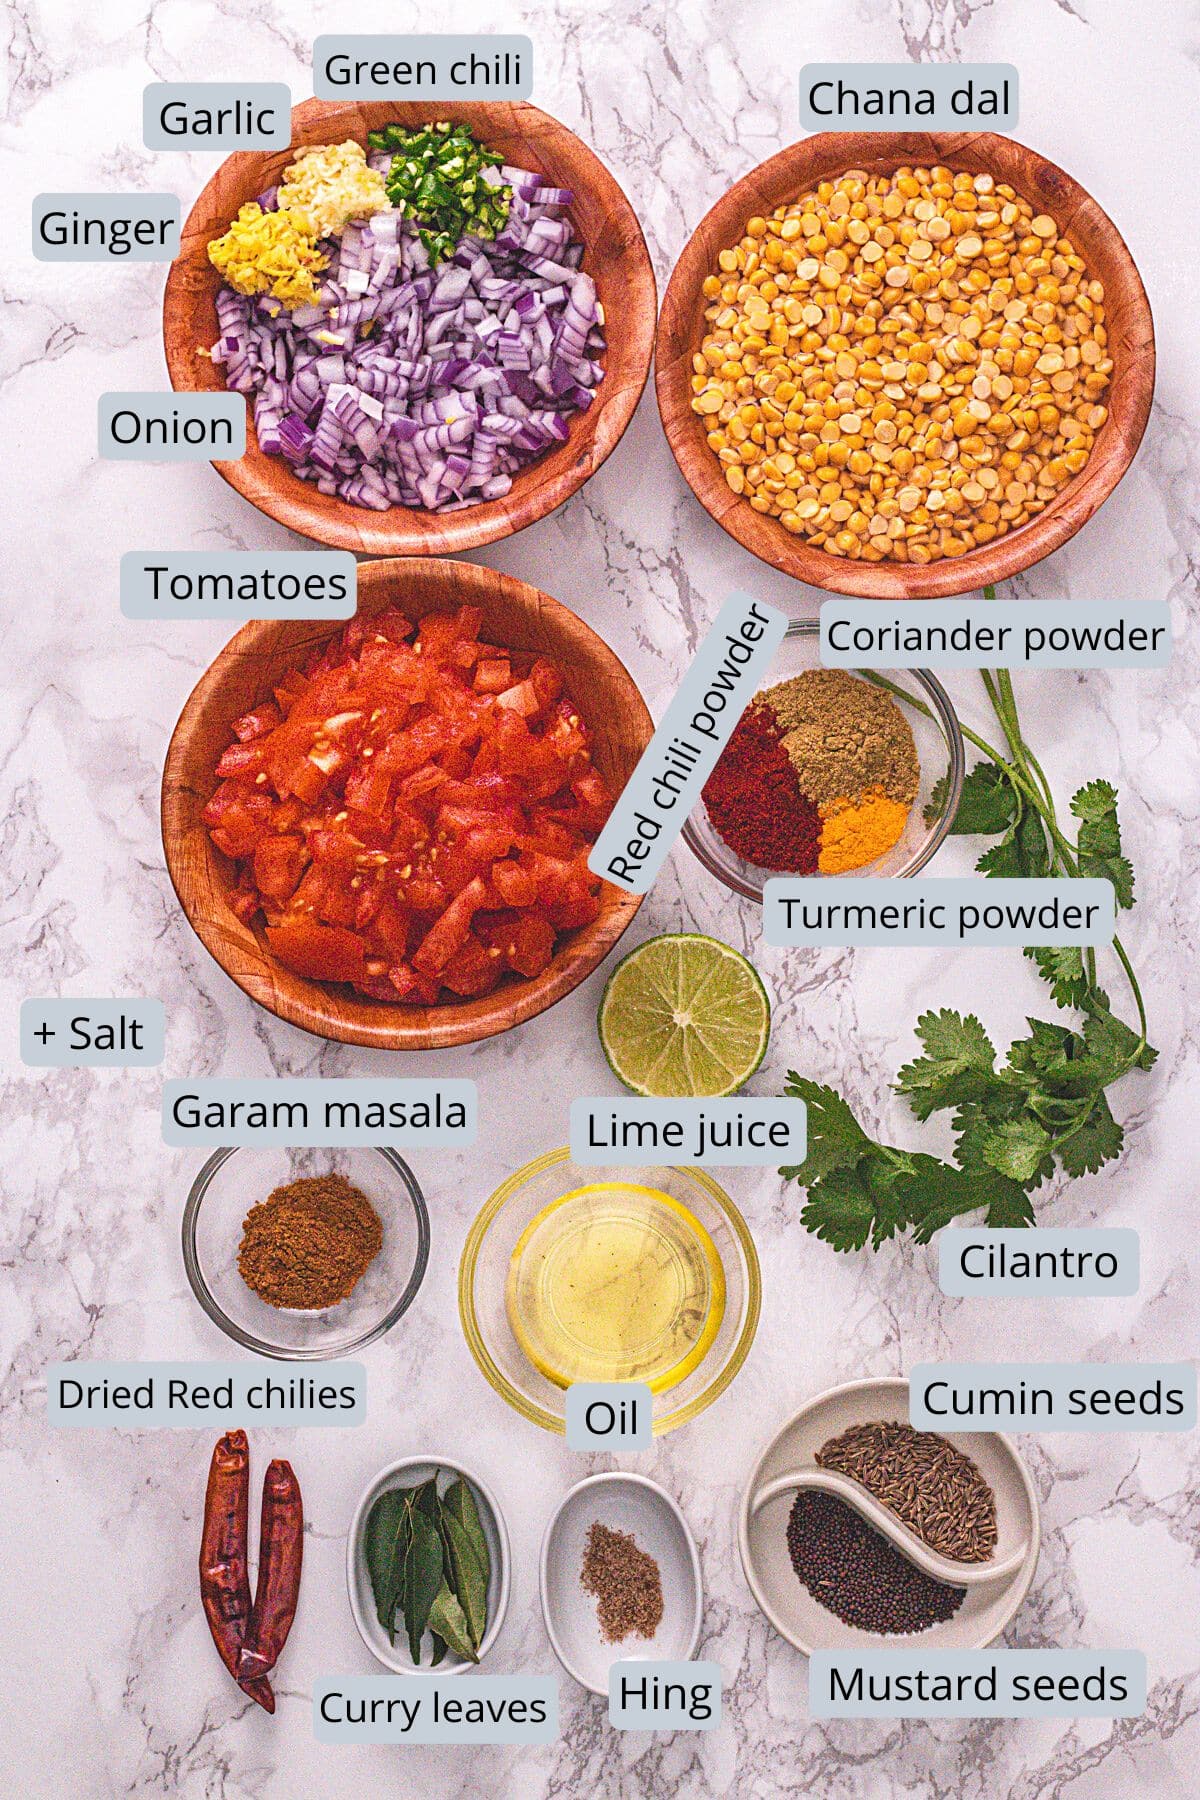
- Chana dal: This lentil is also known as split Bengal gram or split chickpeas. This takes a little longer to cook compared to other lentils like toor dal or moong dal. So it is recommended to soak the dal before cooking.
- Oil: To make this recipe vegan, I have used oil. But you can use ghee to add more flavor.
- Onion: For Indian cooking, I prefer red onion. But if you have yellow or white onion on hand then you can use that as well.
- Ginger, Garlic: Here I have freshly grated the ginger and garlic separately. Instead, you can crush them together in a small grinder or using a mortar and pestle. Or simply use ready ginger garlic paste.
- Green chili: If crushing ginger, and garlic then crush green chilies along with them. Or use finely chopped green chilies.
- Tomatoes: For Indian cooking, I prefer to use Roma or Plum tomatoes.
- Spice powders: Red chili powder, turmeric powder, and coriander powder are used. Garam masala is also used but that is added after pressure cooking to retain flavor and aroma.
- Lime juice: A couple of teaspoons of lime juice perks up the flavor so well. So please do not skip it.
- Tempering: It is made using mustard seeds, cumin seeds, dried chilies, hing, and curry leaves. The tadka or tempering adds a nice flavor and aroma to the chana dal recipe.
👩🍳 How To Make Instant Pot Chana Dal? (Stepwise)
Prep:
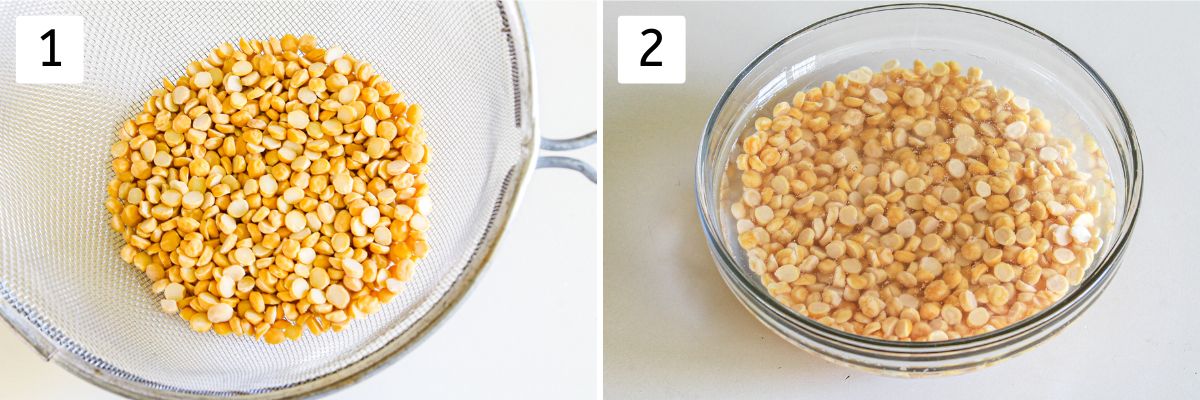
1) Wash or rinse chana dal using regular tap water until the water is clear or not cloudy anymore.
2) Optional step: Soak in enough water for around 20-30 minutes. More soaking time will not hurt. Discard the soaking water once done.
Making Chana Dal In Instant Pot:
1) Turn on the instant pot with saute mode on. Add oil to the liner. Once it is hot add onion, ginger, garlic, and green chili. Sprinkle a little salt to speed up the onion cooking process.
2) Cook until the onion turns translucent and starts to soften.
3) Add tomatoes and mix.
4) Cook until tomatoes start to soften.
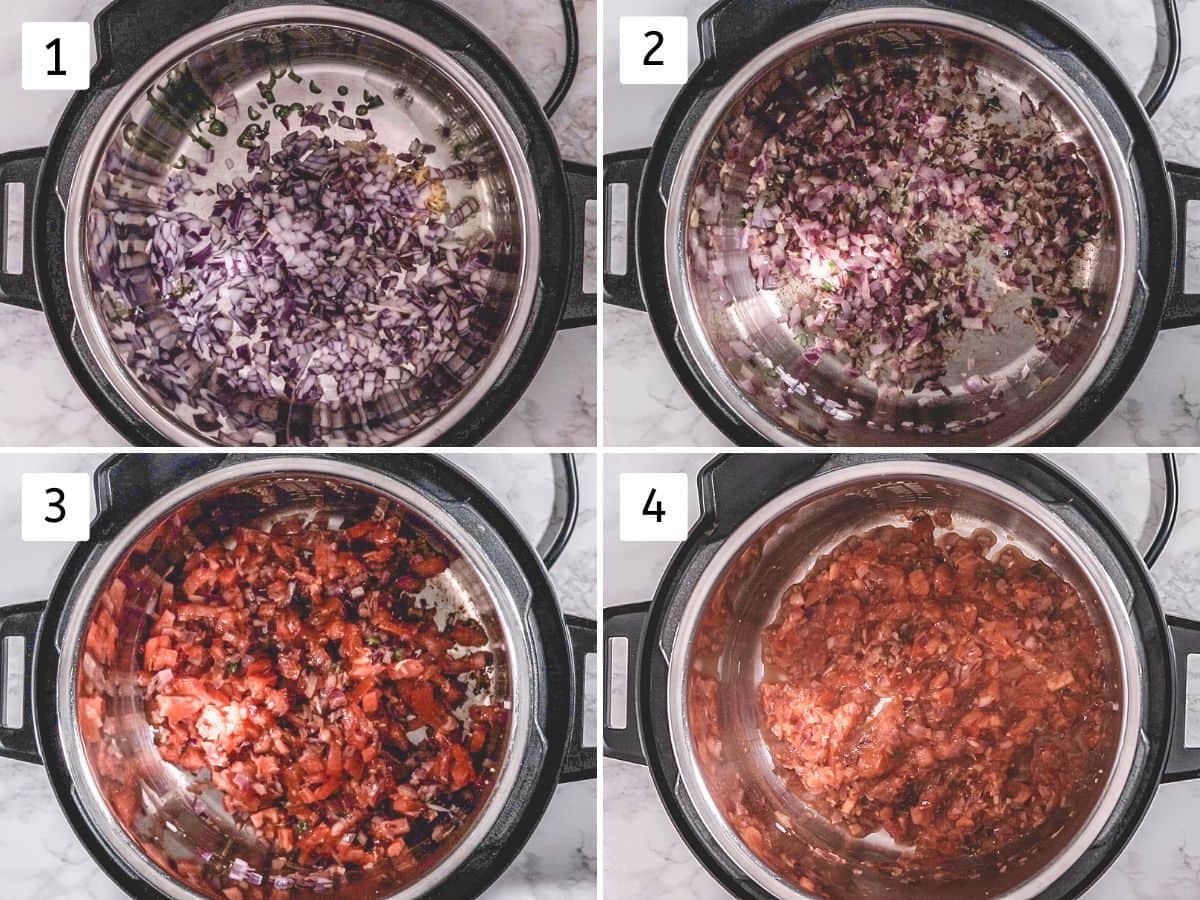
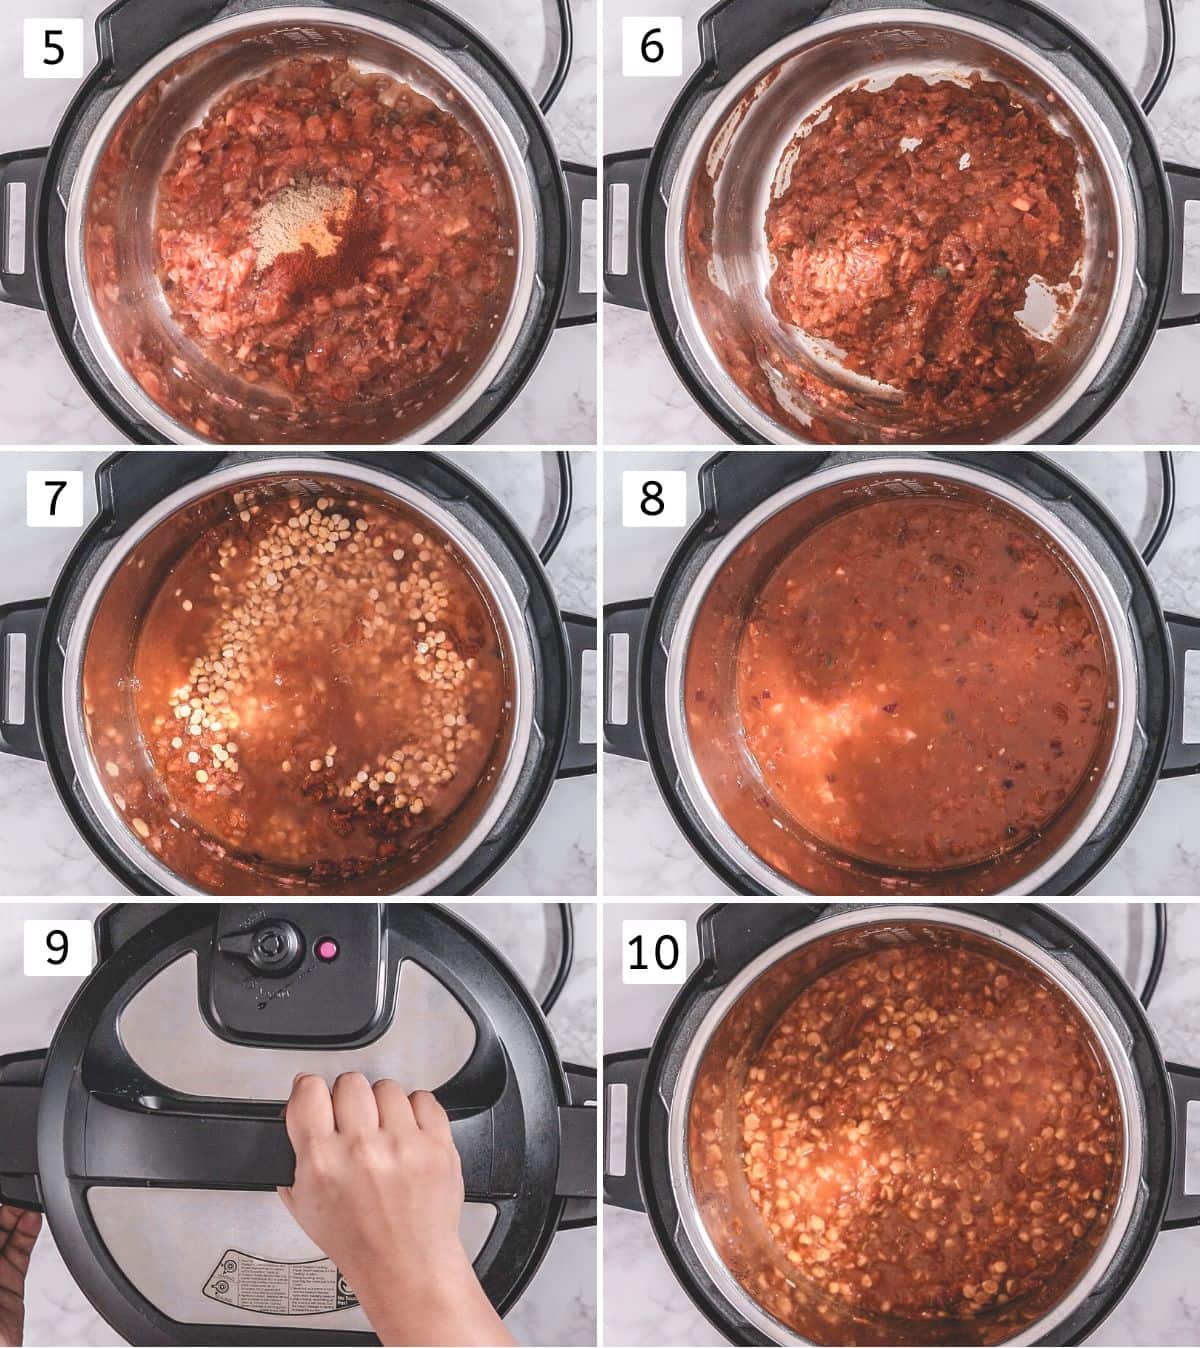
5, 6) Add turmeric powder, red chili powder, and coriander powder. Mix and cook for a minute.
7, 8)Add drained, soaked lentils with fresh water and remaining salt. Stir everything well.
9) Cover the instant pot with a lid and keep the valve in a sealing position. Pressure cook on manual (high pressure) for 10 minutes. (15 minutes for no soak chana dal).
10) Let the pressure release naturally. Once the pin drops, open the lid and stir the dal and check the consistency. If it’s too thick then you can add some hot water to adjust the consistency.
11) To make the tempering, heat the oil in a small tadka pan. Once hot add mustard seeds and let them splutter.
12) Then add cumin seeds and let them sizzle a bit.
13) Add hing, dried chilies, and curry leaves.
14) Immediately add this tempering to the dal.
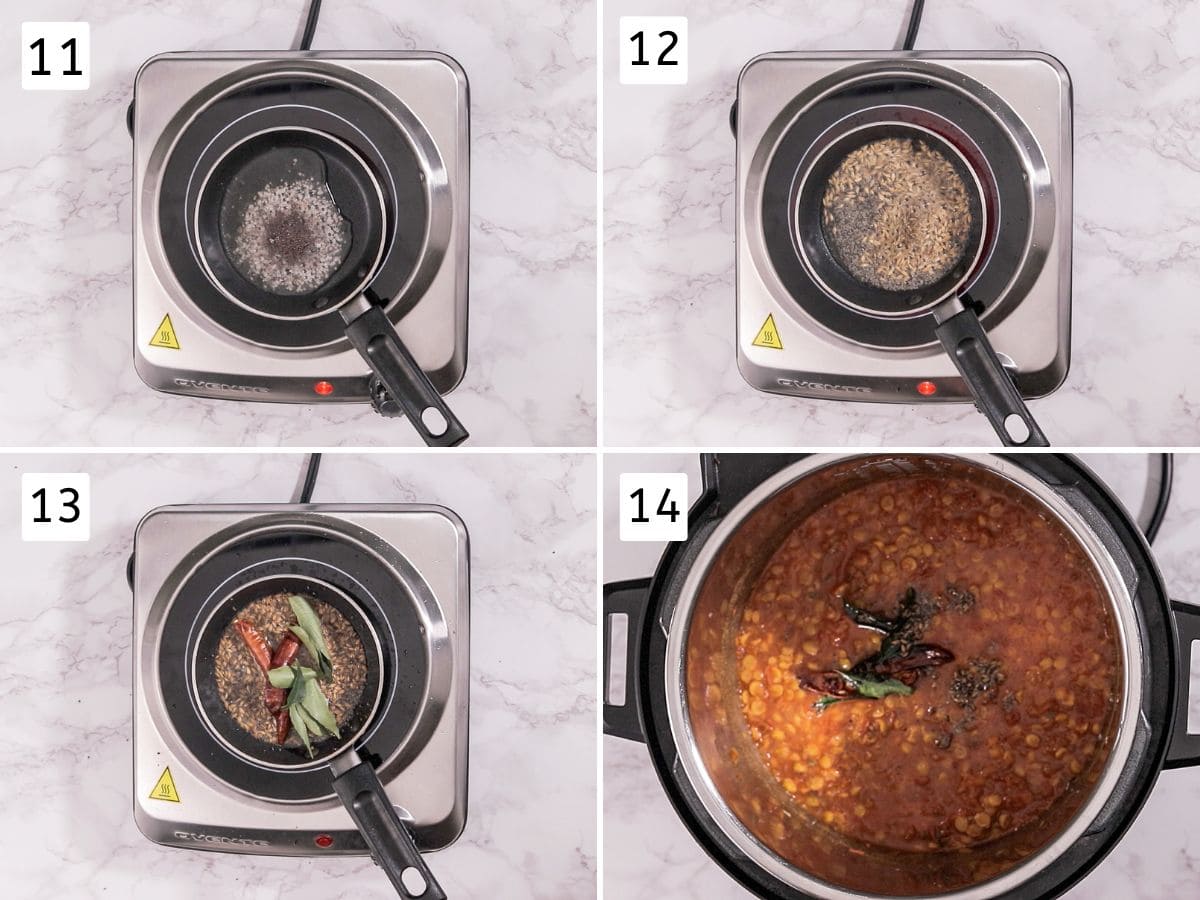
15) Add garam masala.
16) Squeeze the lime juice.
17) Mix everything well. Garnish with fresh cilantro and it is ready to serve.

💭Expert Tips For Chana Dal Recipe
- Soaking chana dal is not required. But it is recommended.
- I prefer the soft dal that holds its shape. If you prefer the mushy version then you can cook it a few minutes more to make it mushy.
- The water amount may vary depending on the dal consistency you prefer. The above measurements give medium-thick consistency. If you like it thin then add more water.
- You see, everything is customizable. Adjust as per your and your family’s liking (soft or mushy, spicy or less spicy, thin or thick dal).
🥣 Storage Instructions
- Chana dal stays good for 3-4 days in the refrigerator in an airtight container.
- You can freeze for up to 3 months. I would freeze in individual servings (or family-size servings) and defrost as needed.
- To thaw, keep the container in the fridge overnight or on the counter for a few hours.
- Reheat on the stovetop until hot. You may need to add a splash of water to adjust the consistency.
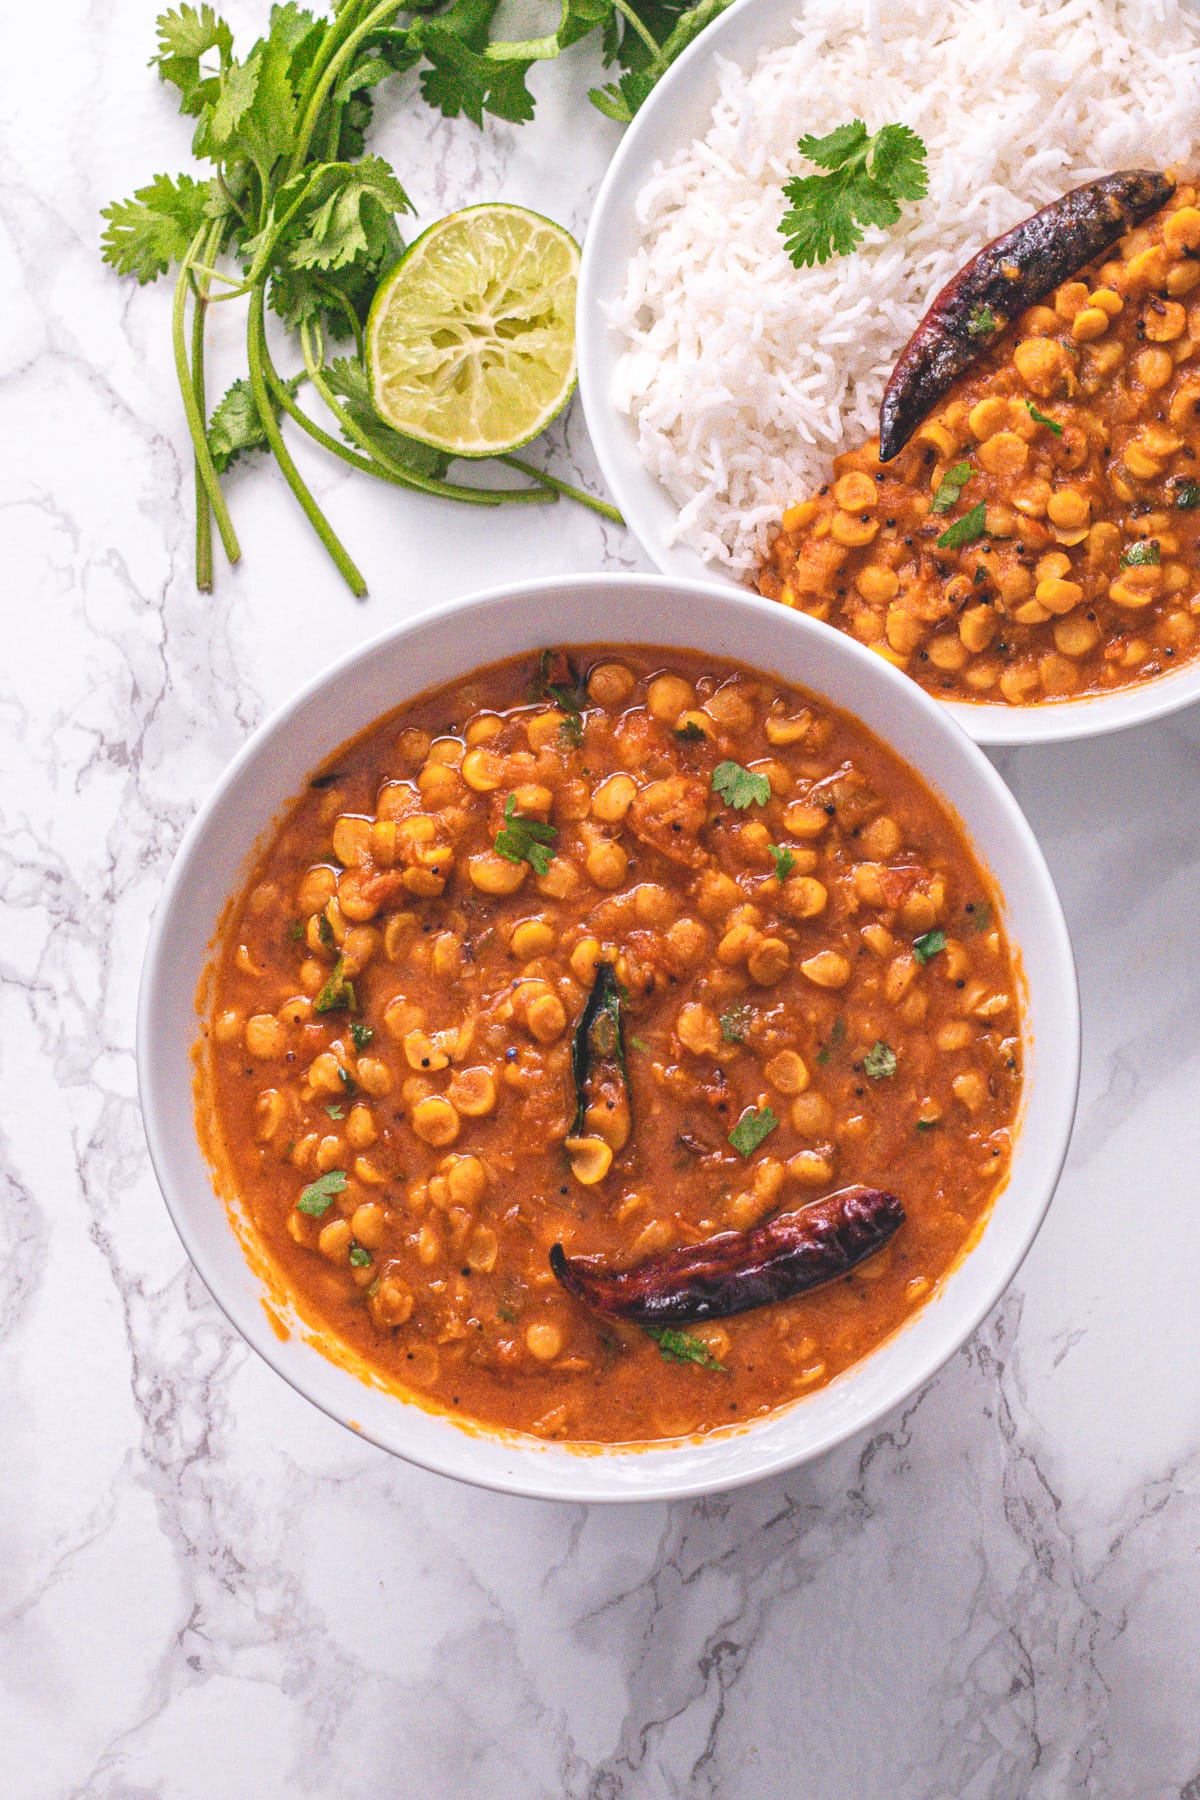
🍽 How To Serve Chana Dal?
- Serve chana dal with rice or jeera rice.
- It can be served with roti or paratha.
- To make a complete meal, have one or multiple sides like kachumber salad or carrot sambharo, roasted papad, and pickle.
Check Out Other Lentil Recipes
Did you try this instant pot chana dal recipe? I’d love to hear about it! Leave a review in the comment section below.
Chana Dal Recipe (Instant Pot)
US measuring cups are used (1 cup = 240 ml)
Ingredients
- 1 cup Chana dal (Split bengal gram)
- 2 cups Water, for pressure cooking
- 2 tablespoon Oil
- 1 teaspoon Ginger paste or freshly grated or crushed
- 1 teaspoon Garlic paste or freshly grated
- 1 Green chilies, finely chopped
- 1 cup Red onion , chopped
- 1 cup Tomato , chopped
- 1 ½ teaspoons Red chili powder
- 1 ½ teaspoons Coriander powder
- ½ teaspoon Turmeric powder
- 1 teaspoon Garam masala
- ½ teaspoon Lemon juice or lime juice
- 2 tablespoons Cilantro or coriander leaves, chopped finely
For Tadka (Tempering):
- 1 tablespoon Oil
- 1 teaspoon Mustard seeds
- 1 teaspoon Cumin seeds
- ¼ teaspoon Hing (Asafoetida)
- 8-10 Curry leaves
- 2 Dried red chilies, stems and seeds removed
Instructions
- Wash or rinse chana dal using regular tap water until the water is clear or not cloudy anymore.
- Optional step: Soak in enough water for around 20-30 minutes. More soaking time will not hurt. Discard the soaking water once done.
- To cook chana dal, turn on the instant pot with saute mode on. Add oil to the liner. Once it is hot add onion, ginger, garlic, and green chili. Sprinkle a little salt to speed up onion cooking process. Cook until the onion turns translucent and starts to soften.
- Add tomatoes and mix. Cook until tomatoes start to soften.
- Add turmeric powder, red chili powder, and coriander powder. Mix and cook for a minute.
- Add drained, soaked dal with fresh water and remaining salt. Stir everything well.
- Cover the instant pot with a lid and keep the valve to a sealing position. Pressure cook on manual (high pressure) for 10 minutes. (15 minutes for no soak chana dal).
- Let the pressure release naturally. Once the pin drops, open the lid and stir the dal and check the consistency. If it’s too thick then you can add some hot water to adjust the consistency.
- To make the tempering, heat the oil in a small tadka pan. Once hot add mustard seeds and let them splutter.
- Then add cumin seeds and let them sizzle a bit.
- Add hing, dried chilies, and curry leaves.
- Immediately add this tempering to the dal.
- Add garam masala. Squeeze the lime juice.
- Mix everything well. Garnish with fresh cilantro and it is ready to serve.
Video
Notes
- Soaking chana dal is not required. But it is recommended.
- I prefer the soft dal that holds its shape. If you prefer the mushy version then you can cook it a few minutes more to make it mushy.
- The water amount may vary depending on the dal consistency you prefer. The above measurements give medium-thick consistency. If you like it thin then add more water.
- You see, everything is customizable. Adjust as per your and your family’s liking (soft or mushy, spicy or less spicy, thin or thick dal).
- Stovetop pressure cooker: 5 whistles on medium heat for soaked dal & 7 whistles for not soaked dal.
Hi-
I was using your old stove recipe which I loved- it did not use the instapot-
Could you please share that one please?
sure. here it is
– For pressure cooking –
Chana dal (Bengal gram) – ½ cup
Water – 1 ½ cups
Turmeric powder – ¼ teaspoon
Salt – to taste
– For dal:
Oil – 2 teaspoons
Ginger paste or freshly grated – ½ teaspoon
Garlic paste or freshly grated – ½ teaspoon
Green chilies – 2, chopped finely
Onion – ½ cup, chopped
Tomatoes – 1 cup, chopped
Red chili powder – 1 teaspoon
Coriander powder – 1 teaspoon
Turmeric powder – a pinch
Garam masala – ½ teaspoon
– For tadka (tempering) –
Oil – 2 teaspoons
Mustard seeds – ½ teaspoons
Cumin seeds – ½ teaspoon
Curry leaves – 5-6
Dry red chili – 1, broken into two pieces
How to –
– Wash and aoak dal for at least 30 minutes. Take dal in pressure cooker along with fresh 1 ½ cups of water. Add turmeric powder and salt. Pressure cook for 6-7 whistles.
– Heat the oil in a pan on medium heat. Once hot add ginger paste, garlic paste and green chilies. Cook for a minute.
– Add chopped onions. Cook until they become translucent.
– Mix in chopped tomatoes and cook till they get soft.
– Add turmeric powder, red chili powder, coriander powder, garam masala and salt. Saute for a minute.
– Add cooked dal with its water. If needed add extra water and make runny consistency. Let it come to a boil. Simmer for 5 minutes.
– Meanwhile prepare the tadka. Heat the oil in a small pan on medium heat. Once hot add mustard seeds. Let them pop. Then add cumin seeds and let them sizzle. Add curry leaves and dried red chili.
– Add tempering to the dal.