Garlic Naan (Indian Bread)
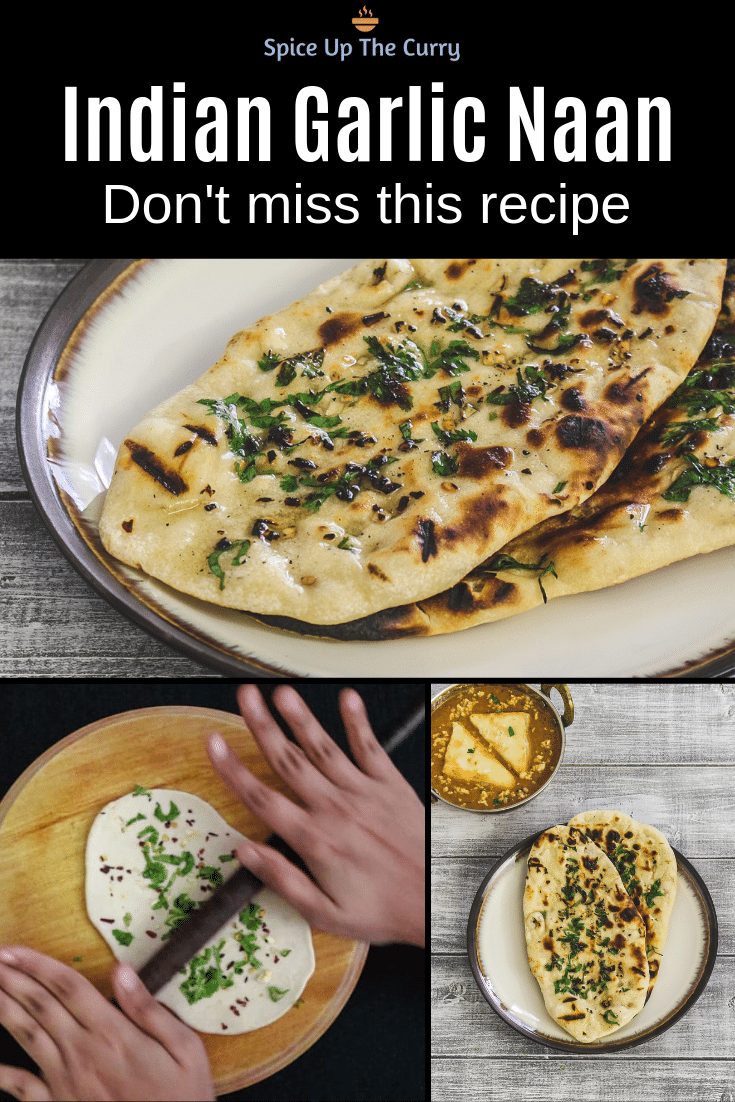
Perfect Homemade Garlic Naan! This restaurant style easy garlic naan recipe is a must-try recipe! No need for a tandoor (clay oven)—you can make this soft, fluffy, and flavorful naan right in your kitchen. Infused with just the right amount of garlic, it pairs perfectly with your favorite curries and gravies. This is the most ordered Indian bread in North Indian restaurants.
One reader Shalini commented “I tried making this garlic naan for the first time and it turned out perfectly. Thanks so much 😊❤️ ” – ⭐⭐⭐⭐⭐
What is Garlic Naan?
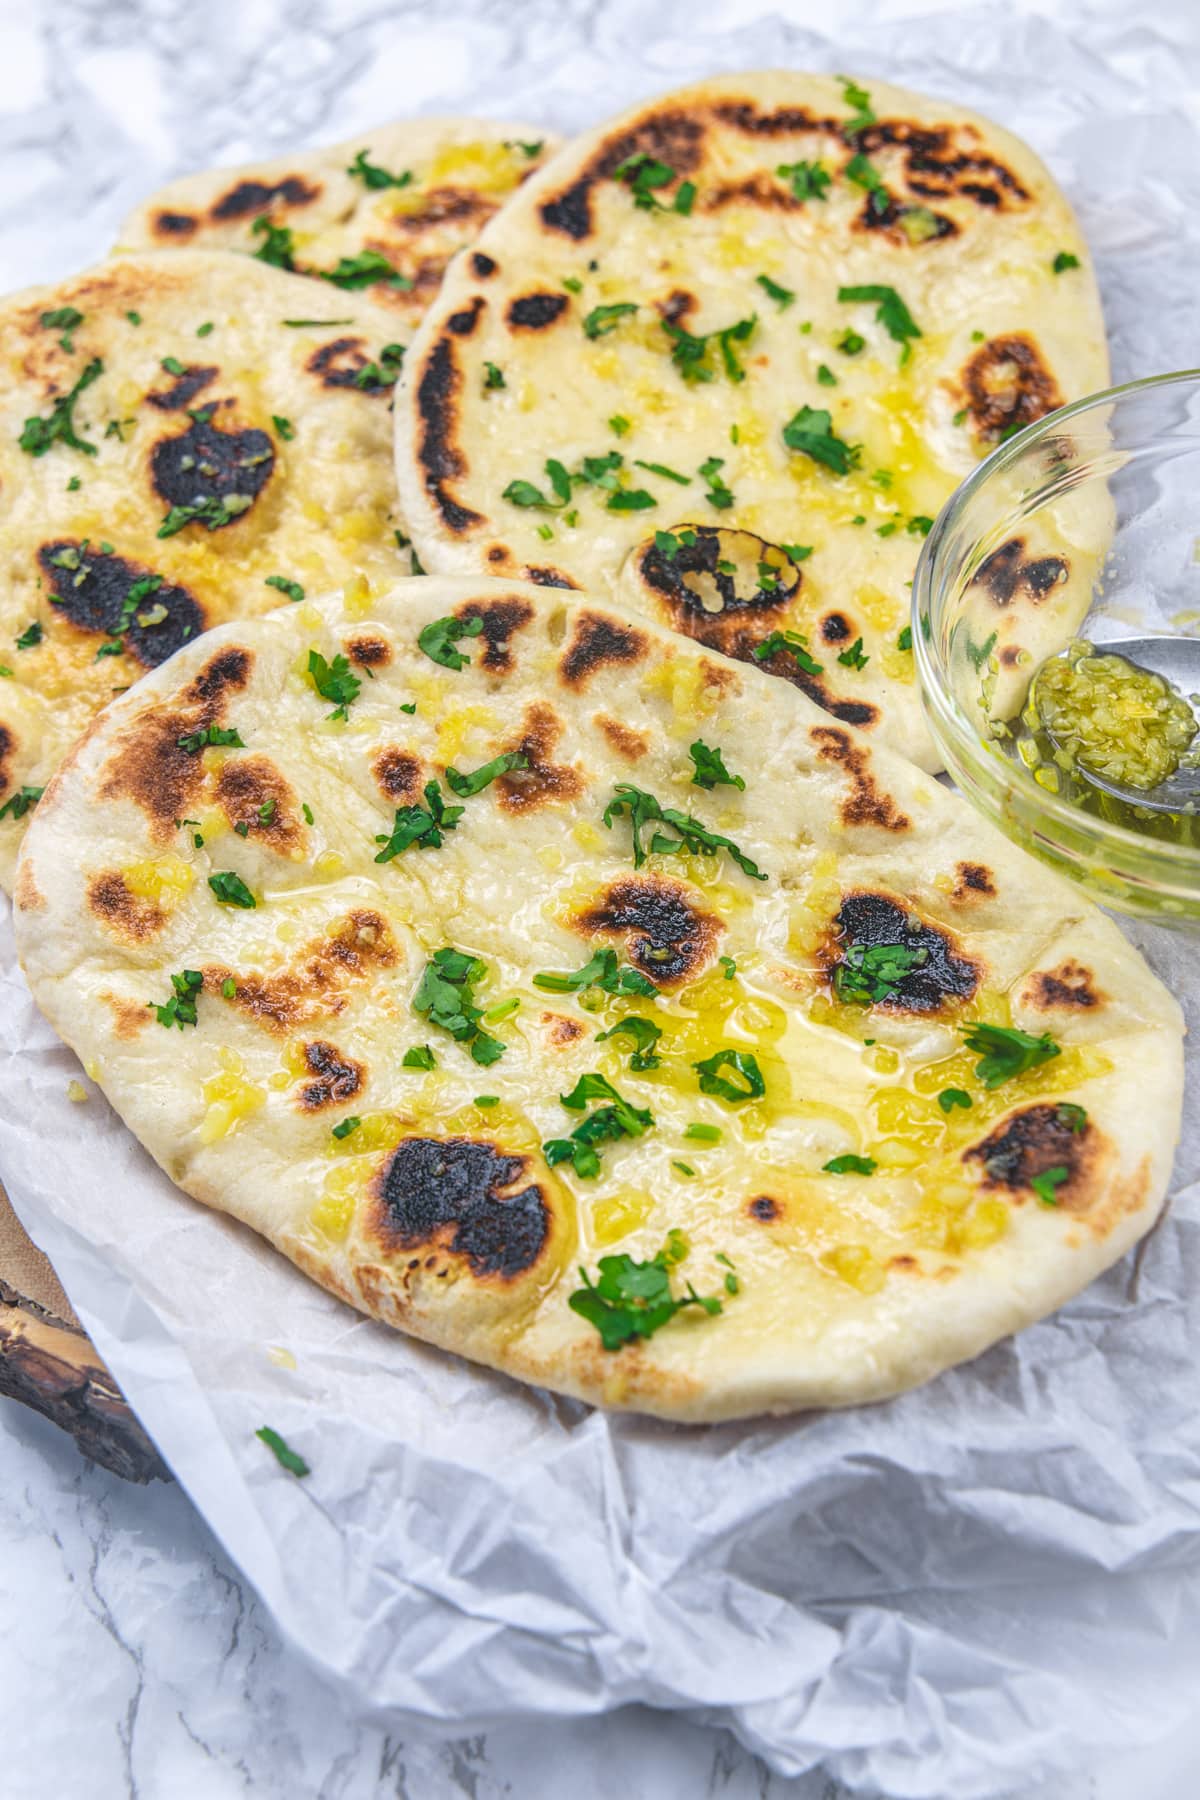
Garlic naan is a soft, leavened Indian flatbread made with all-purpose flour, yogurt, and yeast, flavored with fresh garlic — both inside the dough and brushed on top as garlic-infused ghee after cooking. It is traditionally baked in a tandoor (a cylindrical clay oven that reaches extremely high temperatures), giving it its signature soft, pillowy texture with charred bubbles on the surface.
In this homemade version, a hot cast iron skillet does the job beautifully — you get those same charred spots and soft, fluffy layers without any special equipment.
Garlic naan is one of the most popular Indian breads worldwide and the most commonly ordered bread at North Indian restaurants.
Garlic Naan vs Plain Naan — what is the difference? Plain naan is the base: a simple yeasted flatbread brushed with butter or ghee. Garlic naan takes it further by adding minced garlic directly into the dough and then brushing the cooked naan with garlic-infused ghee. The result is a noticeably more flavorful bread that stands up beautifully to rich curries and gravies.
⭐ My Recipe For Garlic Naan
This garlic naan recipe, which I first shared in 2017, has evolved over time to become even more flavorful and convenient. Back then, I used to knead the dough by hand, and it worked perfectly, yielding soft, fluffy naans every time. However, over the years, I’ve made a few tweaks to enhance the flavor and texture.
One of the most significant changes is using my KitchenAid stand mixer for kneading the dough. This not only saves time but ensures a perfectly smooth and consistent dough every time, even when making larger batches.he mixer has made the process easier and more efficient.
Traditionally, naan is cooked in a tandoor, a cylindrical clay oven where rolled naan is slapped against the hot walls to cook quickly. However, at home, we don’t have a tandoor, but that doesn’t mean we can’t replicate that perfect naan texture! You can achieve the same result by cooking naan on a cast iron skillet or by baking it on a pizza stone in the oven.
But here’s the beauty of this recipe: You don’t need to complicate things. By cooking the naan on a cast iron skillet over the stovetop, you’ll get soft, fluffy, and perfectly charred garlic naan—no special equipment required. Give it a try, and you’ll be hooked!
Why Choose My Recipe
Restaurant style garlic naan that you can enjoy in the comfort of your home for a fraction of the price. They really are easier to make than you’d think.
🧂 Ingredient Notes
Complete list of ingredients and amounts is written in the recipe card below.
Pro Tip:Use yogurt at room temperature, not straight from the fridge. Cold yogurt slows down the yeast activity and your dough may not rise properly. If you forgot to take it out, place the yogurt container in a bowl of warm water for 10 minutes.
Tried this recipe? A star rating ⭐️ and a quick comment below help others (and me!) know how it went.
Garlic Naan Recipe (Indian Bread)
US measuring cups are used (1 cup = 240 ml)
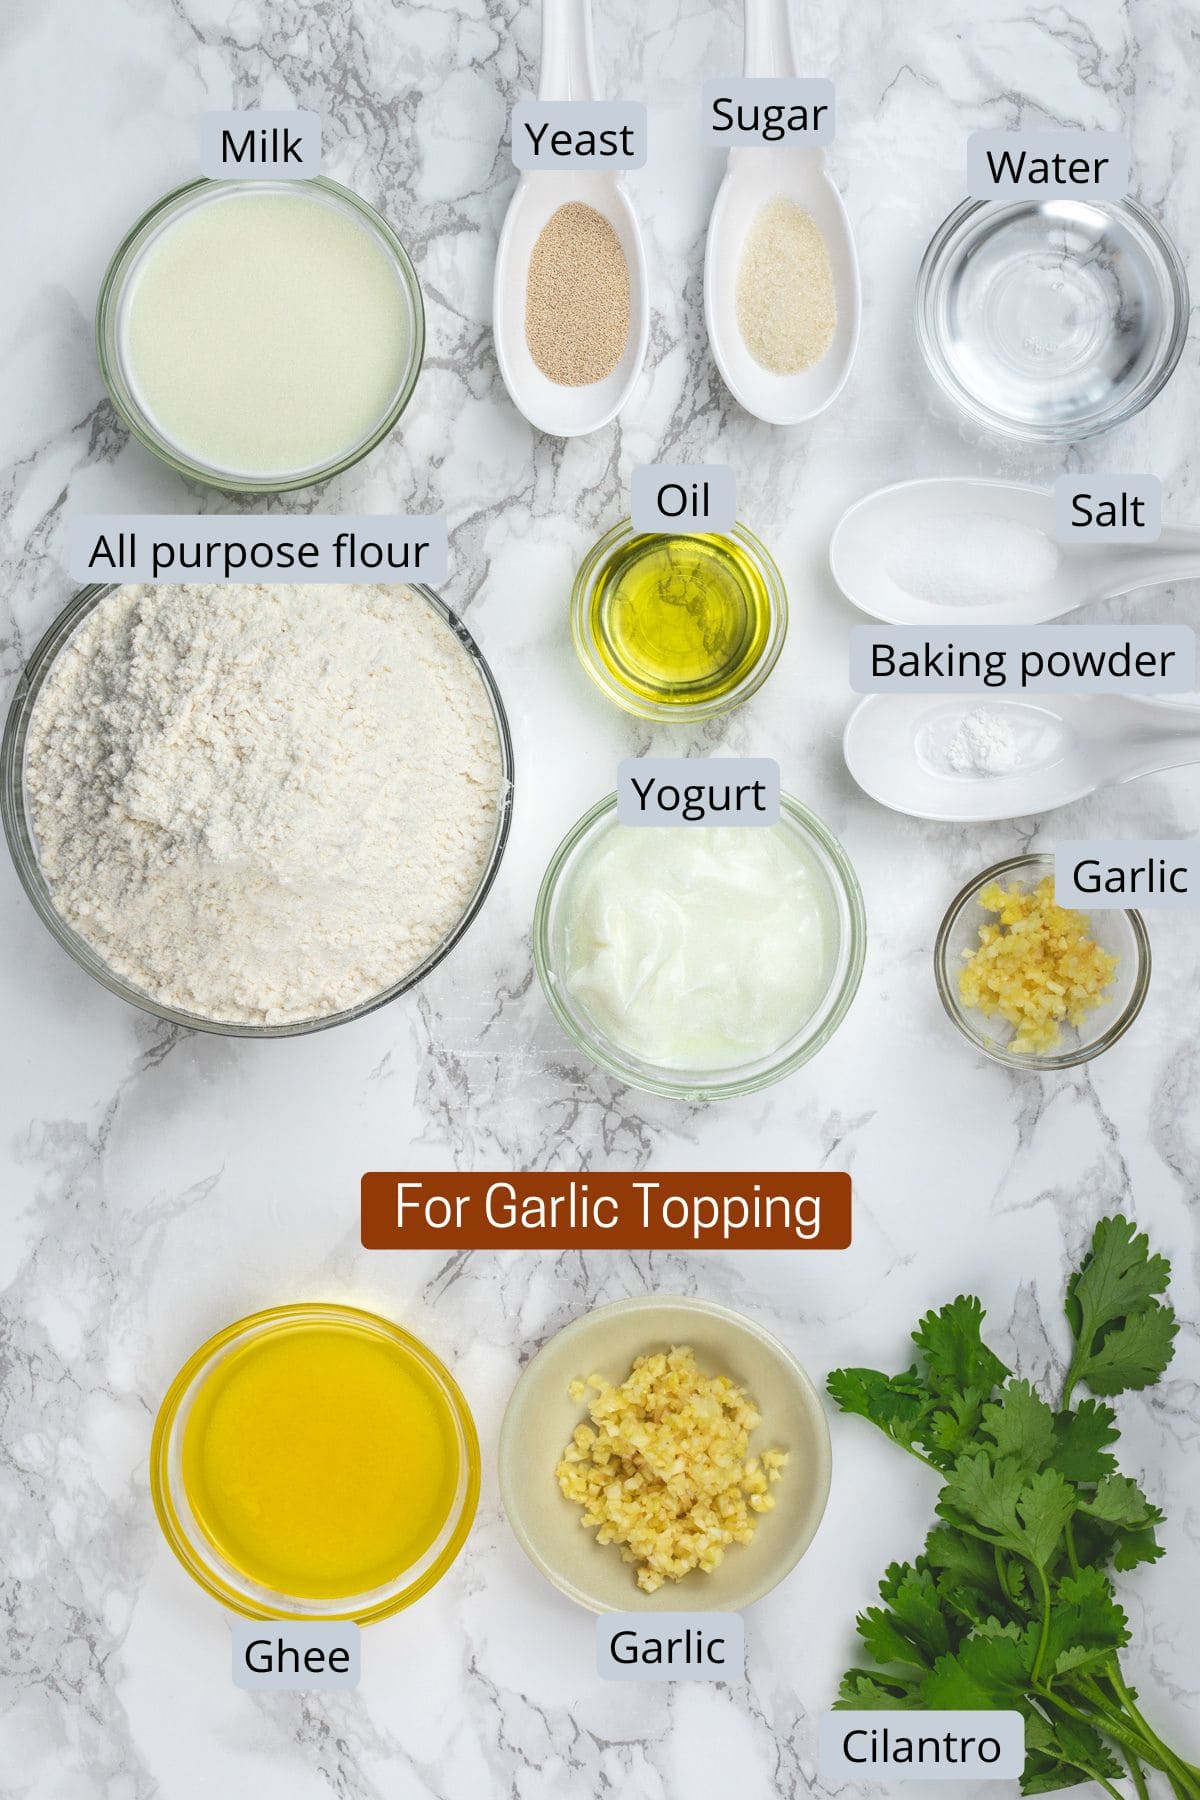
Ingredients
- ⅓ cup Milk, (Warm)
- 1 teaspoon Sugar
- (½ packet) or 1 ¼ teaspoons Active dry yeast
- ⅓ cup Water
- ⅓ cup Plain yogurt, at room temprature
- 1 tablespoon Oil
- 2 ¼ cups All purpose flour (Maida)
- ¼ teaspoon Baking powder
- ½ teaspoon Salt, or to taste
- 2 tablespoons Garlic, finely chopped or minced
Topping:
- ¼ cup Ghee (clarified butter)
- 2-3 tablespoons Garlic, chopped finely
- 2-3 tablespoons Cilantro or coriander leaves, chopped finely
Instructions
Making Dough:
- Warm the Milk: Heat the milk in the microwave or on the stovetop until it's warm to the touch (not hot or cold). This is important because if the milk is too hot, it can kill the yeast, and if it's too cold, the yeast won't activate properly. The ideal temperature is 105–110°F (40–43°C) — warm enough that you can comfortably hold your finger in it.
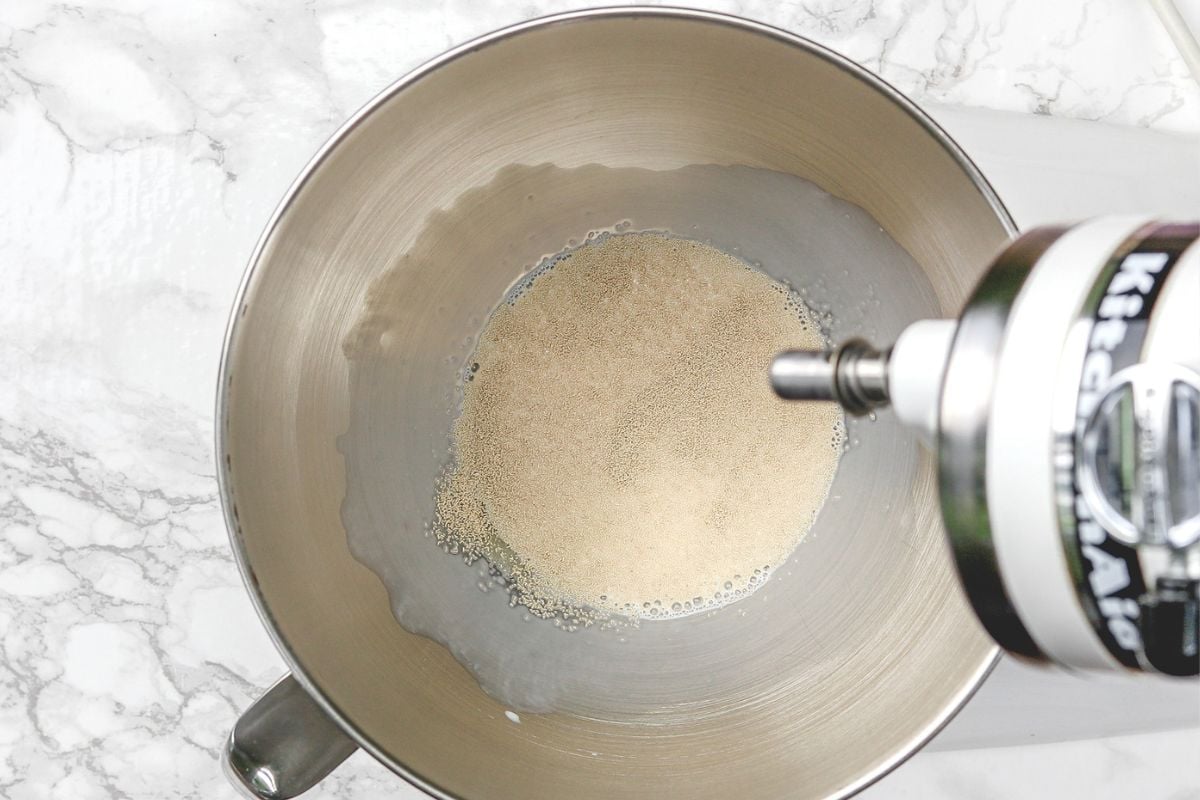
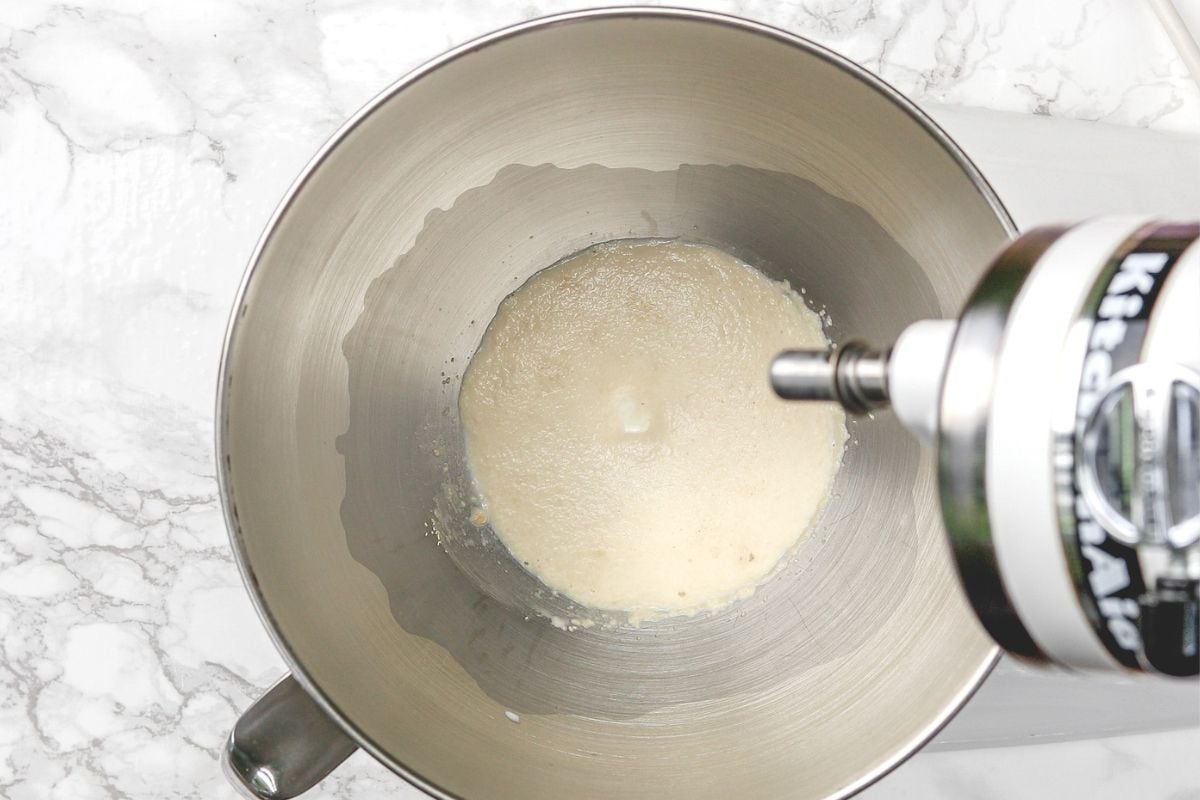
- Activate the Yeast: Add the warm milk to the stand mixer bowl, then stir in the sugar and yeast. Give it a gentle stir and let it sit for 10-15 minutes. The yeast should become frothy and bubbly, indicating it's active.Yeast Tip: If the yeast doesn't bloom (meaning it doesn't become frothy), it could be because the yeast has expired or the milk temperature was either too hot or too cold. In this case, it's best to start over with a fresh pack of yeast. Without proper blooming, the dough will not rise, resulting in dense naan.Make sure to check the yeast's expiration date and always use warm milk (not too hot or cold) for the best results.
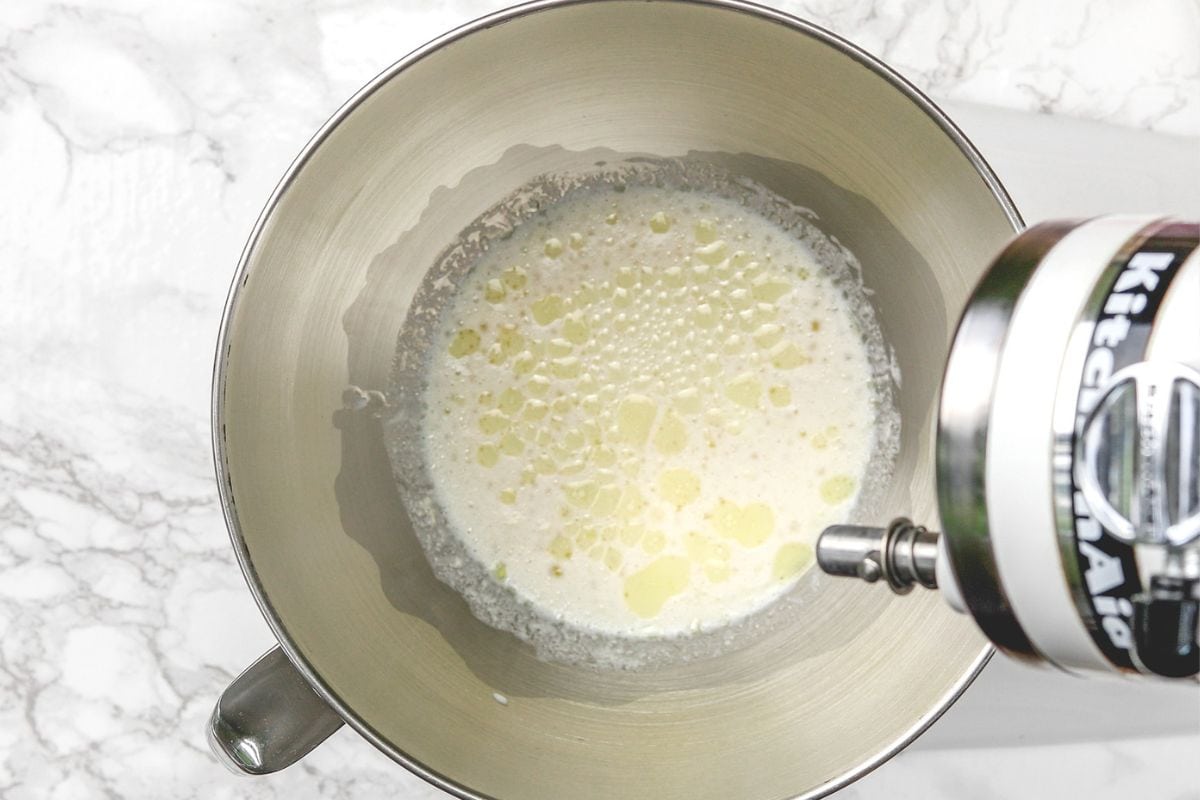
- Add Remaining Wet Ingredients: Once the yeast is ready, add the room-temperature yogurt, water, oil, and freshly minced garlic to the bowl. Stir to mix everything.
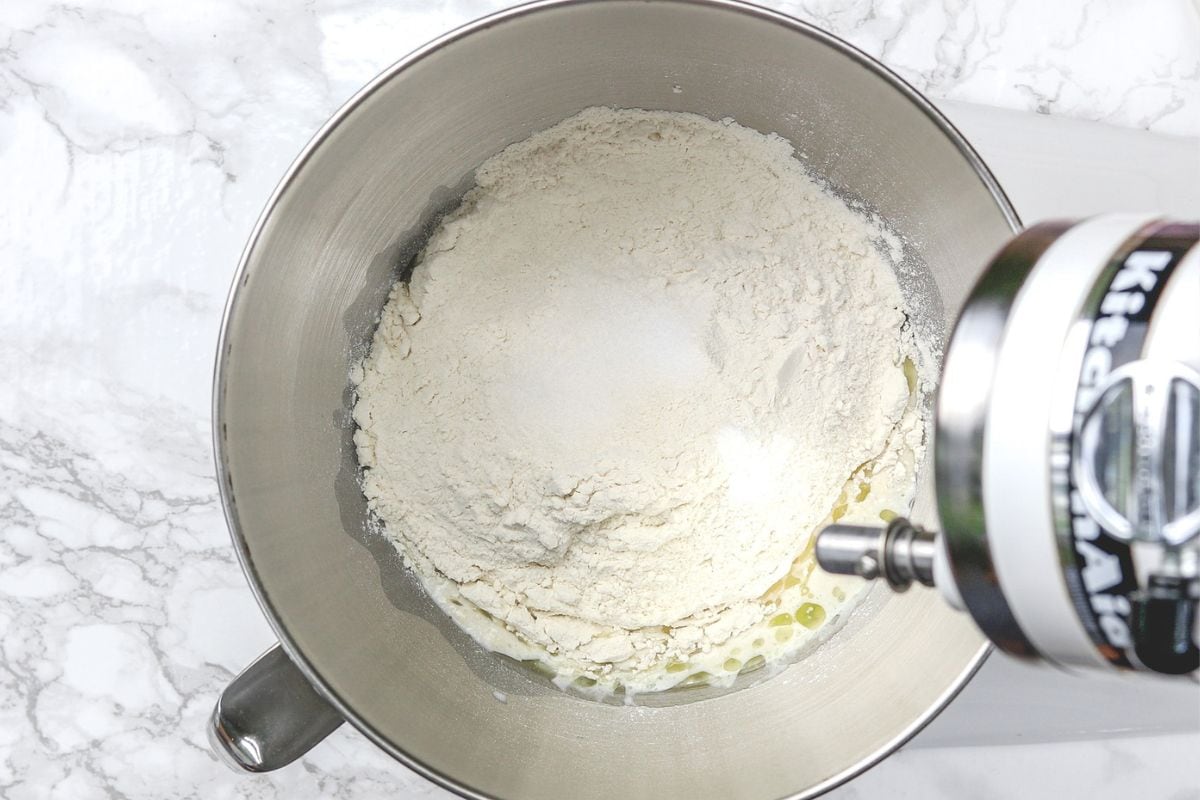
- Add Dry Ingredients: Into the bowl, add the all-purpose flour, salt, and baking powder. Mix briefly to combine.
- Dough Hook: Attach the dough hook to your stand mixer.
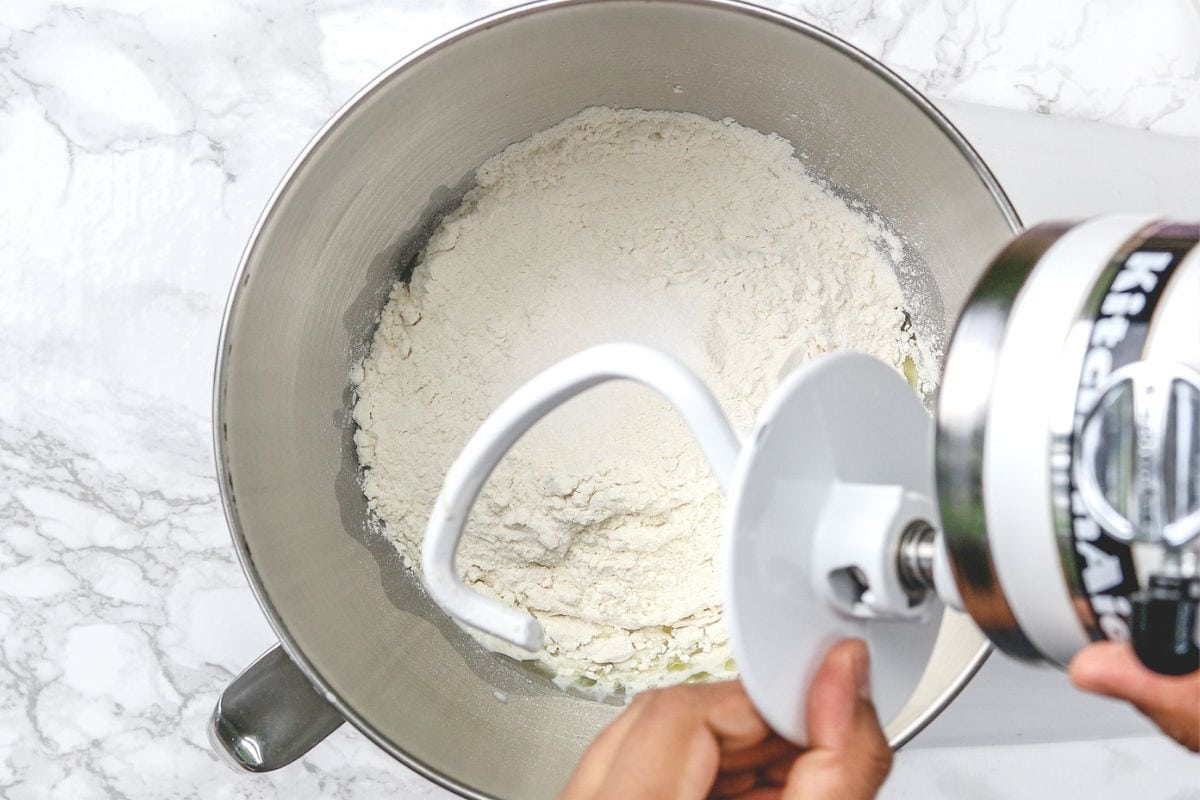
- Knead the Dough: Run the mixer on low-medium speed until the mixture comes together and forms a smooth, elastic dough. This should take about 5–7 minutes. If kneading by hand, it will take about 10–12 minutes on a lightly floured surface. The dough is ready when it is smooth, not sticky.
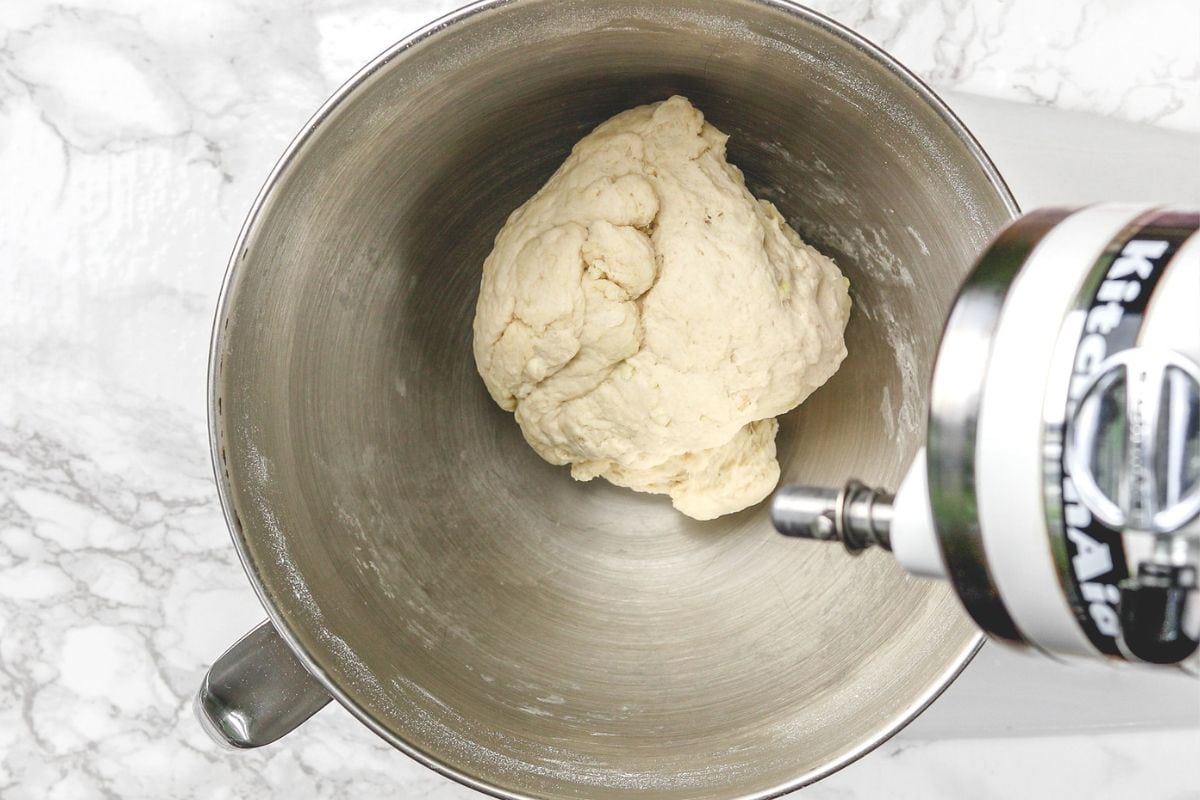
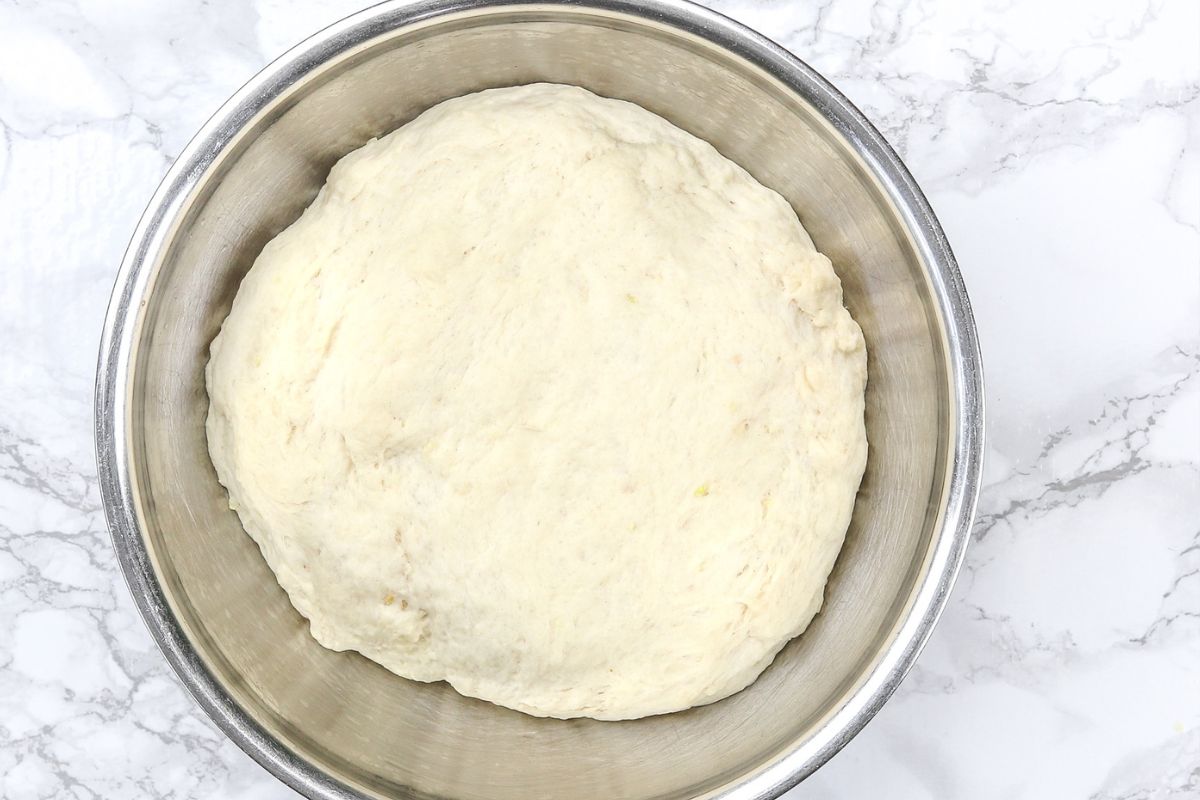
- Proof the Dough: Lightly oil the surface of the dough and the inside of the mixing bowl. Cover the bowl with a damp cloth or plastic wrap, and let it rest in a warm place for 1–2 hours or until it has doubled in size.
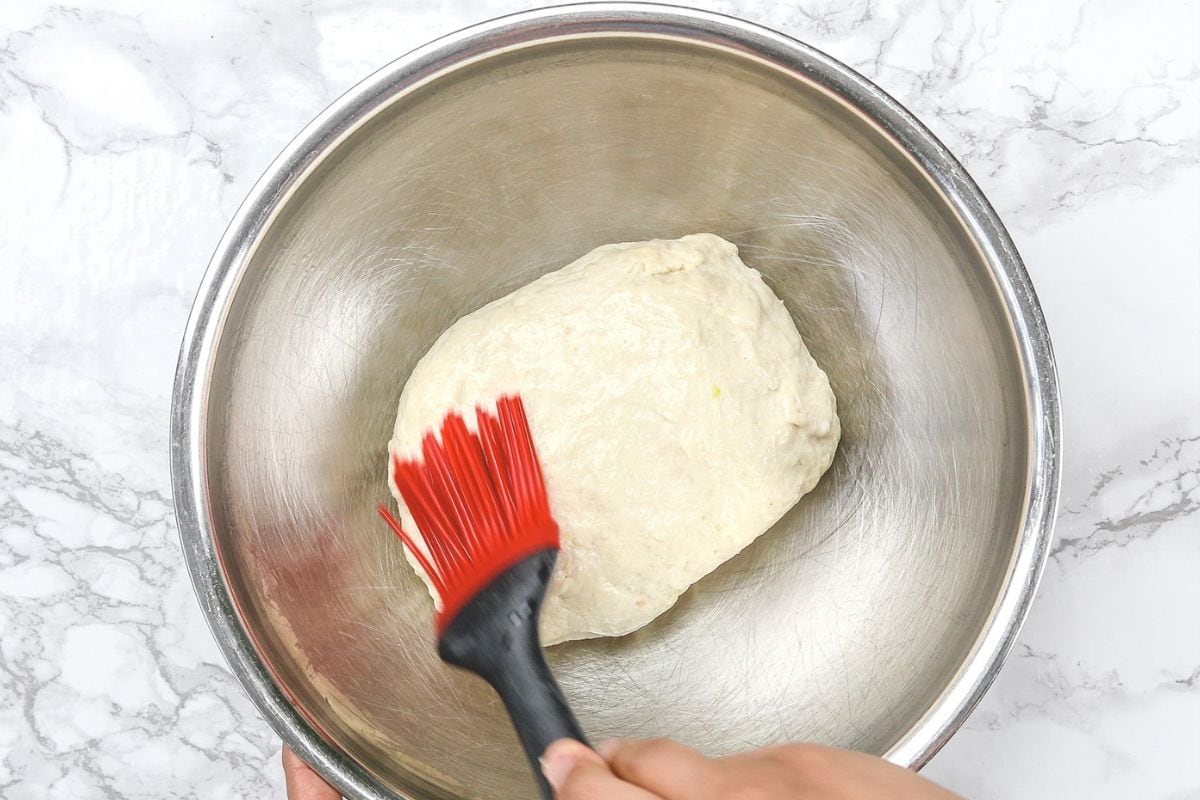
- How to Promote Dough Rising: If you're cooking on a stovetop and have a microwave above it, place the dough inside the microwave (without turning it on) — it will naturally be slightly warmer. Alternatively, you can place the dough in an oven with just the light on, or inside a warm kitchen cabinet. The gentle warmth helps activate the yeast and encourages the dough to rise beautifully.
Making Garlic-Infused Ghee:
- Heat the ghee in a small pan on medium heat. Once the ghee is hot, add minced garlic.
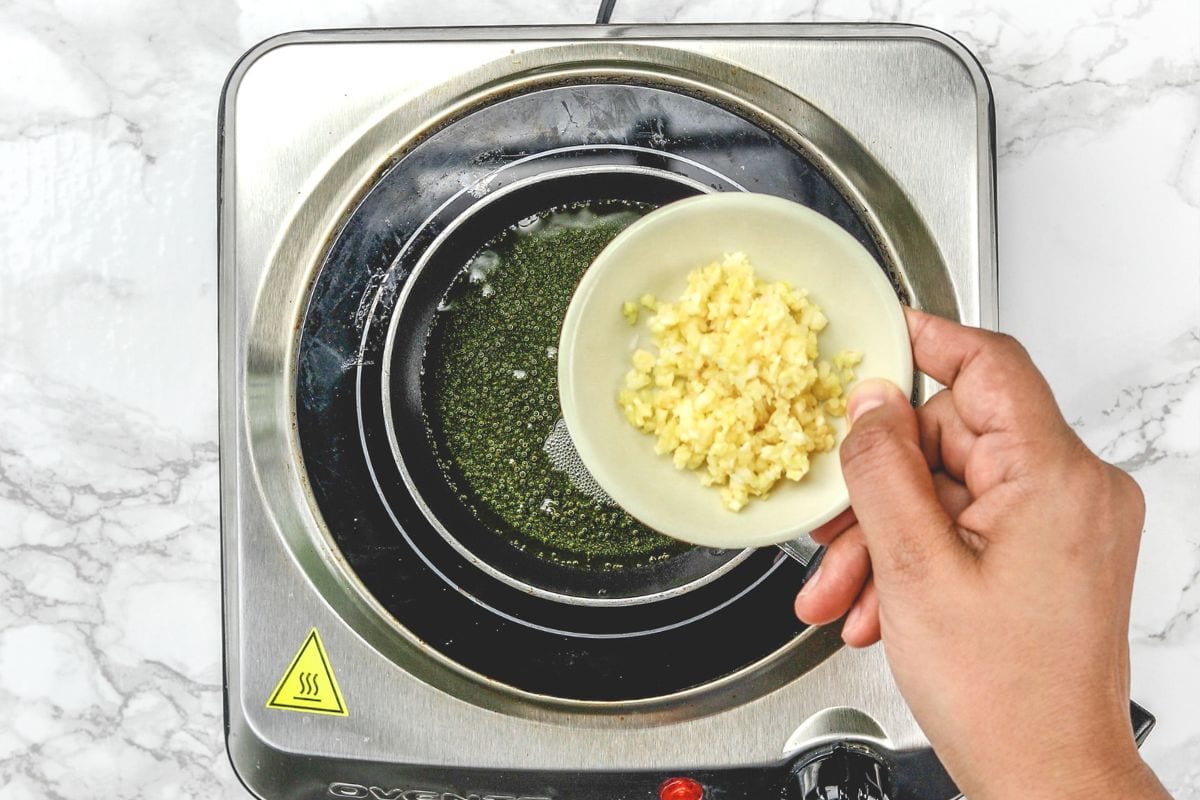
- Stir and cook for 30 seconds only, or until the garlic becomes fragrant. Be careful not to burn the garlic — it goes from golden to burnt very quickly.
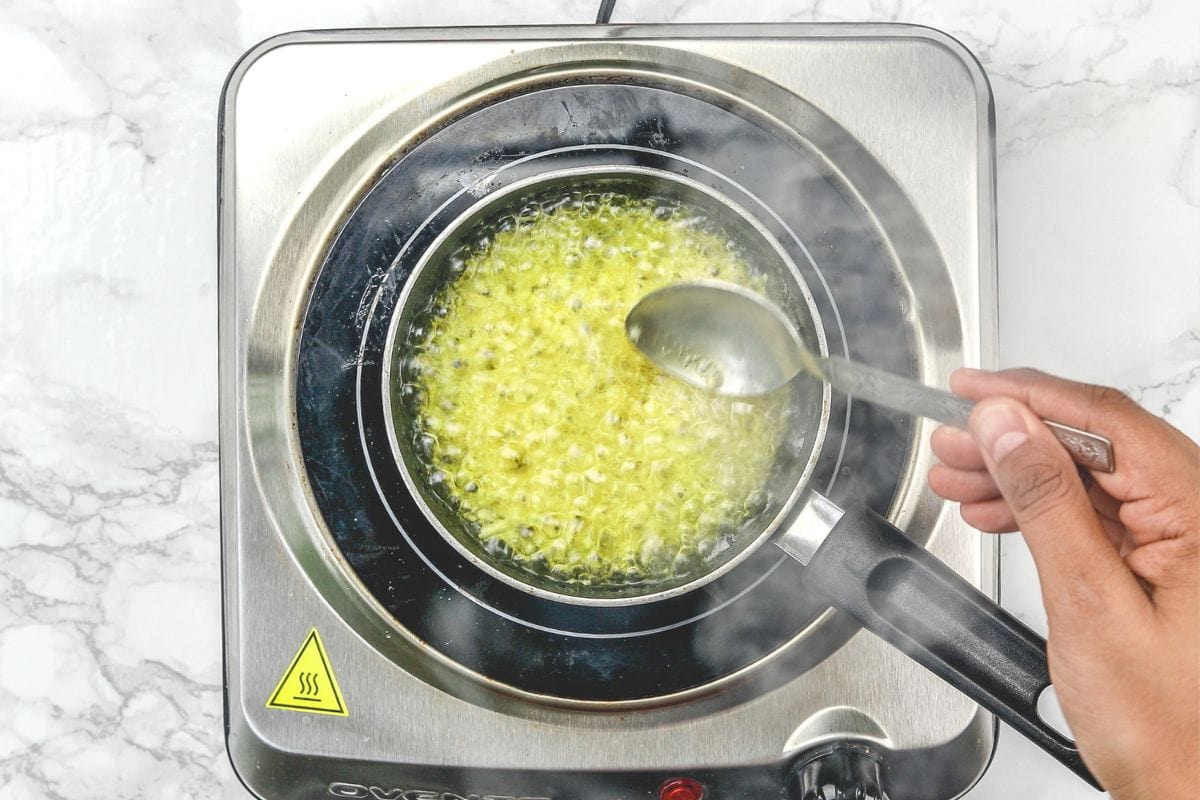
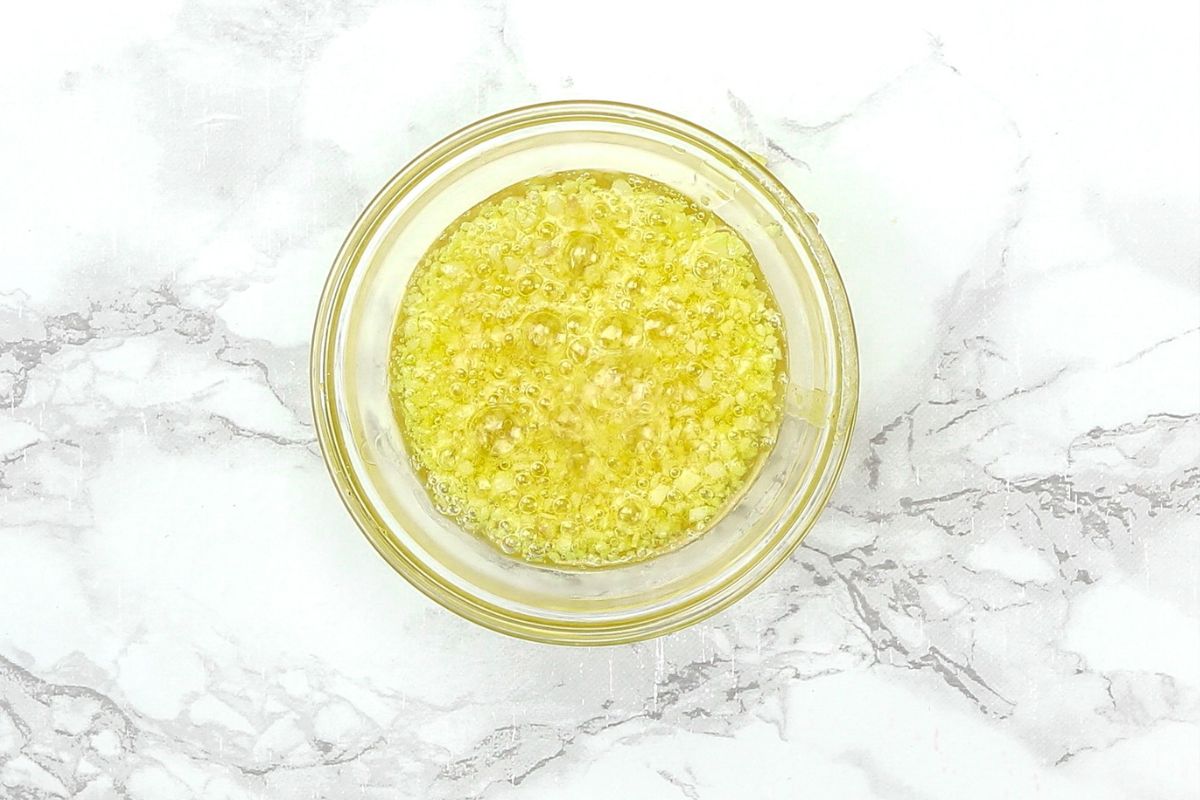
- Turn off the stove. Remove to a small bowl and keep aside to brush on cooked naan.
Rolling & Cooking Garlic Naan:
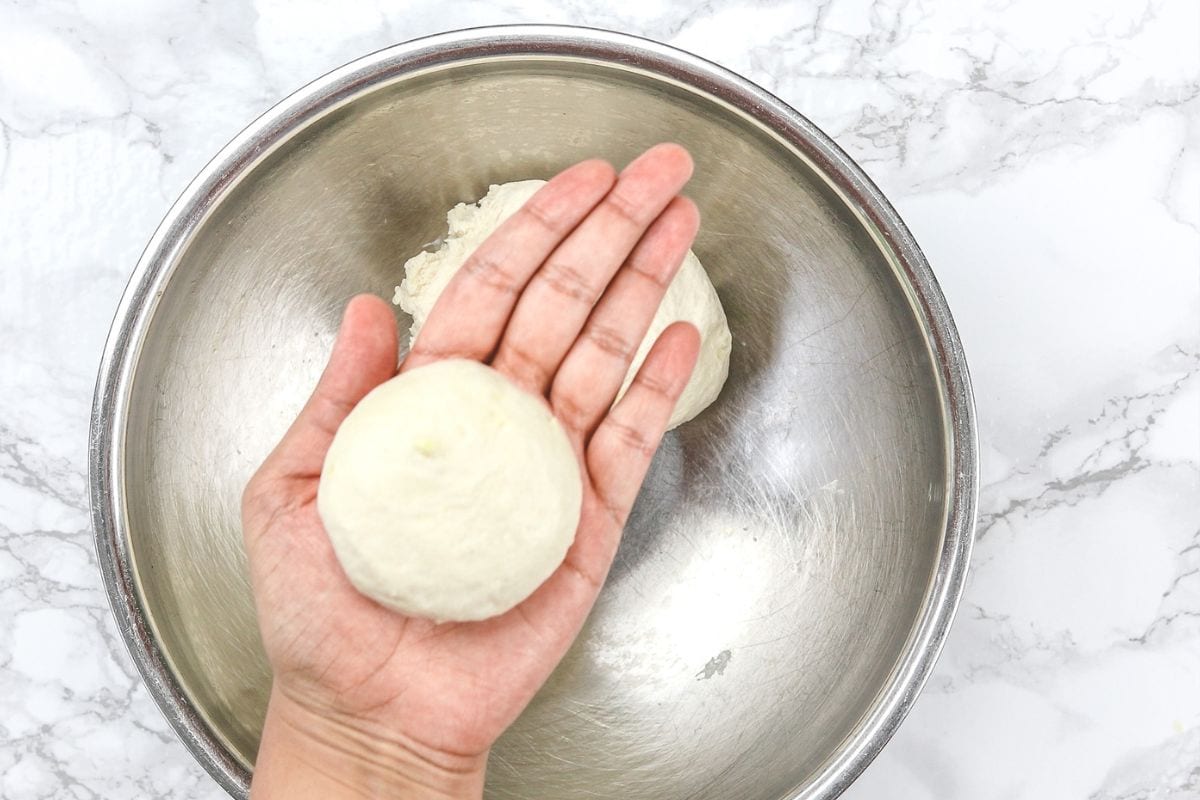
- Punch Down & Divide: After the dough has proofed and doubled in size, punch it down gently to release the gas. Divide it into 8 equal portions and shape each into a smooth round ball.
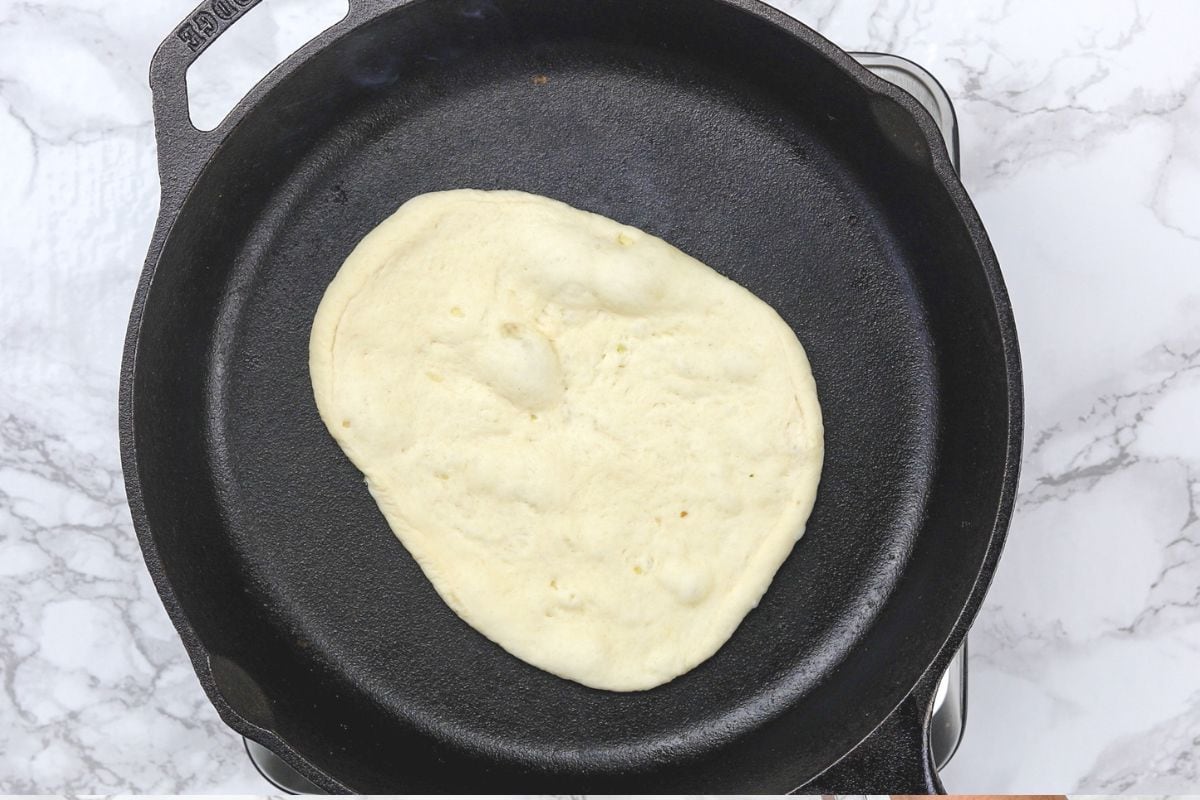
- Preheat the Skillet: Heat a cast iron skillet over medium-high heat. Let it get hot until it just starts to smoke. A properly preheated skillet is what gives you those large bubbles and charred spots — do not rush this step.
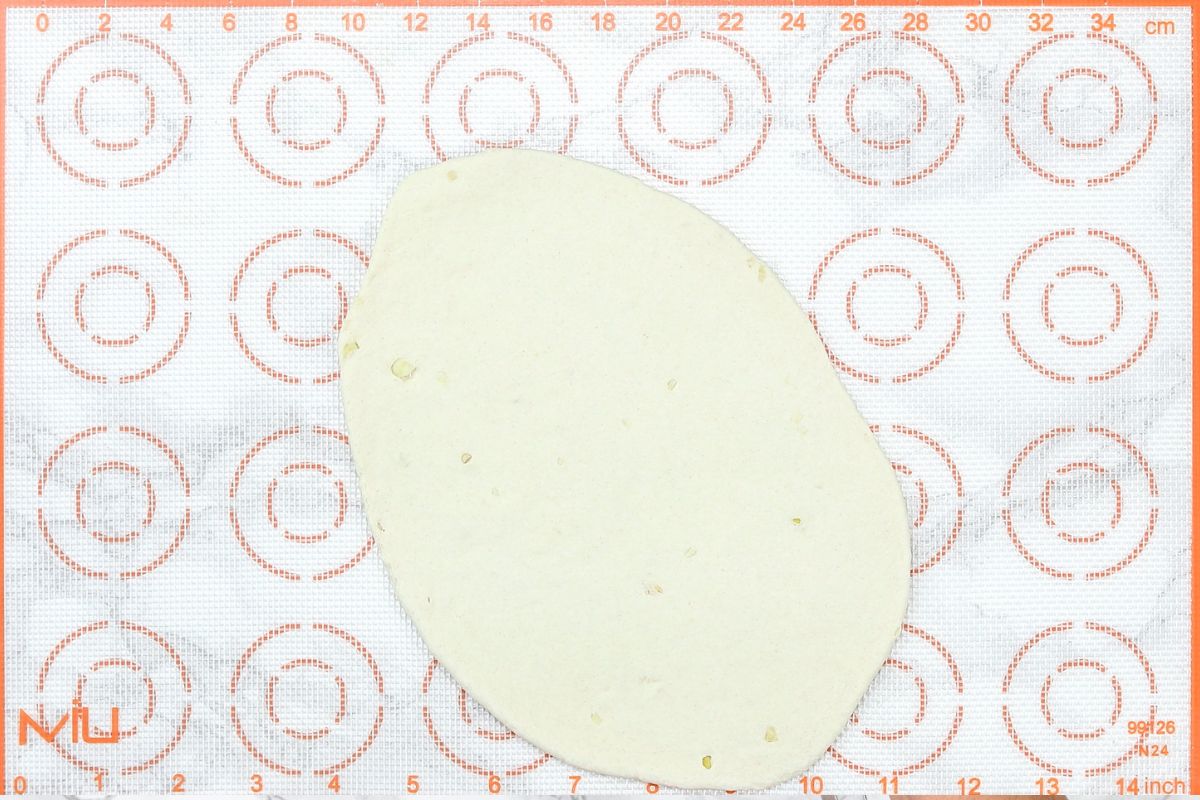
- Roll the Dough: Roll each dough ball into a 6–7 inch oval shape using a rolling pin. If needed, lightly dust the dough with flour while rolling. Roll evenly — if one side is thicker than the other, the naan won't cook through uniformly.
- Cook the First Side: Place the rolled naan onto the hot skillet. It should start to bubble up within a few seconds. Let it cook for about 45 seconds to 1 minute until bubbles form and puff up on the surface.
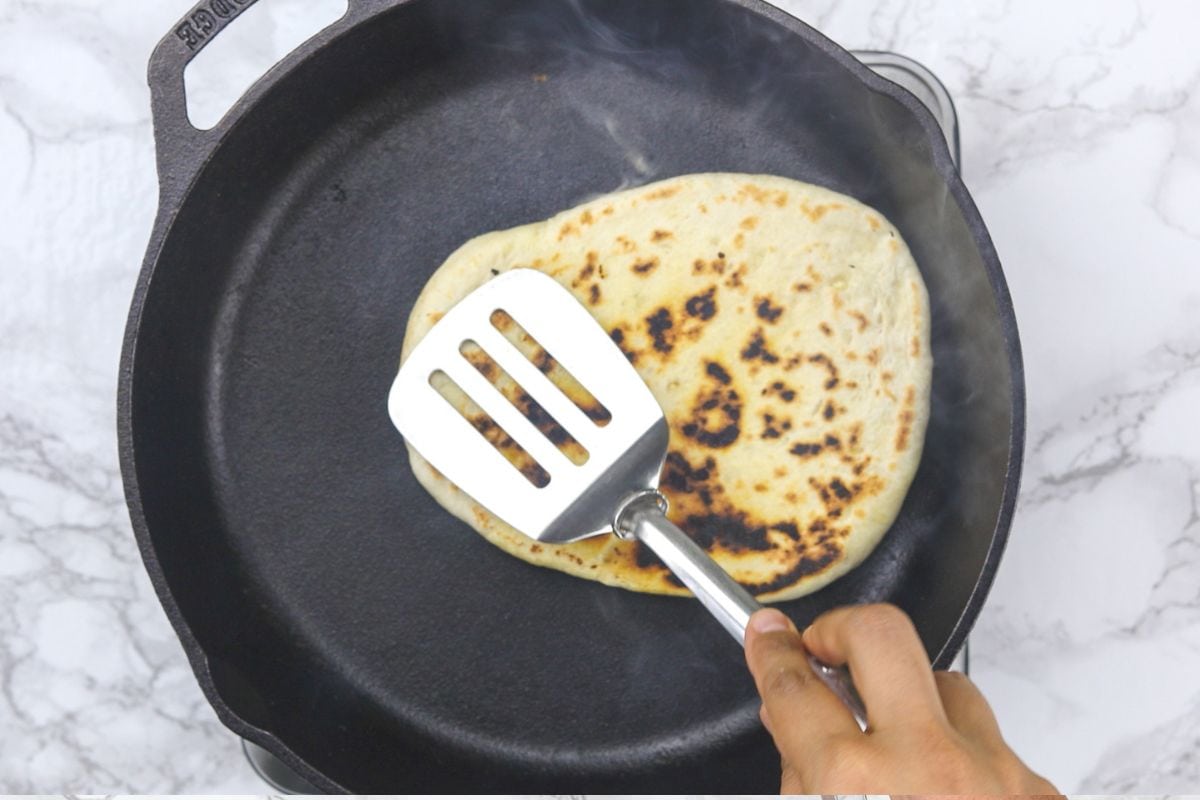
- Flip and Cook the Second Side: Flip the naan using a spatula and cook the other side for about 30-45 seconds, pressing gently with the spatula to ensure even cooking. The bottom should have a nice golden-brown color with some charred spots.
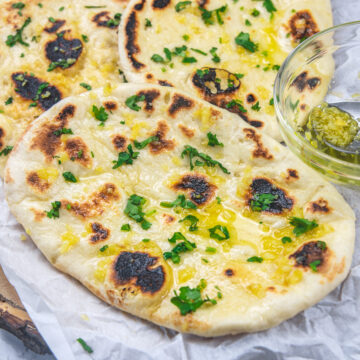
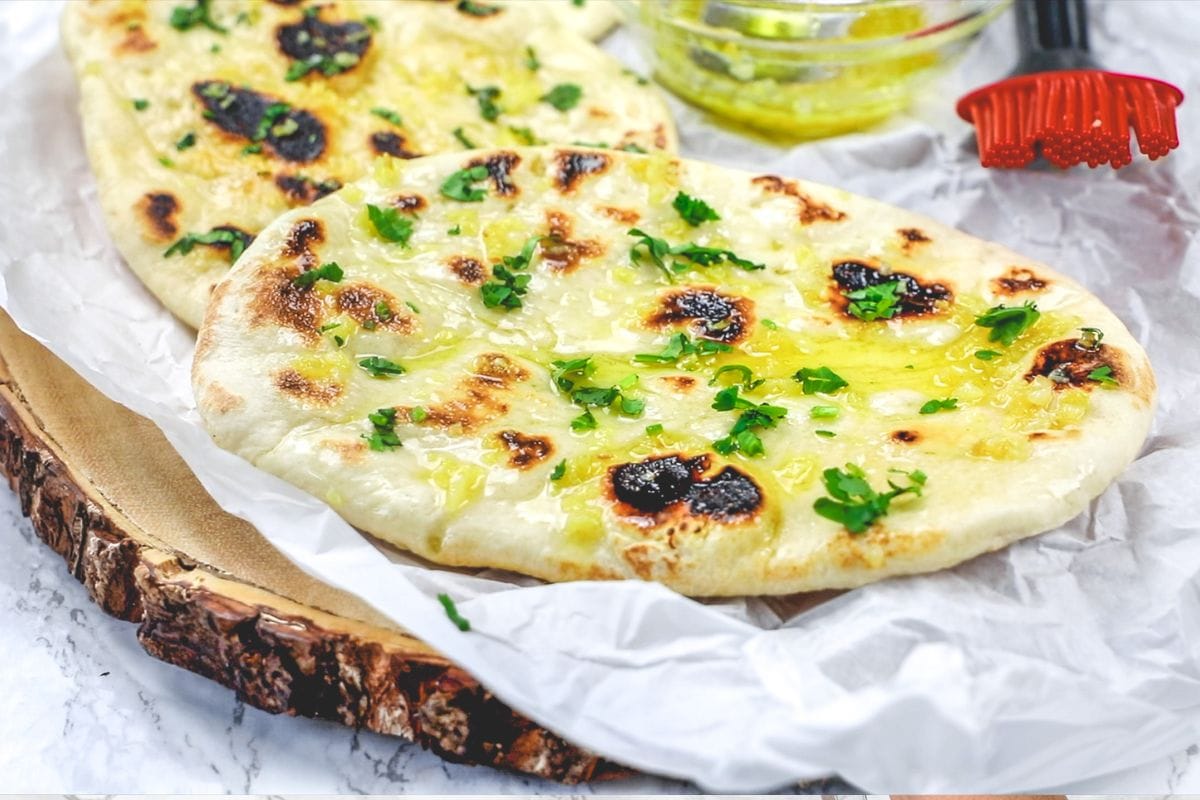
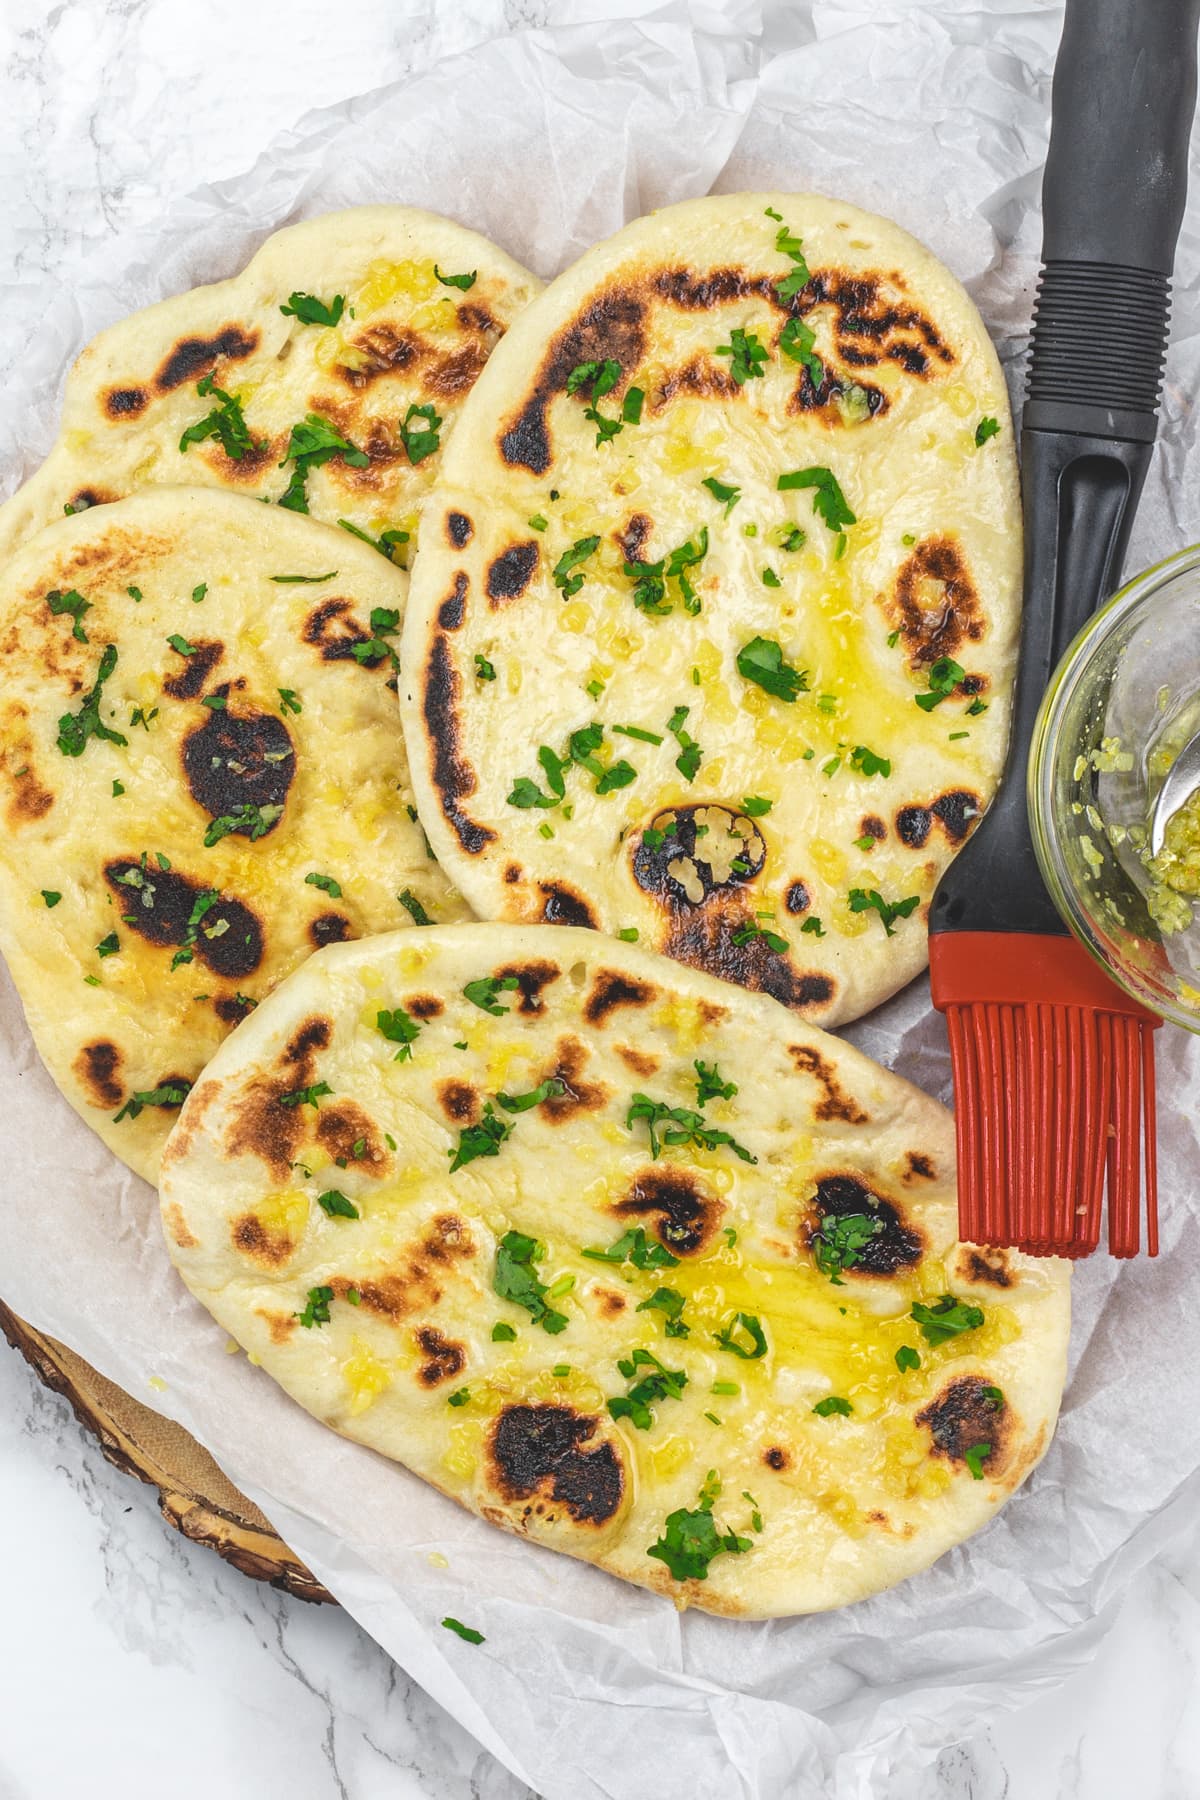
- Brush with Garlic Ghee: Remove the naan from the skillet, place on a plate, and immediately drizzle garlic-infused ghee all over. Use a pastry brush to spread evenly. Garnish with freshly chopped cilantro and serve hot.
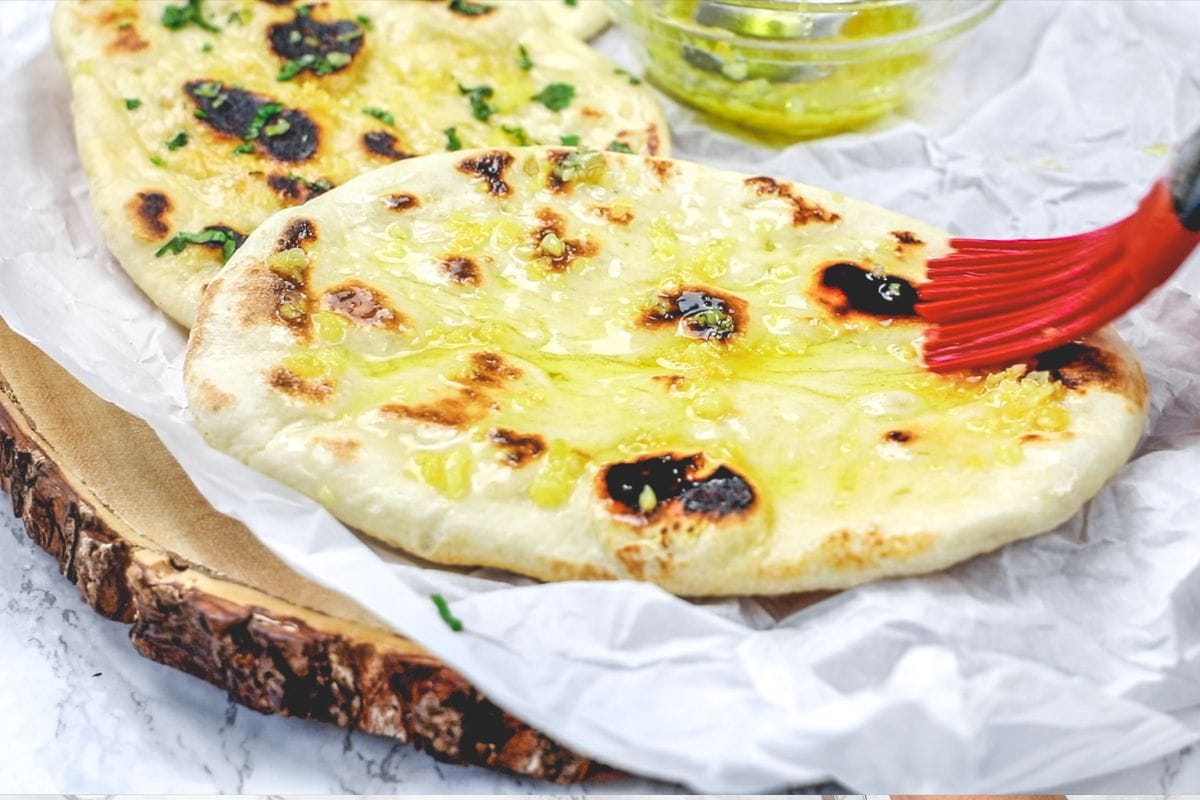
- Garnish with freshly chopped cilantro and serve hot.
Notes
- Cast Iron Tip: Cast iron is ideal for creating the crispy, charred effect on naan because it retains heat exceptionally well. The key to getting that perfect char is ensuring the skillet is very hot before placing the naan on it — you should see slight smoke rising from the skillet when it’s ready.
- Use yogurt at room temperature, not straight from the fridge. Cold yogurt slows down the yeast activity and your dough may not rise properly. If you forgot to take it out, place the yogurt container in a bowl of warm water for 10 minutes.
Nutrition
💡 Tips For Soft, Fluffy Garlic Naan
🧊 Storage & Freezing Instructions
🍽️ What To Serve With Garlic Naan?
❓ Frequently Asked Questions
🔗 Check Out Other Indian Bread Recipes
Did you try this recipe? I’d love to hear about it! Leave a review in the comment section below. If you’re sharing it on your Instagram then don’t forget to tag me @spice.up.the.curry
Follow me on all of the platforms below.
I tried making this garlic nan for the first time and it turned out perfectly. Thanks so much 😊❤️
Glad to hear it
Hi,Kanan darling,
Thank you very much for your Garlic naan recipe on tawa,, I love Garlic in all my diet its smelly on the breath but it works wonders in our health, I am Indian from Goa and I look foward into looking at your other recipes as well thanks again an d wish you all the best keep it up!
Jose
Sure, so check out and try the recipes. Please let me know your feedback,
Happy cooking