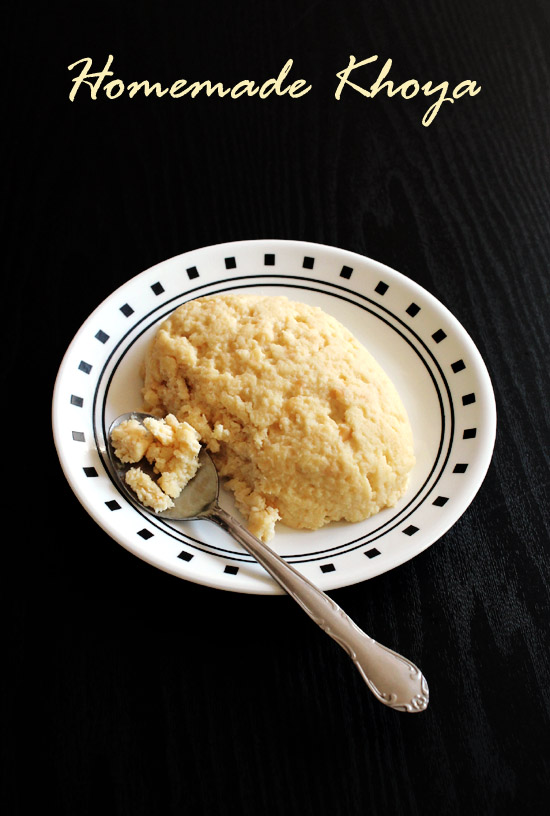
Khoya Recipe (Homemade Mawa)
Khoya Recipe (Mawa Recipe) – Today I’m sharing the traditional, slow-cooked method of making khoya at home using just one ingredient – full-fat milk.
Thank you so much for this khoya recipe! I made this and then followed your recipe for the chocolate burfi! I think I’m a fan now of your blog, after making this sweet and also the mango cake, and I can’t wait to try more of your recipes! ⭐⭐⭐⭐⭐
– Padma
What is Khoya?
Khoya, also known as mawa, is a traditional Indian dairy product made by slowly simmering full-fat milk until all the moisture evaporates and only milk solids remain. The result is a rich, creamy, slightly grainy solid that forms the base of many Indian sweets and desserts.
It’s a staple in Indian cooking, especially during festivals like Diwali, Holi, and Raksha Bandhan. You’ll find it used in popular mithai like gulab jamun, peda, kalakand, burfi, and gujiya, or even in savory dishes like khoya kaju.
In short, khoya is pure milk in its most concentrated form, packed with flavor and richness.
Different Types Of Mawa (Khoya)
There are 3 main types of khoya. Each one is made by cooking milk for a different amount of time. Each type is used for different Indian sweets.
- Hard Khoya (Batti Khoya or Pindi Mawa)– This is the driest form of mawa. It has firm and dense texture that can be shaped like a ball (batti = ball). You’ll have to grate or shred it to use in the recipes. It is mostly used in sweets that need a dry texture like barfi, peda, ladoo, etc.
- Soft Khoya (Chikna Khoya or Hariyali Mawa) – It has a soft and smooth texture (chikna = smooth). This type of khoya is ideal for making gulab jamun, gajar halwa, or rabri. It is also used in savory dishes like shahi gravies (khoya kaju, khoya makhana).
- Danedar Khoya – It has a grainy texture (danedar = granular) It is made by adding some Alum or Tartaric acid which gives granular texture to the khoya. It is used in making kalakand or granular burfi.
Why Make Khoya At Home?
Yes, making khoya at home is super easy—but I’ll be honest, it does take time. These days, mawa is easily available in Indian stores, but it’s not always fresh, especially if you’re living abroad like I am. Sometimes it has a funky smell or odd texture, and that can ruin your final dish.
So if you prefer fresh, clean, homemade flavors—just like me—then this recipe is worth the effort.
This traditional khoya recipe may take time and patience, but the result is totally worth it—rich, flavorful, and perfect for your favorite mithai!
Also, I totally understand if the traditional slow-cooking method feels too long. That’s why I’ve already shared a quicker instant mawa recipe using milk powder—perfect for when you’re short on time but still want that rich, authentic taste.
How To Make Khoya At Home? (Pics)
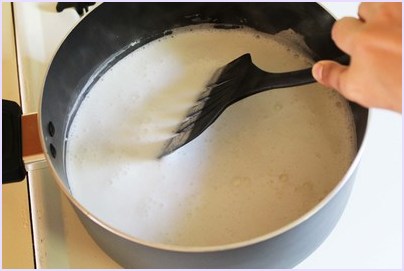
- Take a heavy-bottom pan and pour in the milk. Heat it on medium flame.
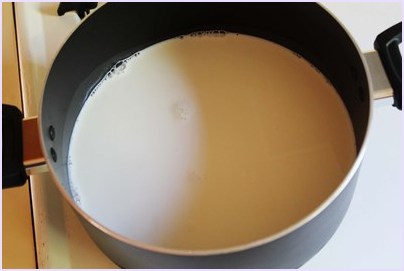
- Once the milk comes to a boil, lower the heat to medium-low. Let it simmer and reduce slowly.
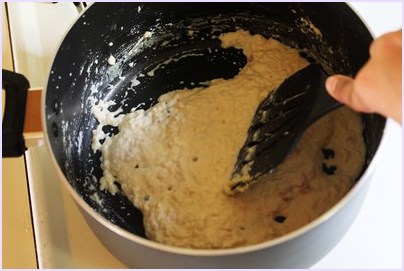
- Stir every 5 minutes. Use a wide spatula if possible. It covers more surface and makes stirring easier. If you use a small spoon, the milk may stick or burn at the bottom.
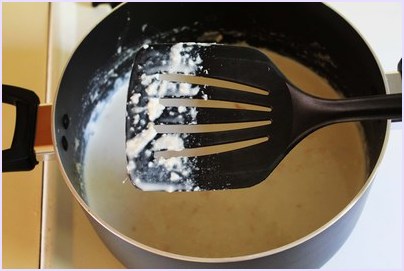
- Below is the pic after 40 minutes.

- The milk will become thicker and look slightly grainy. Don’t forget to scrape the bottom and sides of the pan.
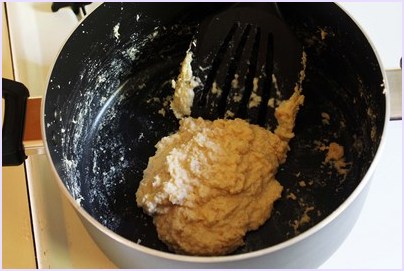
- Below is the pic at 50-minute mark.
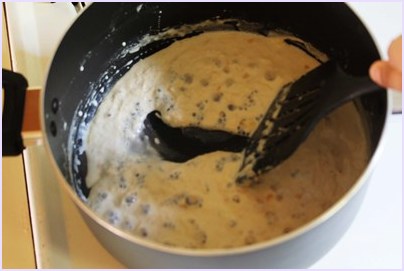
- It will look more grainy and dense.
- From this point, you need to stir more often and scrape the sides constantly.
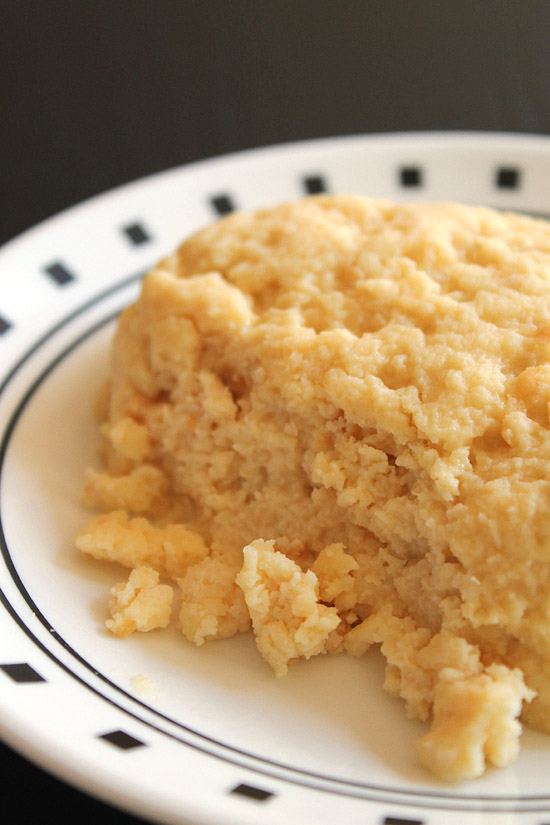
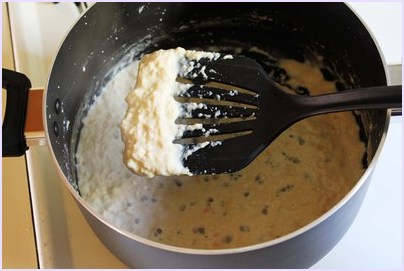
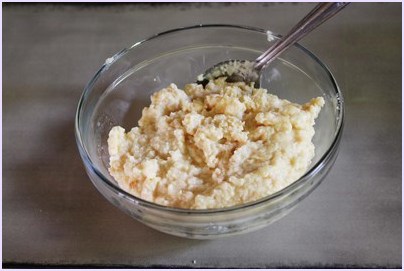
- Keep stirring and cooking until the mixture becomes solid and thick like halwa. You’ll notice it gets harder to stir — that means it’s ready.
— Turn off the heat. This stage took me around 1 hour and 15 minutes.
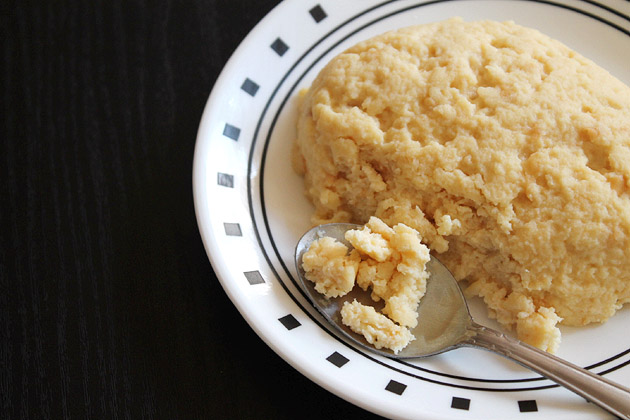
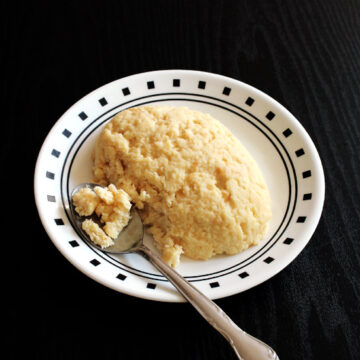
- Transfer the khoya to a clean bowl. Let it cool completely. As it cools, it will firm up even more.
Expert Tips
How To Store Khoya (Mawa)?
Check out other Indian kitchen basics
Homemade dahi (Yogurt)
Homemade garam masala
How to make ginger garlic paste
Homemade paneer cubes
Did you try this recipe? I’d love to hear about it! Leave a review in the comment section below. If you’re sharing it on your Instagram then don’t forget to tag me @spice.up.the.curry
Follow me on all of the platforms below.
Khoya Recipe (Homemade Mawa)
US measuring cups are used (1 cup = 240 ml)
Ingredients
- (about 1 liter) 5 cups Milk, Full fat milk
Instructions
- Take a heavy-bottom pan and pour in the milk. Heat it on medium flame.
- Once the milk comes to a boil, lower the heat to medium-low. Let it simmer and reduce slowly.
- Stir every 3–4 minutes. Use a wide spatula if possible. It covers more surface and makes stirring easier. If you use a small spoon, the milk may stick or burn at the bottom.
- After 40 minutes, the milk will become thicker and look slightly grainy. Don’t forget to scrape the bottom and sides of the pan.
- At the 50-minute mark, it will look more grainy and dense.Note: Cooking time may vary depending on the shape and size of the pan. It also depends on the quantity you're making—whether it's half, double, or triple the recipe.
- From this point, you need to stir more often and scrape the sides constantly.
- Keep stirring and cooking until the mixture becomes solid and thick like halwa. You’ll notice it gets harder to stir — that means it’s ready.
- Turn off the heat. This stage took me around 1 hour and 15 minutes.
- Transfer the khoya to a clean bowl. Let it cool completely. As it cools, it will firm up even more.
About how much khoya does this produce?
it is already mentioned in the recipe card – 200 grams (around 1 cup)
Nice lam using for chandrahar sweet