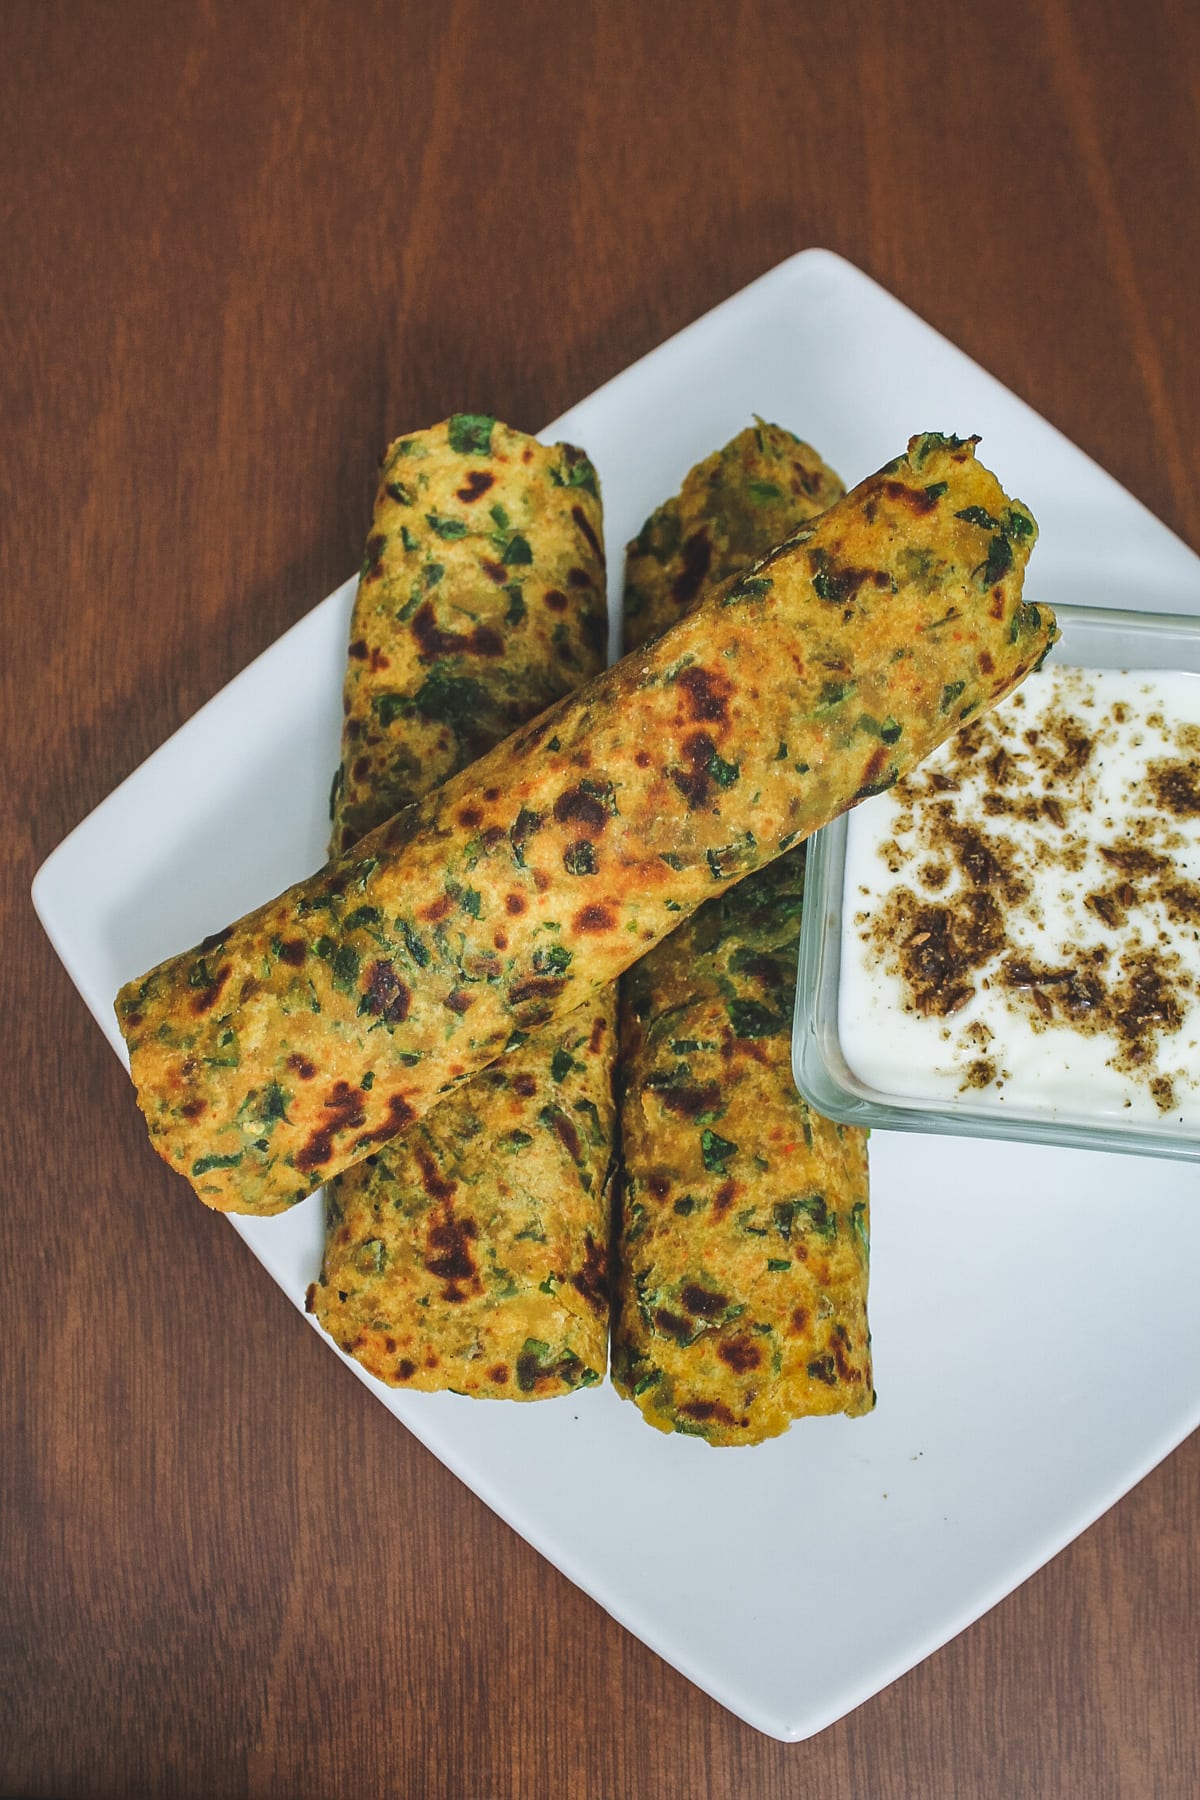
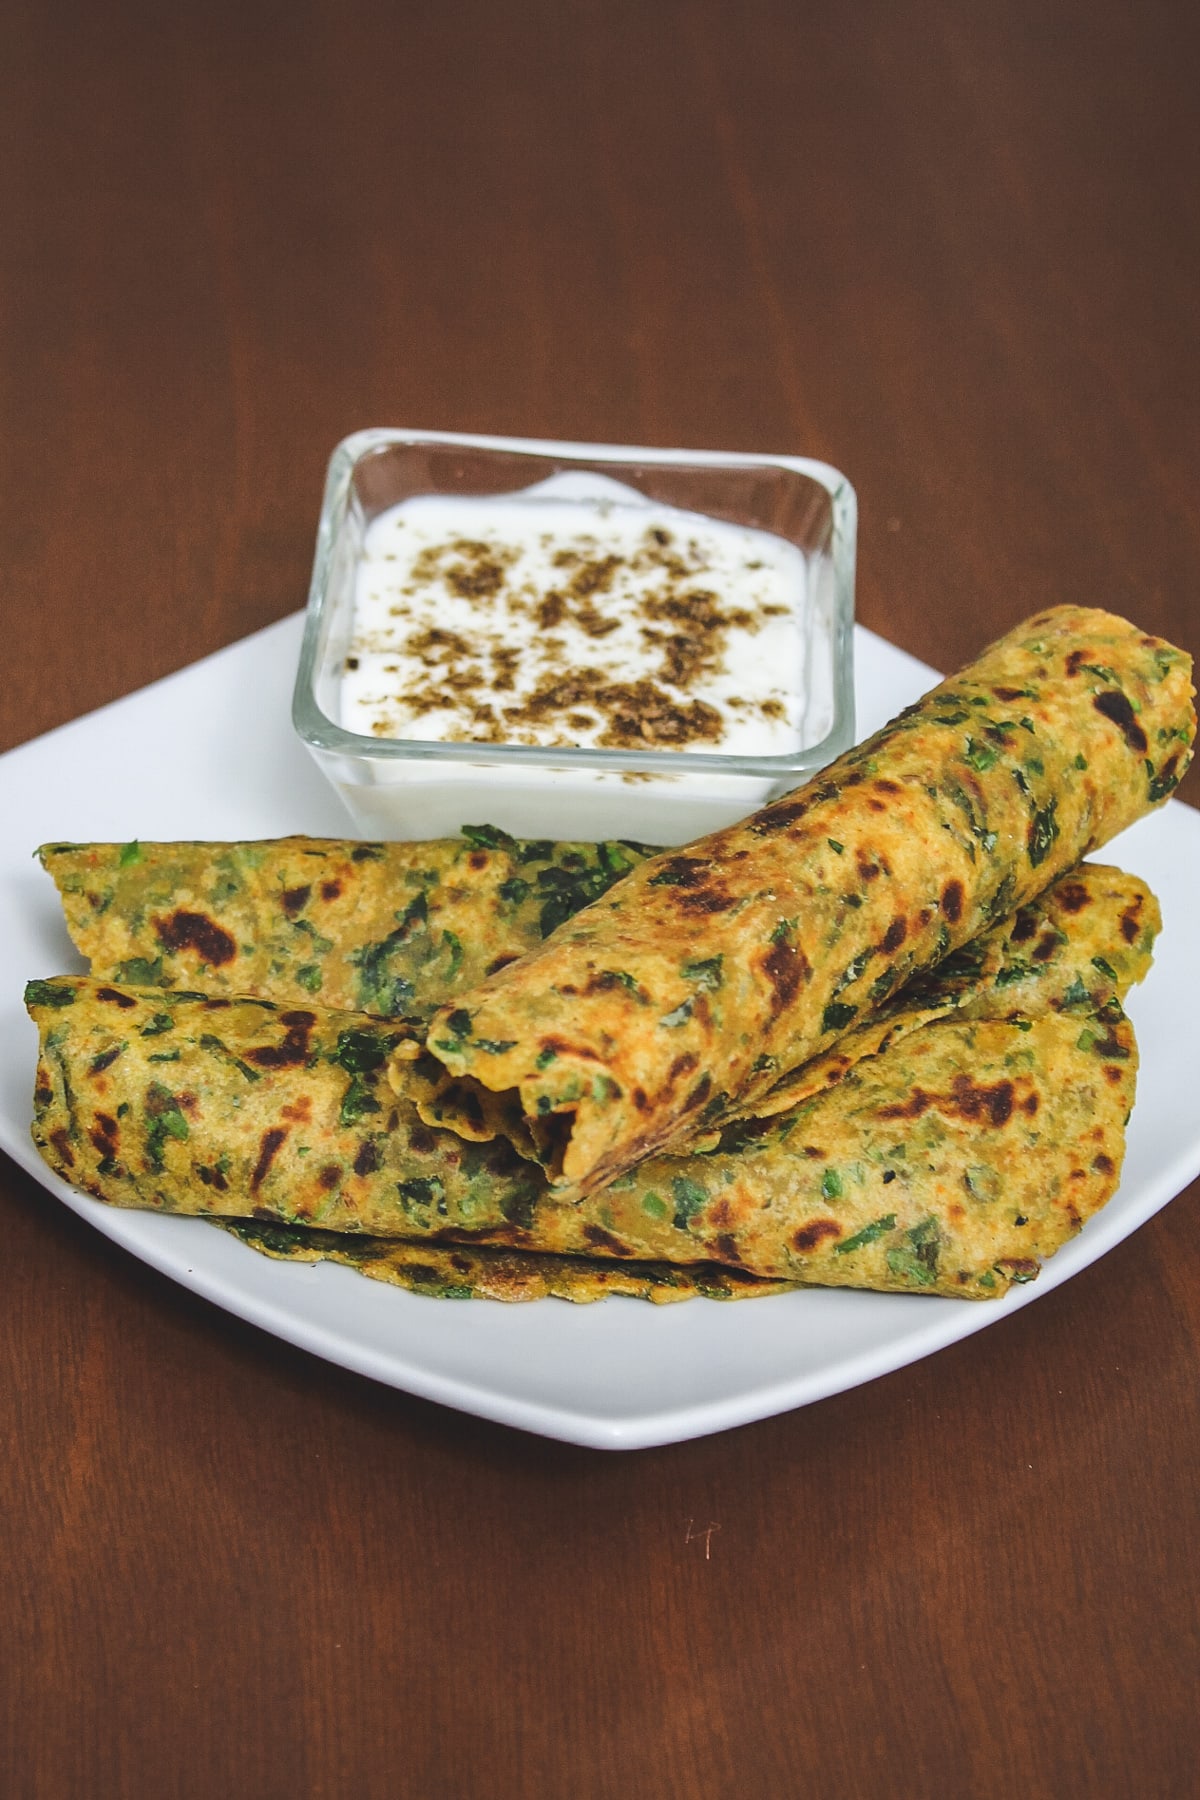
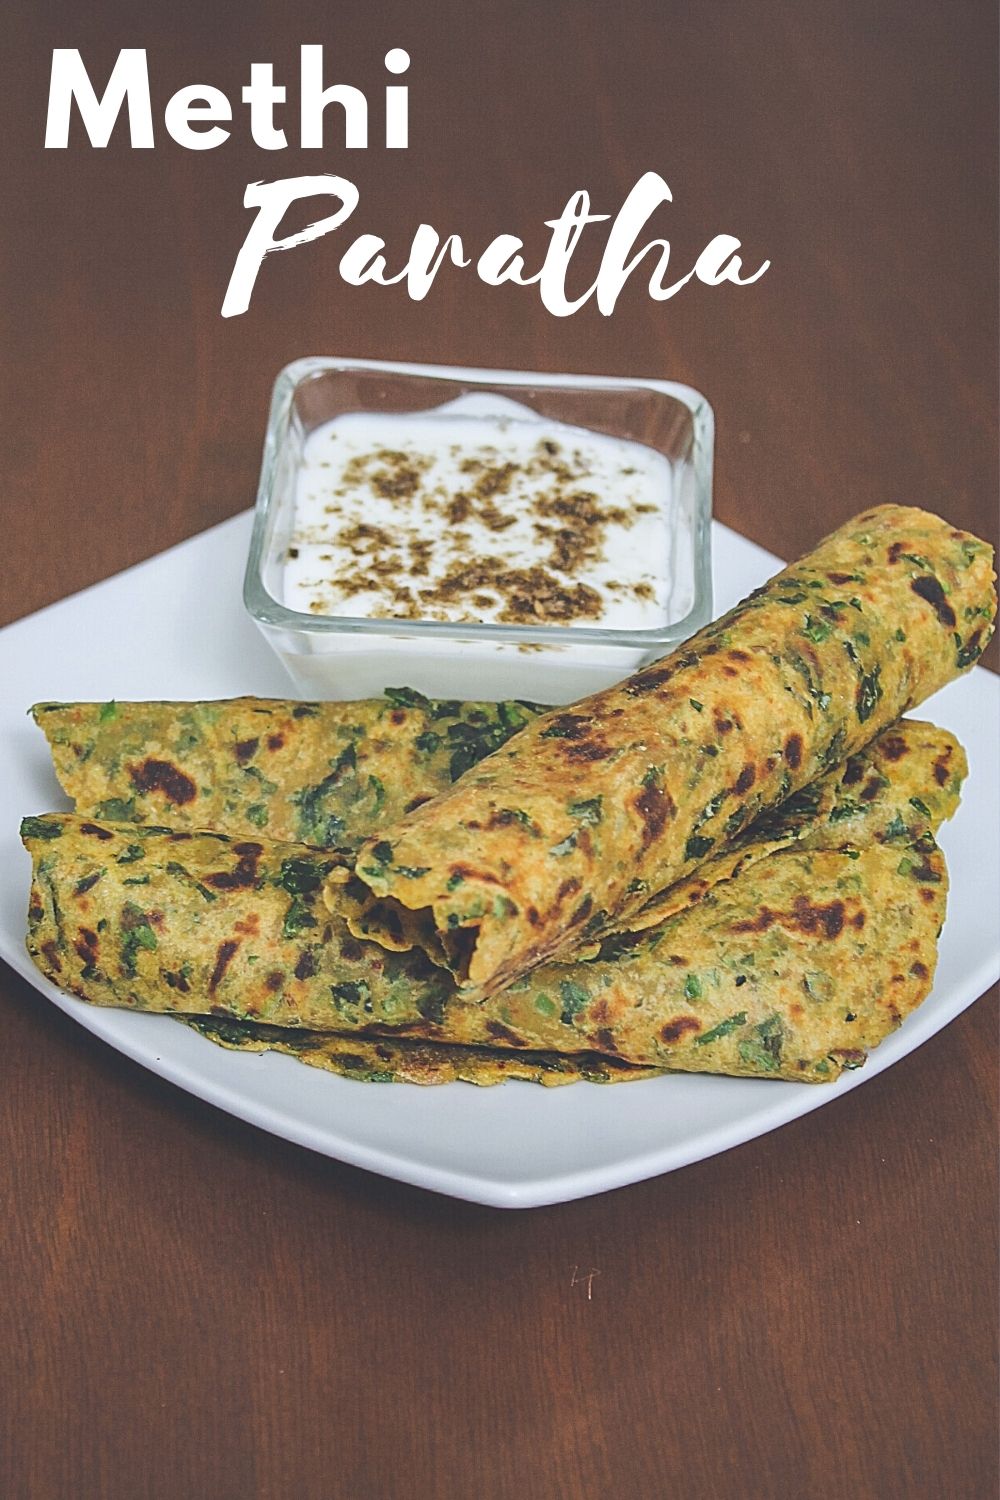
Methi Paratha - This makes a healthy and filling breakfast when served with yogurt or pickle. It tastes too good with a hot cup of chai (tea).
Jump to:
❤️About This Methi Paratha Recipe
Taste:
- Fenugreek leaves (methi) has a slightly bitter taste. Personally, I prefer this taste and here in the USA, I do not get really bitter one like we get in India during winter months. Even though methi leaves are bitter, once kneaded into the dough and paratha are made, the paratha doesn’t taste bitter at all.
- Still if you would like to reduce the bitterness of methi then you need to sprinkle some salt over the methi leaves. Let it sit for 15-20 minutes and then squeeze out the water. Now chop and use in the dough.
Texture:
- These are soft methi paratha and don’t become chewy or hard even after it’s cooled down. Even a few hours after cooking, they still stay soft.
- Wanna know the reason? Because boiled, mashed potato is added while kneading the dough. This makes paratha super soft and not chewy at all.
Pack into Lunchbox: Because of its nature of staying soft, this methi paratha can be packed into kids' or adult’s lunch boxes. Pack some yogurt or raita or favorite curry/sabzi in a separate container to go with methi paratha.
🧾Ingredient Notes
Here is the pic of the ingredients you’ll need to make delicious tasting methi paratha recipe.
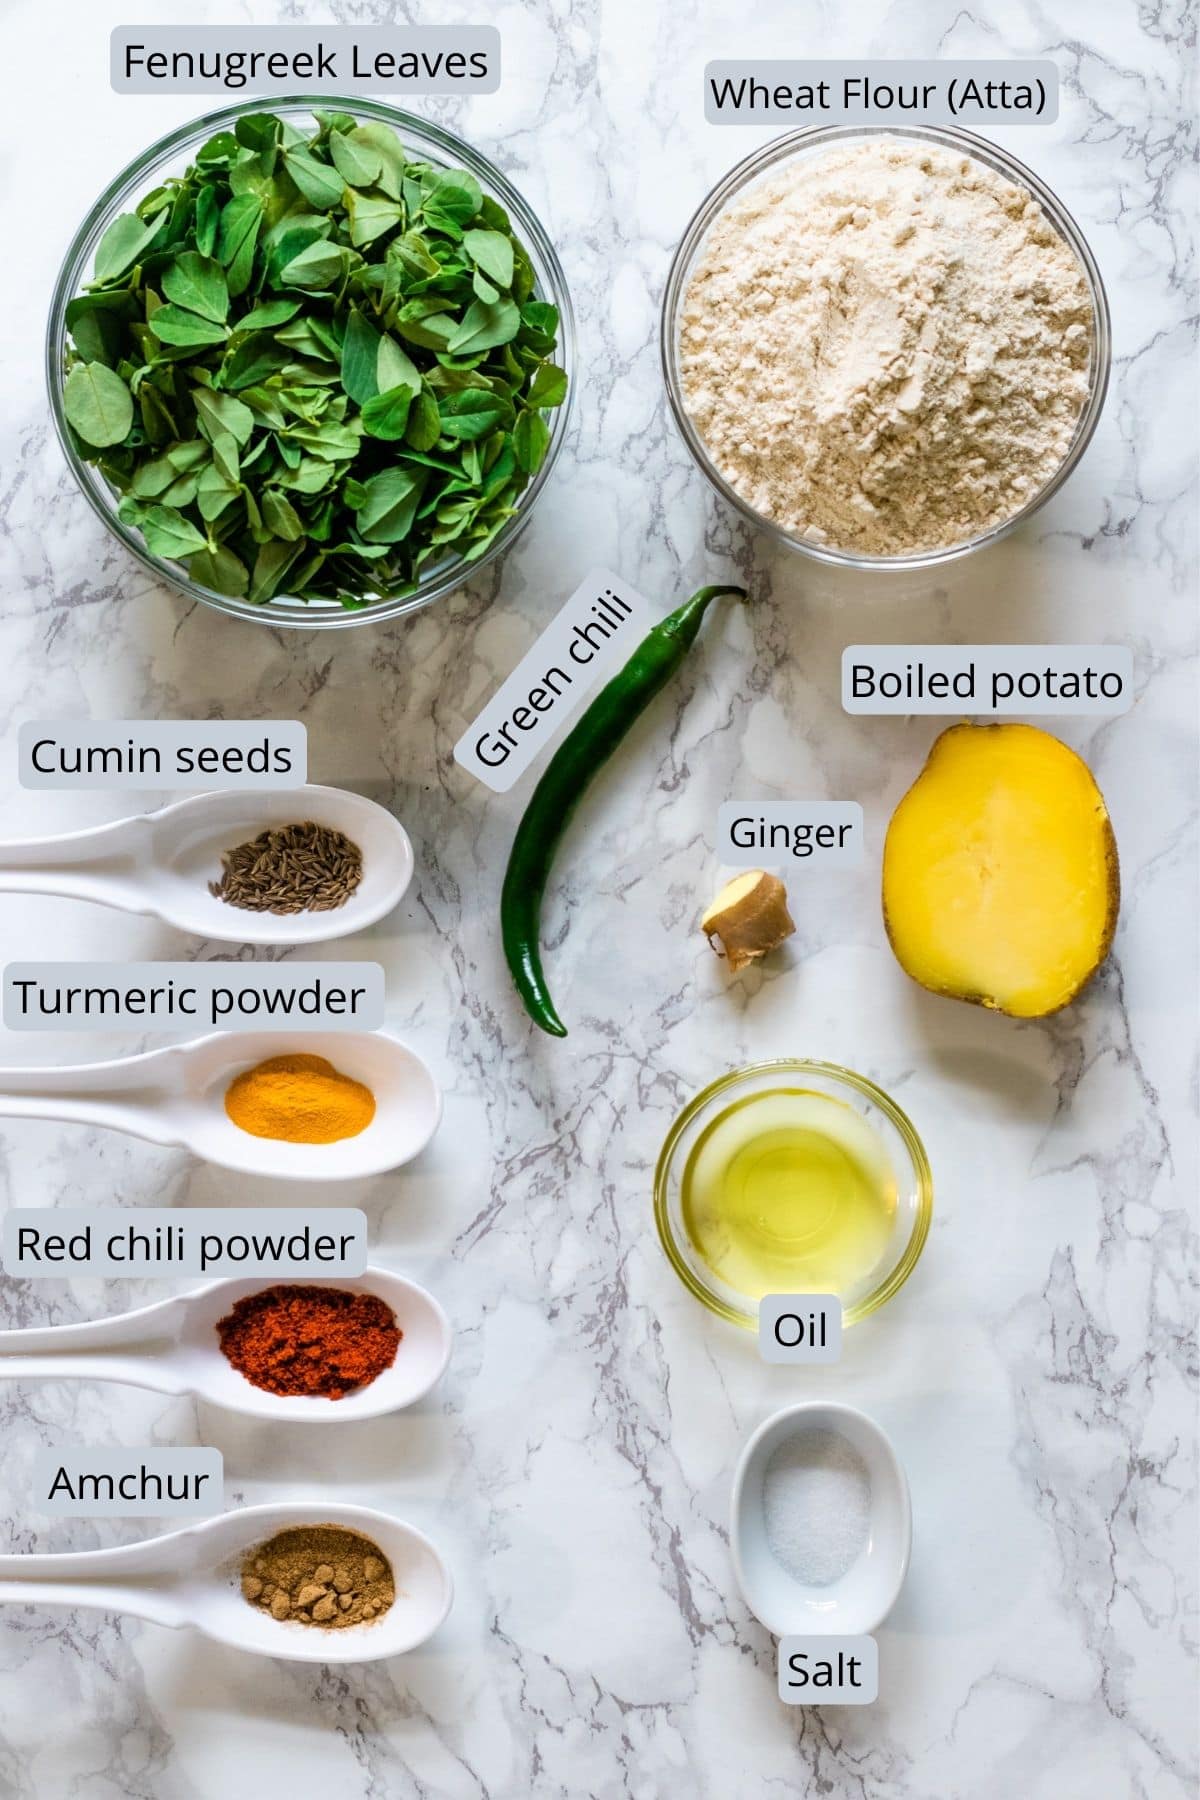
- Methi (Fenugreek Leaves): When methi is in season, I buy fresh methi leaves. But sometimes good quality fresh methi is not available in Indian grocery stores then I would use frozen methi. If using frozen one then you need just ½ cup or less because they are pressed and compacted.
- Boiled potato: I boil the potato in instant pot beforehand. At the time of making the dough, I just grate the boiled potatoes and use them.
- Spice level: If making for kids who cannot tolerate the spicy food then you can reduce/skip green chili and red chili powder.
👩🍳How To Make Methi Paratha? (With Photos)
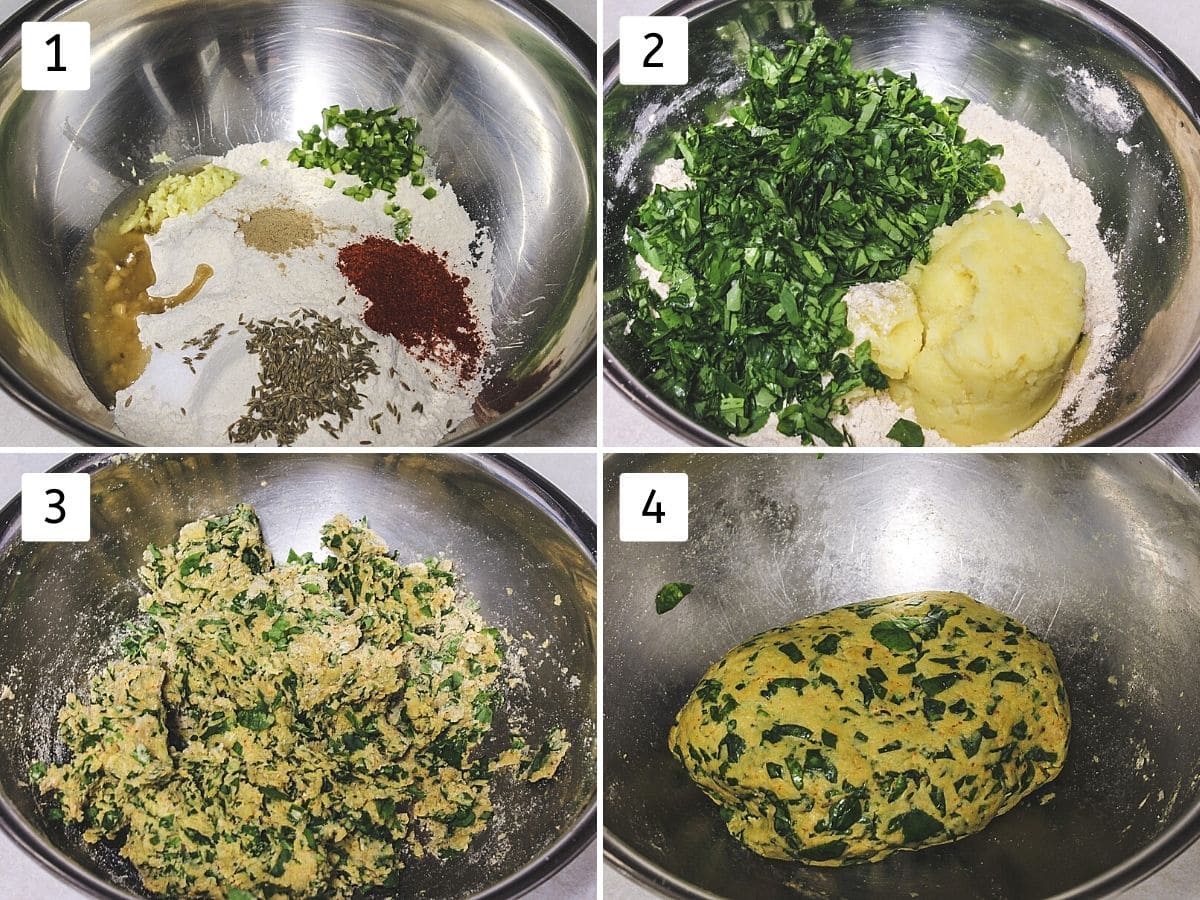
1) Take chapati atta, cumin seeds, red chili powder, turmeric powder (not in the photo but added later), amchur, salt, ginger paste, green chilies and oil. Mix everything well.
2) Now add washed, chopped methi leaves and mashed (or grated) boiled potato.
3) Mix everything really well. Because of the moisture from potatoes, the dough starts to come together.
4) Keep kneading and until you get smooth, soft dough. NOTE: I have not added any extra water as moisture from potatoes and water particles from methi leaves is enough. Depending on your potato moisture you may need little water or may not need it.
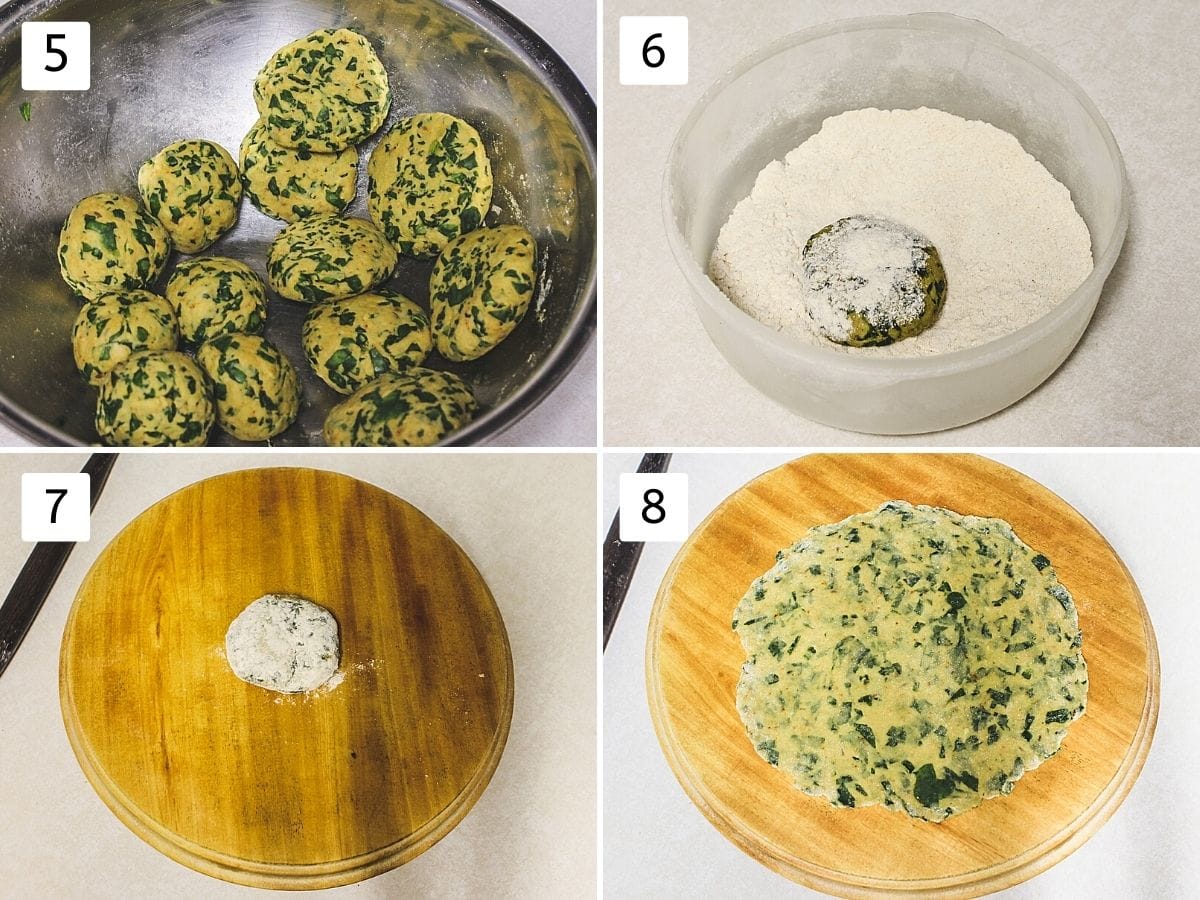
5) Cover it and let it rest for 15-20 minutes. After that again knead the dough 2-3 times to make it smooth. Divide it into 12-13 equal portions, make a smooth ball and flatten between your palm.
6) Work with one disc at a time. Dust both sides of the disk with dry flour.
7) Take it on to the rolling board. And start rolling using a rolling pin.
8) Roll into a 6-inches diameter circle.
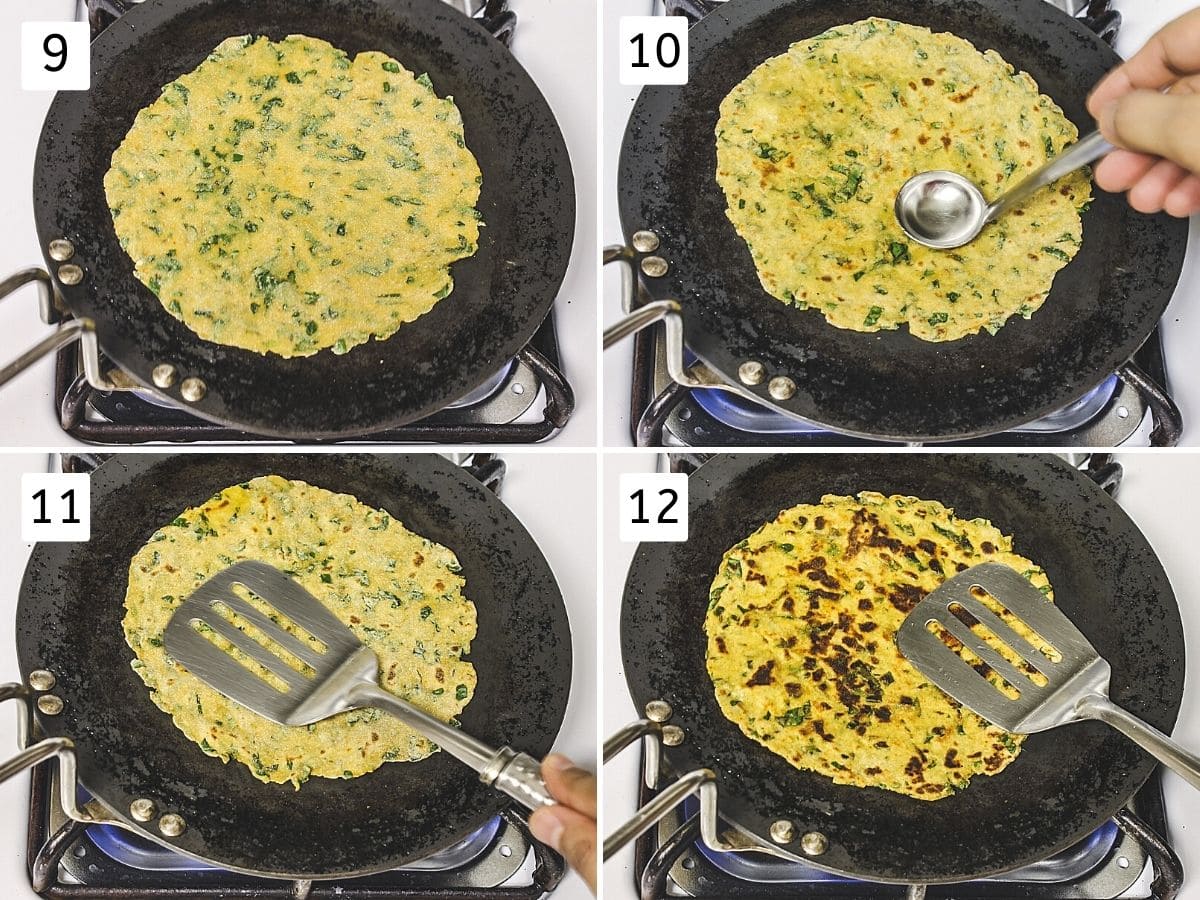
9) Heat the tawa or skillet on medium heat. Once hot place rolled paratha.
10) Wait for a few seconds, you will notice the bubbles appear on the surface. Now flip the paratha using a spatula and you’ll see a few brown spots. Now apply oil all over the surface.
11) Flip again (so oil side is down), cook by gentle pressing until bottom side has nice golden brown spots.
12) Now again apply oil, flip and cook another side similarly. Remove it and keep it in an insulated container. Repeat the same for the rest of the paratha.
💭Expert Tips
- Do not have speed as our moms have (rolling & frying paratha simultaneously). No worries. Roll 5-6 paratha, lay them on a large plate overlapping slightly (but do not stack them). Keep the plate covered with a clean kitchen napkin. Now fry these 5-6 rolled methi paratha. Then repeat the rolling, frying process in batches.
- Reduce the amount of methi leaves as per your liking/preference. In my family, we love lots of methi in our methi paratha or thepla. So I have added plenty.
- Use ghee for frying paratha instead of oil. It gives a nice, rich flavor. I use ghee for my kid as you know growing kid needs ghee.
- Sometimes I cut down the amount of potato in the dough and add some grated paneer in the dough. My daughter loves that.
Check Out Other Non-Stuffed Paratha Recipes
PS Tried this methi paratha recipe? Please leave a star rating in the recipe card below and/or a review in the comment section.
Recipe Card
Methi Paratha Recipe
Ingredients
- 1 ¼ cup Whole wheat flour (Chapati atta)
- 1 tablespoon Oil
- ½ teaspoon Cumin seeds
- 1 Green chili chopped finely
- 1 ½ teaspoons Ginger paste or freshly grated or crushed
- 1 teaspoon Red chili powder
- ¼ teaspoon Turmeric powder
- ½ teaspoon Amchur powder (dried mango powder)
- Salt to taste
- 2 small or 1 cup Potatoes boiled, peeled, mashed or grated.
- 3 cups Fenugreek leaves (Methi leaves) plucked, measured, washed and chopped
Instructions
Kneading The Dough:
- Take chapati atta, cumin seeds, red chili powder, turmeric powder (not in the photo but added later), amchur, salt, ginger paste, green chilies and oil. Mix everything well.
- Now add washed, chopped methi leaves and mashed (or grated) boiled potato.
- Mix everything really well. Because of the moisture from potatoes, the dough starts to come together. Keep kneading and until you get smooth, soft dough. NOTE: I have not added any extra water as moisture from potatoes and water particles from methi leaves is enough. Depending on your potato moisture you may need little water or may not need it.
- Cover it and let it rest for 15-20 minutes.
Rolling & Frying Paratha:
- After the resting time, knead the dough again 2-3 times to make it smooth. Divide it into 12-13 equal portions, make a smooth ball and flatten between your palm.
- Work with one disc at a time. Dust both sides of the disk with dry flour.
- Take it on to the rolling board. And start rolling using a rolling pin. Roll into a 6-inches diameter circle.
- Heat the tawa or skillet on medium heat. Once hot place rolled paratha.
- Wait for a few seconds, you will notice the bubbles appear on the surface. Now flip the paratha using a spatula and you’ll see a few brown spots. Now apply oil all over the surface.
- Flip again (so oil side is down), cook by gentle pressing until bottom side has nice golden brown spots.
- Now again apply oil, flip and cook another side similarly. Remove it and keep in an insulated container. Repeat the same for the rest of the methi paratha.
Notes
- You can use frozen methi instead of fresh ones. You need just ½ cup or less because they are pressed and compacted.
- Do not have speed as our moms have (rolling & frying paratha simultaneously). No worries. Roll 5-6 paratha, lay them on a large plate overlapping slightly (but do not stack them). Keep the plate covered with a clean kitchen napkin. Now fry these 5-6 rolled methi paratha. Then repeat the rolling, frying process in batches.
- Reduce the amount of methi leaves as per your liking/preference. In my family, we love lots of methi in our paratha, thepla. So I have added plenty.
- Use ghee for frying methi paratha instead of oil. It gives a nice, rich flavor. I use ghee for my kid as you know growing kid needs ghee.
- Sometimes I cut down the amount of potato and add some grated paneer in the dough.

Vasundhara
its tastes really good....
Kanan Patel
Glad that you liked.
Eve
I’m Cuban and my husband is Indian so I love all your recipes as I’m from a deferent culture i don’t now all his favorite things by heart so it’s good I found a place where I can take that stress off my shoulders a little and bonus he loves the food I make
Kanan Patel
Good to know that he loves the food you make.
Happy cooking!
Sangita
It turned out Perfect!!!!! I didn't know you could put potato in it, they were amazingly soft. I love it!!!!
Kanan Patel
Glad that paratha came out prefect.