How To Make Curd? (Dahi) – Instant Pot
Here is the foolproof recipe for thick, creamy, and delicious homemade curd (dahi)! Using Instant Pot’s pot-in-pot method, making plain yogurt at home has never been easier. It is 1000 times better than the store-bought yogurt.
What Is Curd or Dahi?
In Indian English, the term “curd” is commonly used to refer to plain yogurt, which is a dairy product made by fermenting milk with specific bacterial cultures. It has a thick, creamy consistency and a slightly tangy flavor.
In Hindi language, curd is known as “Dahi”. Other names are
- Mosaru (Kannada),
- Thayir (Tamil),
- Thayiru (Malayalam),
- Doi (Assamese, Bengali),
- Dohi (Odia),
- Perugu (Telugu) and
- Dhahi or Dhaunro (Sindhi).
Curd aka dahi is made through the process of fermentation. To prepare it, milk is heated to kill any harmful bacteria, then cooled to a warm temperature that allows beneficial bacteria cultures to thrive.
A small amount of existing yogurt, containing live cultures, is added to the milk as a starter.
The mixture is then left to ferment for several hours at a controlled temperature, usually around 110°F (43°C), allowing the bacteria to convert lactose (milk sugar) into lactic acid. This acidification thickens the milk and gives curd its characteristic tangy flavor.
You’ll Love This Recipe
- Passive Time: In the traditional method, heating milk on the stovetop requires constant monitoring to prevent boiling over. However, with the pot-in-pot (PIP) method used in the Instant Pot, you can avoid the need for constant supervision.
- Perfect Every Time: This Instant Pot yogurt method for fermentation ensures consistent results, regardless of the season (winter or summer). You can expect perfectly thick and creamy curd every single time.
- Adjust Sourness to Taste: Tailor the sourness of your curd to your liking by adjusting the fermentation time to achieve the perfect level of tanginess.
- Save on Costs: Making dahi at home is not only convenient but also economical, allowing you to enjoy fresh and delicious Indian yogurt at a fraction of the cost of a store-bought one.
Ingredient Notes
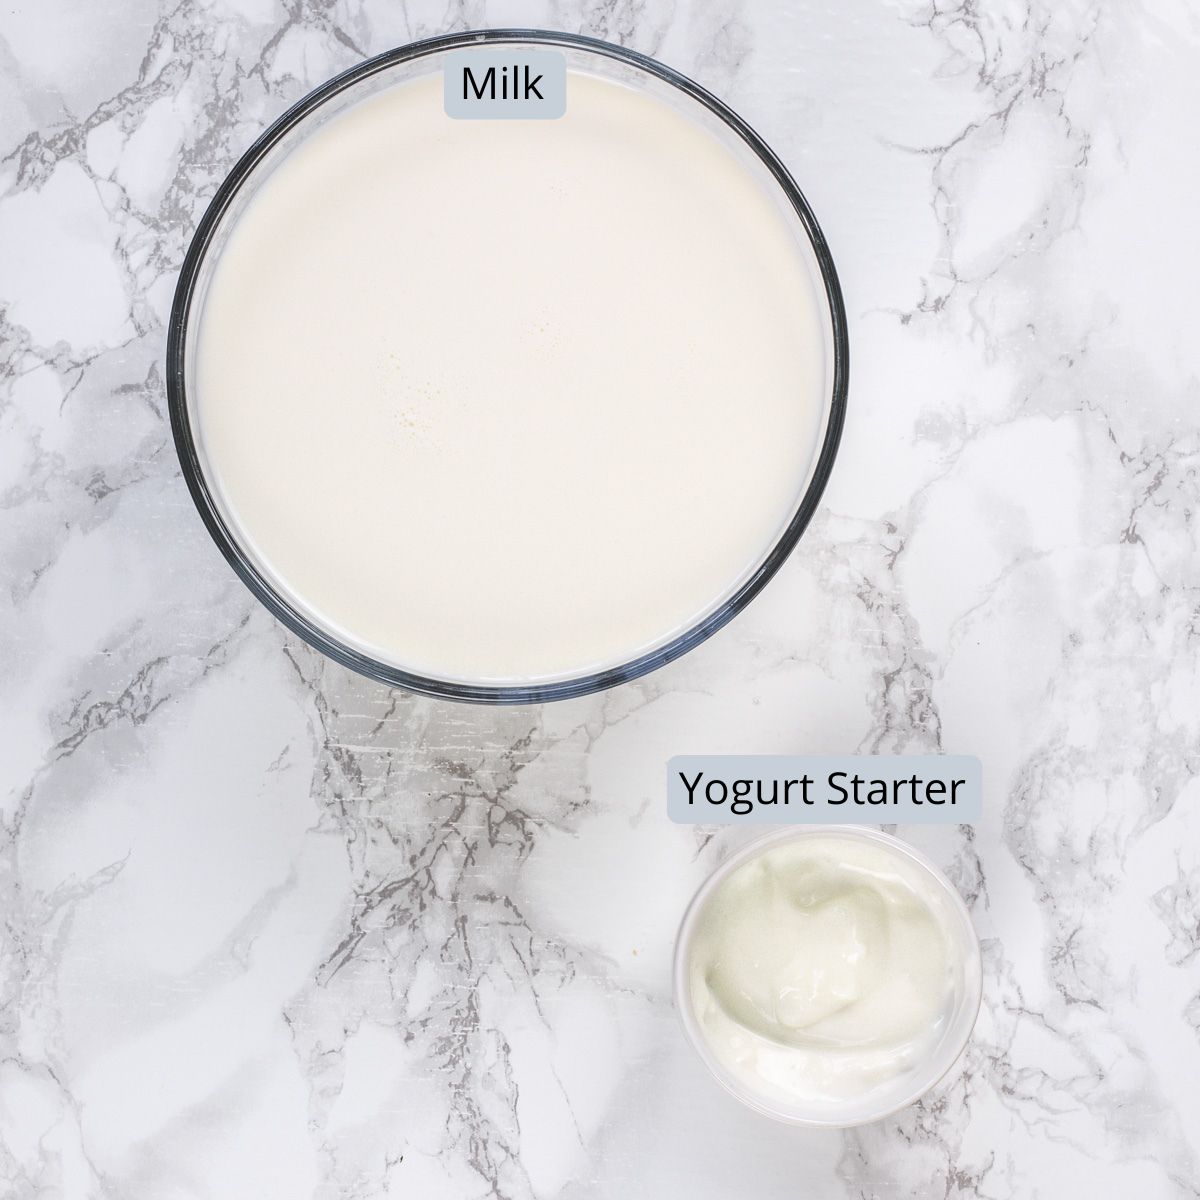
- Milk: Opt for full-fat whole milk for a creamier, thicker texture in your yogurt. However, if you’re aiming for a lower-fat option, you can use low-fat or fat-free milk, though the resulting yogurt may be slightly less creamy and have more whey content.
- Yogurt Starter: This can be store-bought plain yogurt (dahi) with live active cultures or reserved yogurt from a previous batch of homemade yogurt. Choose a yogurt that is made without gelatin.
How To Make Curd (Dahi) In Instant Pot?
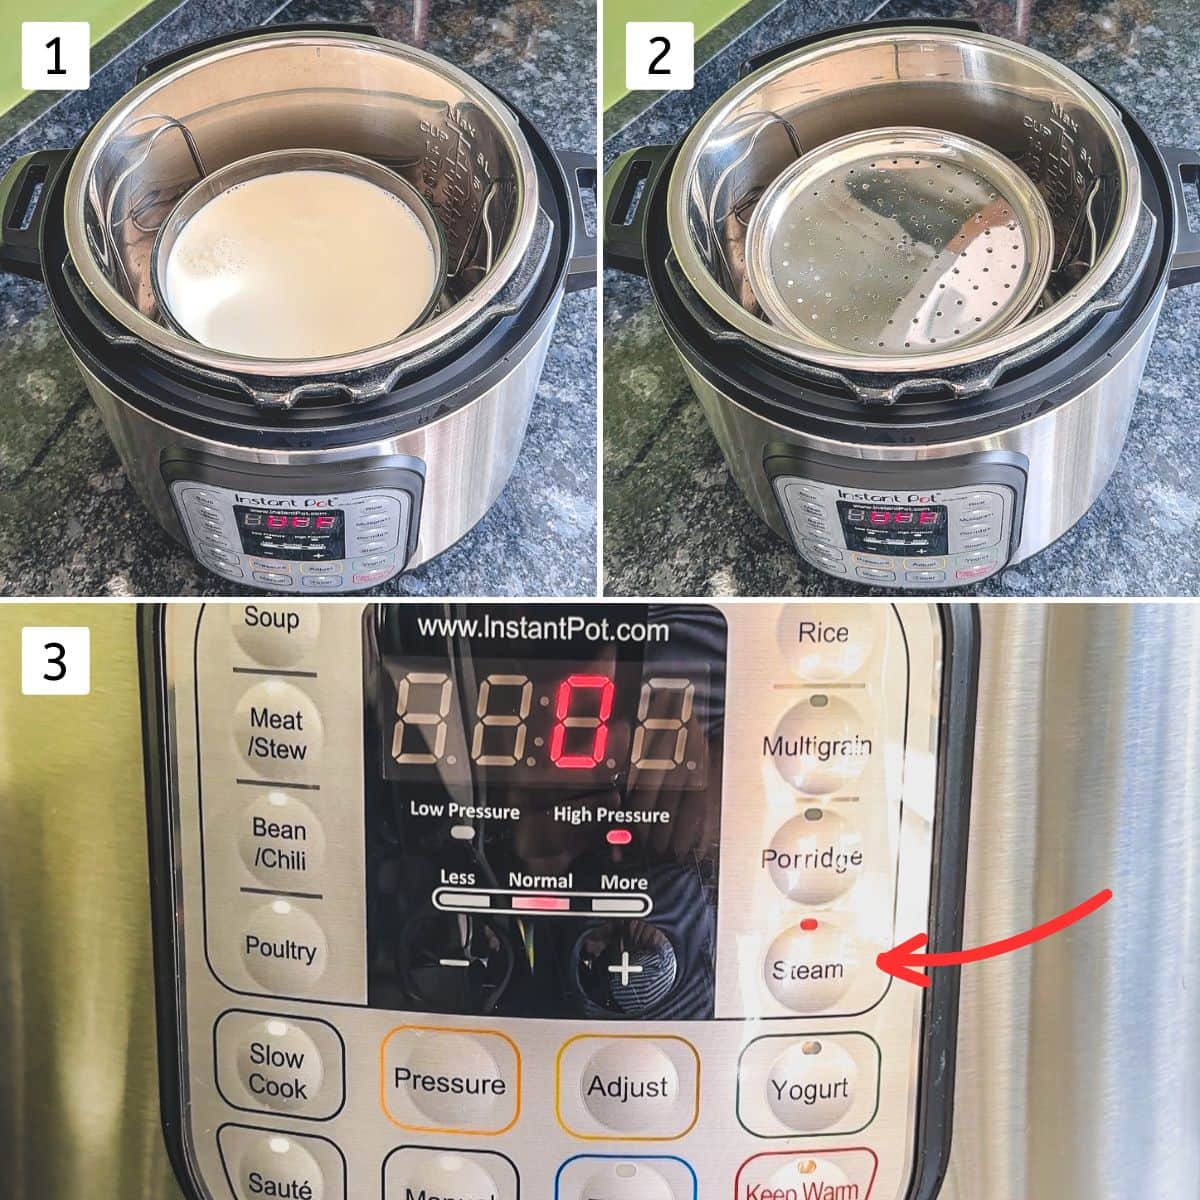
1) Fill the Instant Pot liner with about 1 inch of water and place a rack inside.
2) Put a glass container (e.g., Pyrex) on the rack and fill it with milk. Optionally, cover the container with a lid.
3) Close the Instant Pot lid, set the valve to sealing, and steam for 0 minutes.
4) After the pin drops, carefully remove the container from the Instant Pot and let it cool down to lukewarm (If it cools to room temperature, that’s fine).
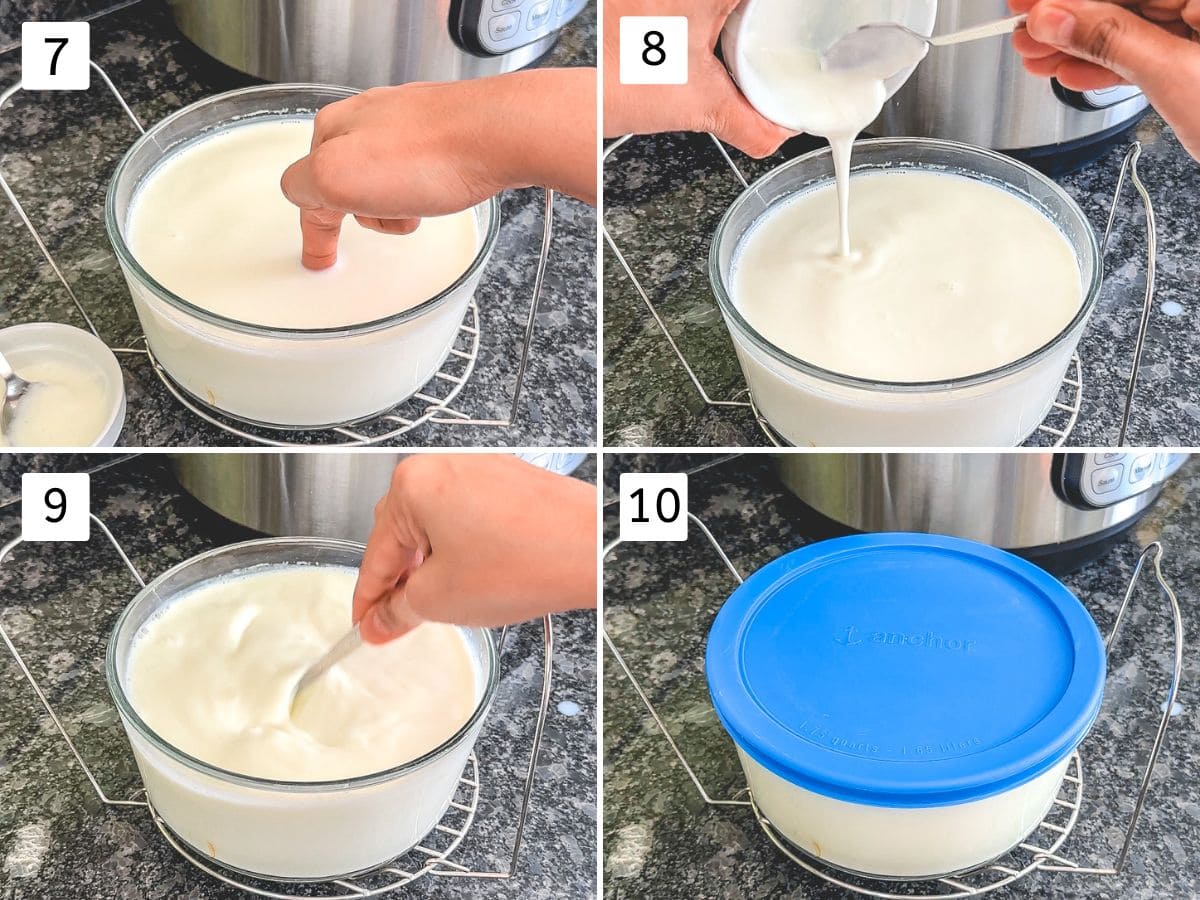
5, 6) While the milk cools, remove the yogurt starter from the fridge, whisk it to smooth, and let it come to room temperature.
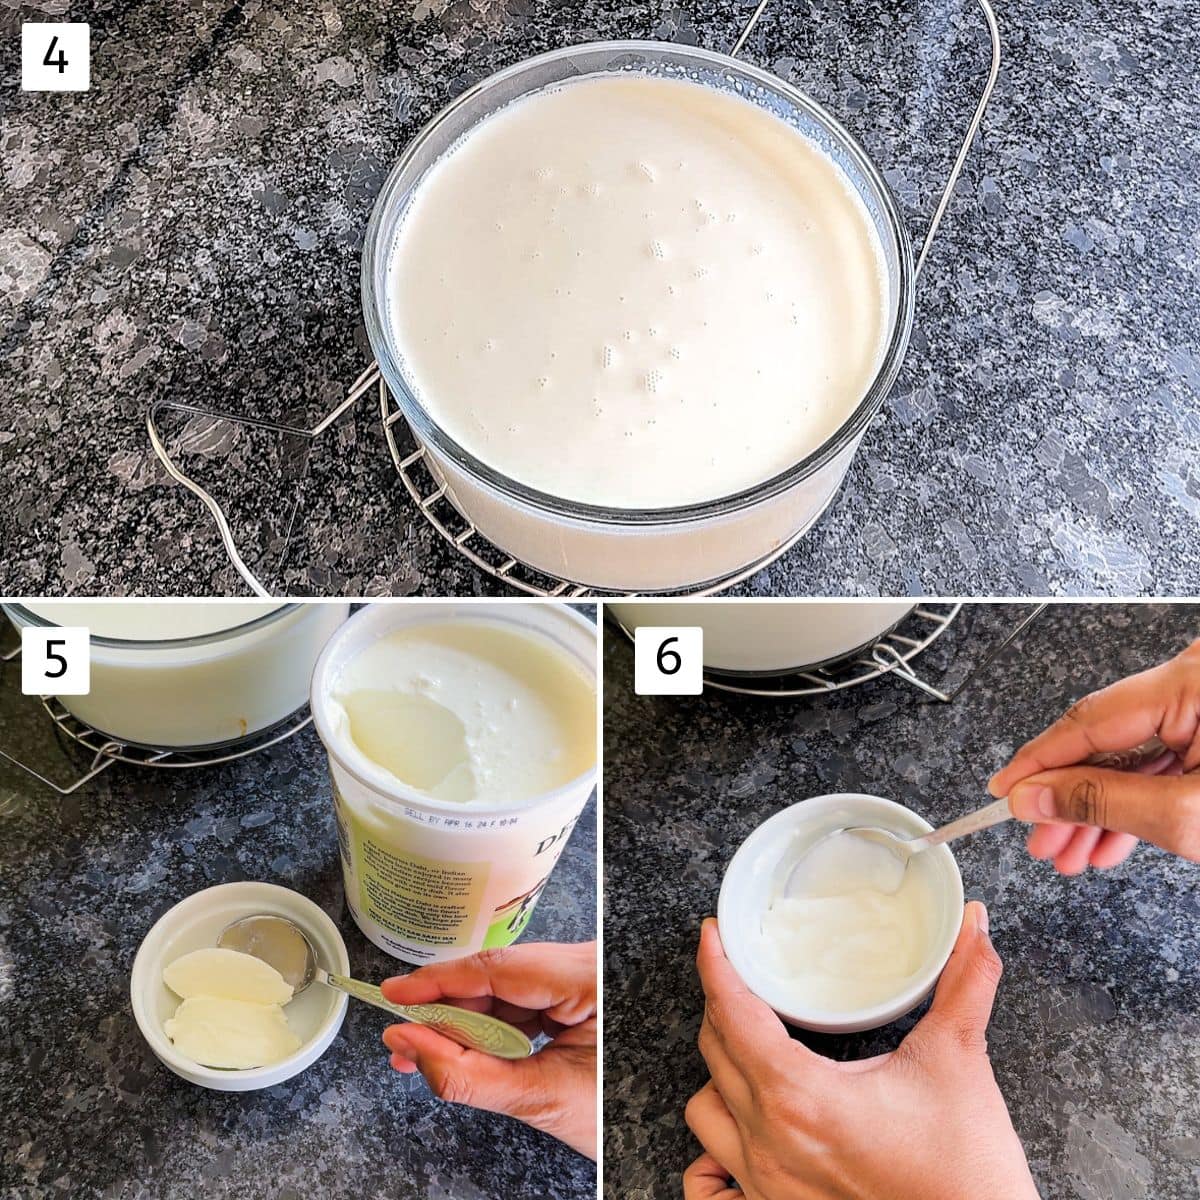
7, 8, 9) Once the milk reaches lukewarm temperature (check by inserting your finger or using a thermometer – about 110°F or 43°C), add the whisked yogurt starter and stir well.
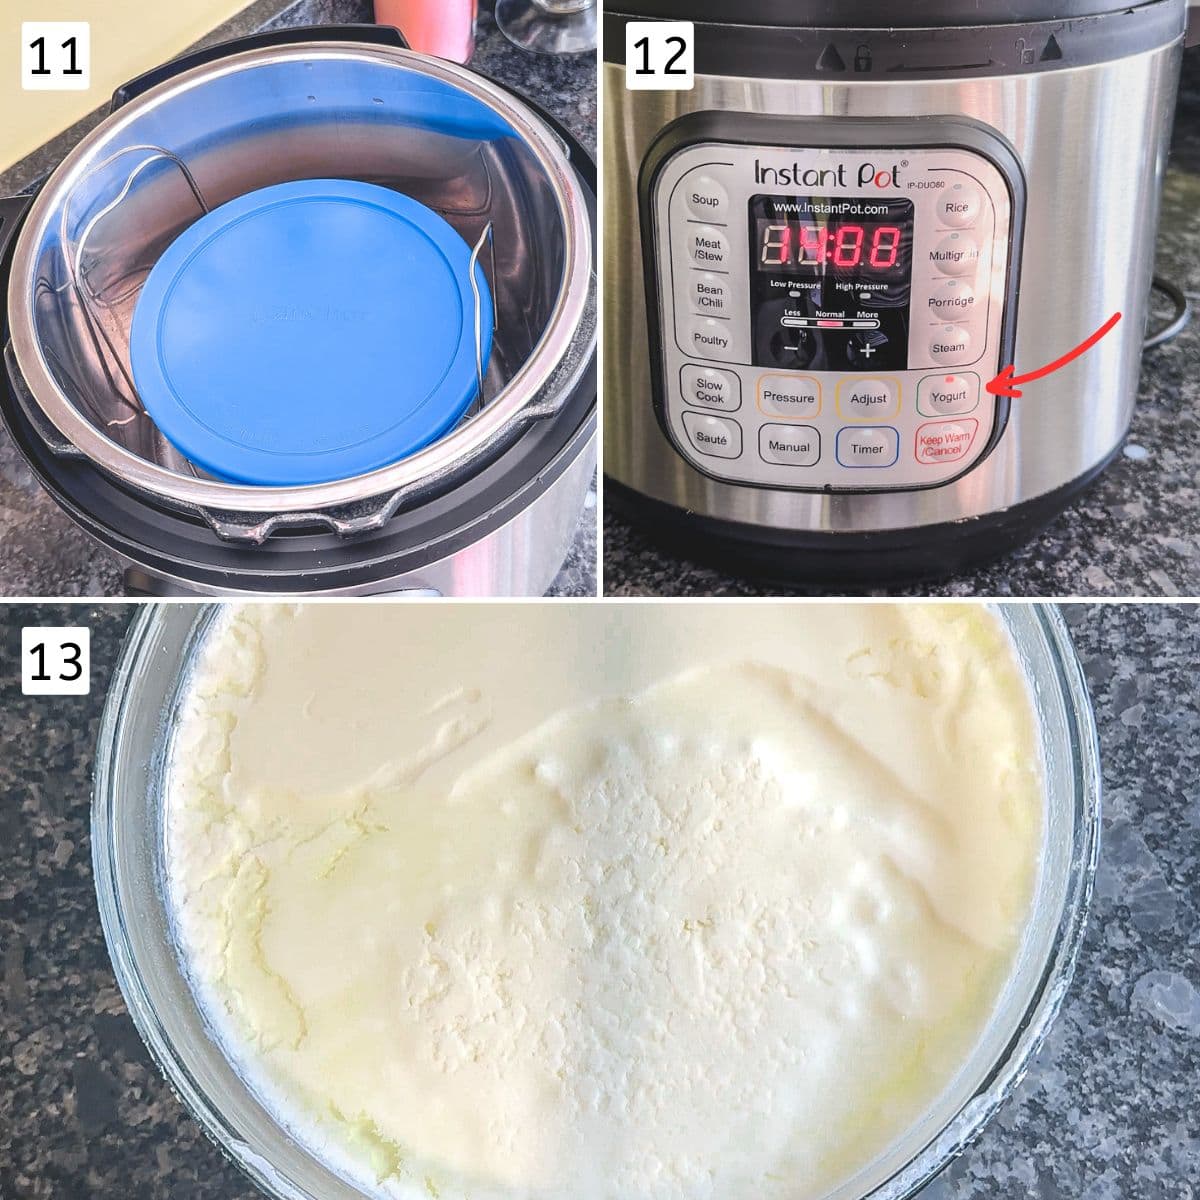
10) Cover the container with its lid and place it back in the Instant Pot.
11, 12) Close the Instant Pot lid, press the ‘Yogurt’ button, and set the timer for 10-14 hours, depending on your desired level of sourness.
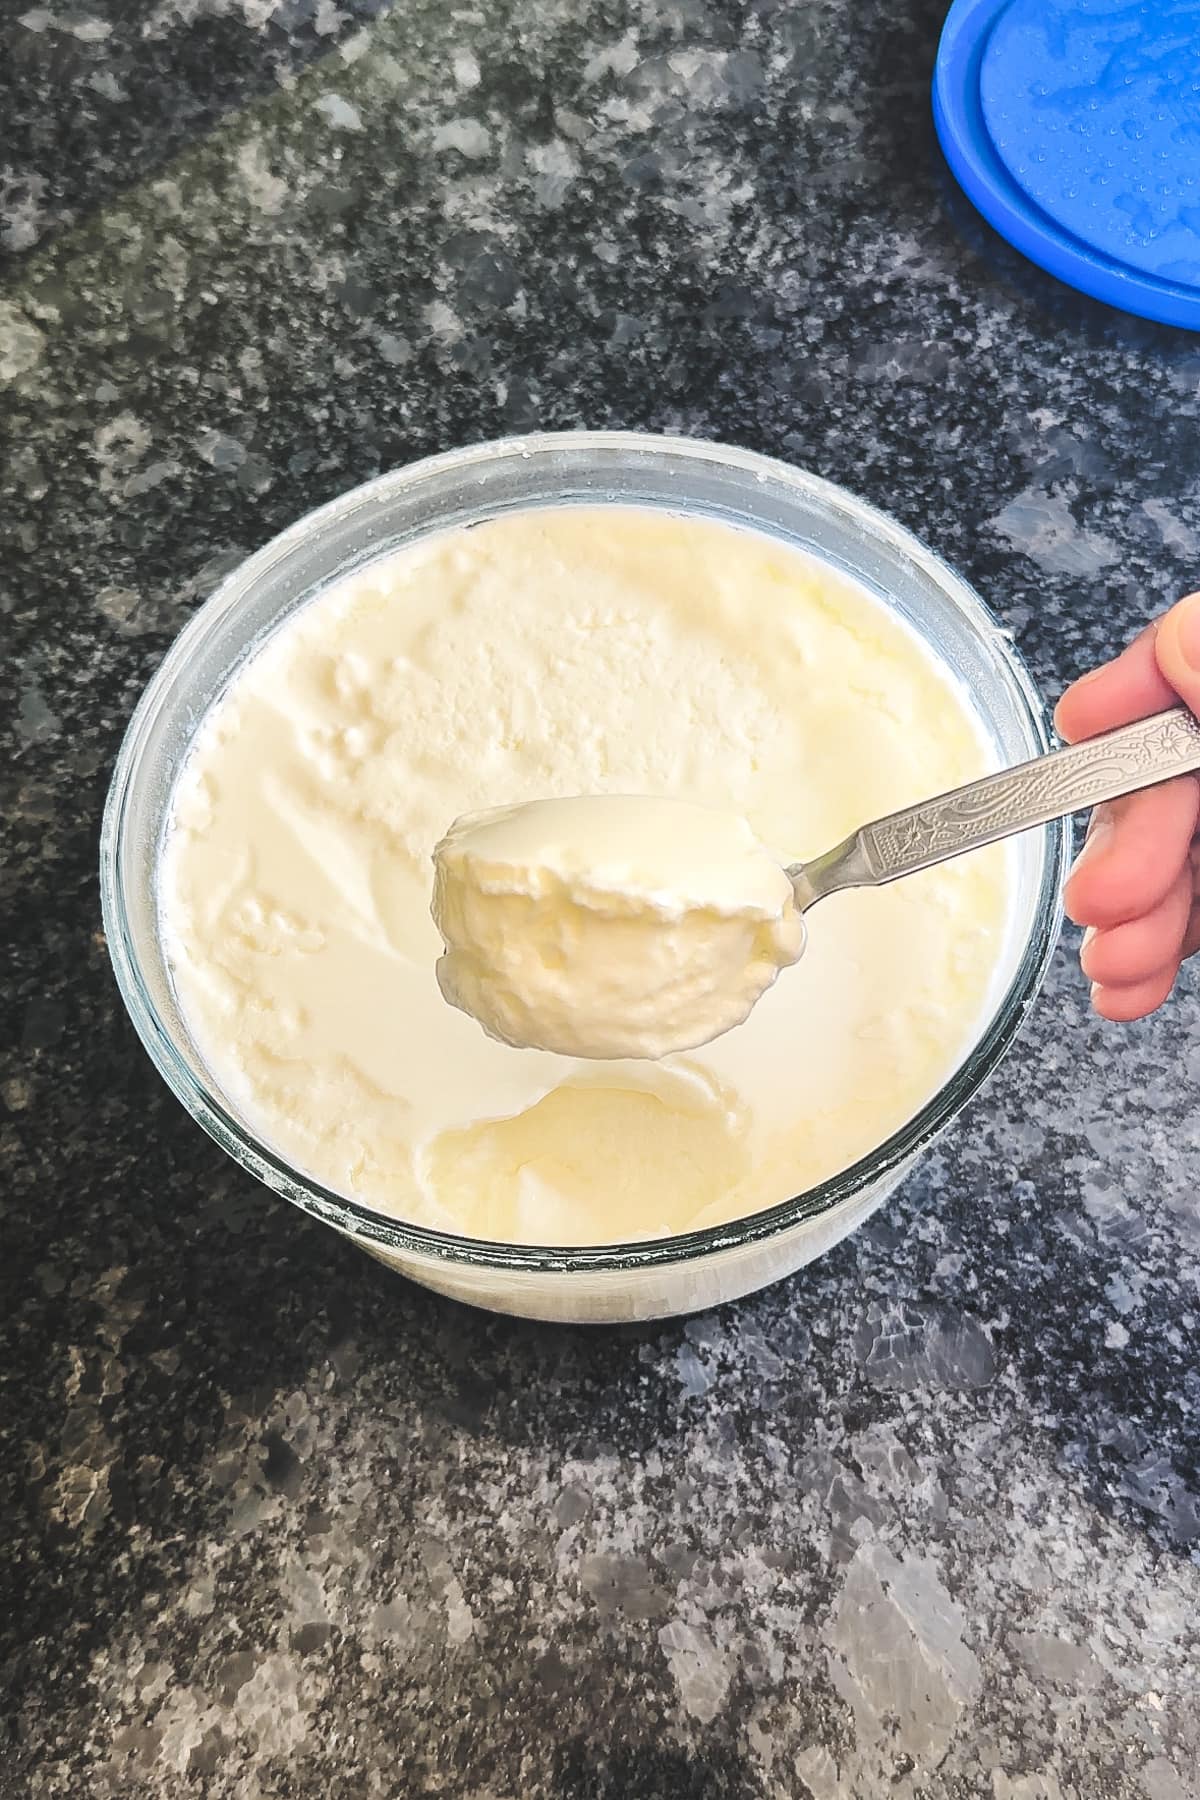
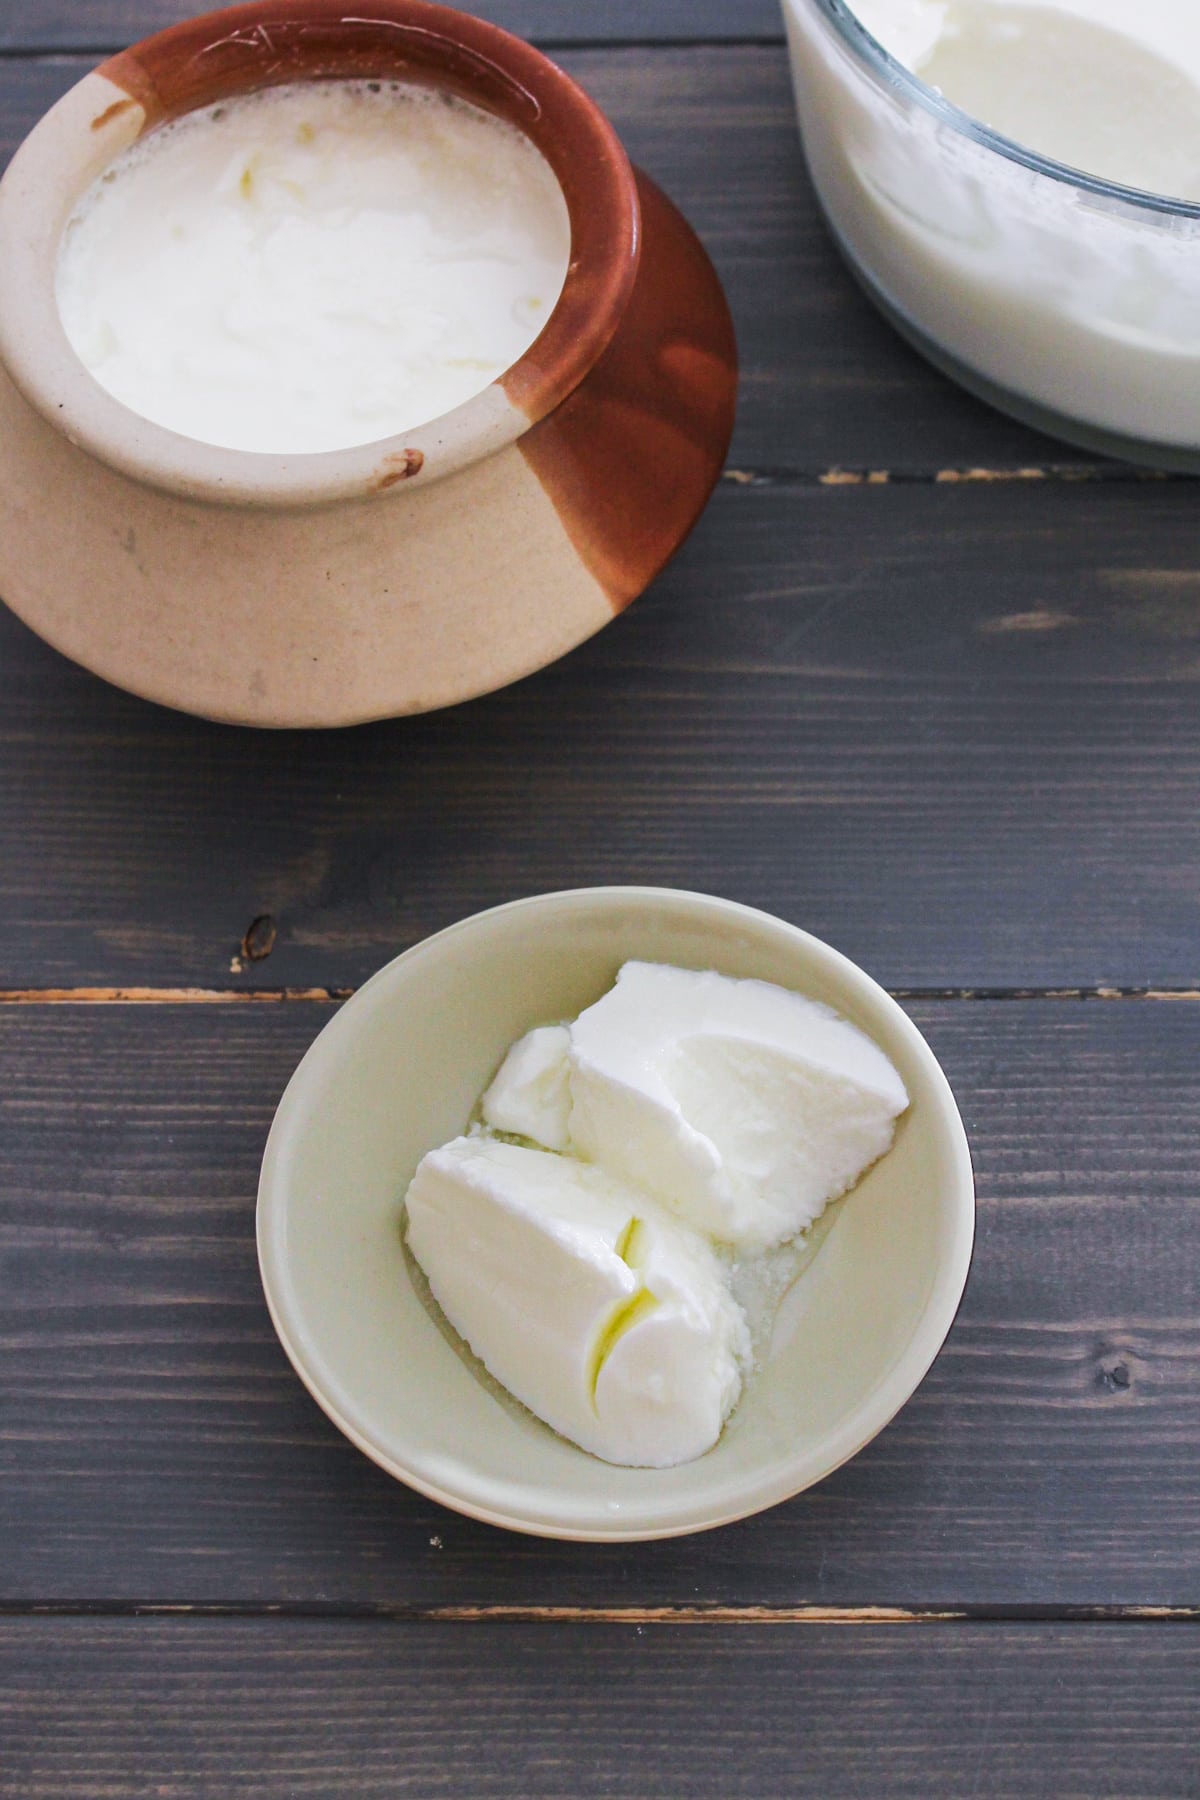
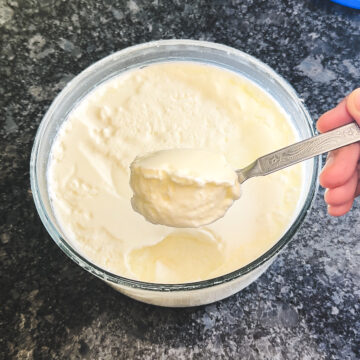
13) Once the timer is done, your curd or dahi is ready. You can enjoy it immediately, but for a firmer texture, chill it in the fridge for a couple of hours.
Expert Tips
Temperature of Milk:
- Ensure the milk cools down to lukewarm before adding the yogurt starter. This temperature is ideal for the fermentation process.
- If the milk is too hot, it can kill the active cultures in the starter, resulting in a curd that doesn’t set properly.
- If the milk cools down to room temperature, it’s still fine, especially since we’re fermenting it in the Instant Pot. The curd will still turn out good.
Room Temperature Yogurt Starter: The yogurt starter must be at room temperature before adding it to the lukewarm milk. This helps activate the cultures and promotes successful fermentation. So, remember to take the starter out of the fridge and let it sit on the counter until you’re ready to use it.
Adjust Fermentation Time: Depending on your preference for sourness, adjust the fermentation time to 8-10-12-14 hours. Longer fermentation yields tangier curd, while shorter fermentation results in a milder flavor.
Chill Before Serving: For a firmer texture and better flavor development, chill the curd (dahi) in the refrigerator for a couple of hours before serving. This allows the curd to set further.
Refresh/Change your Yogurt Starter: After using it consistently for 2-3 months, you should buy a small pack of yogurt from the store to start with a fresh yogurt starter.
- Over time, the bacterial culture in the starter can weaken or become less effective, which may affect the quality and consistency of your curd.
- If you notice any changes in the texture, flavor, or fermentation process of your yogurt, it may be a good indicator that it’s time to refresh or replace your starter culture.
Storage Instructions
- This homemade curd stays good for 7-10 days in the refrigerator. Yes, here in the USA it is ok to store for longer because of the cooler climate here.
- But in India, we usually store it for 2 days only otherwise it starts to get more sour.
Uses of Homemade Curd
- Indians usually have a bowl of dahi or raita along with their meal. It is beneficial for your gut health.
- Make beverages: Use in smoothies of Indian drinks like chaas or lassi.
- Make kadhi: e.g. Gujarati kadhi, kadhi pakora.
- Use in chaat, snacks: e.g. dahi vada, papdi chaat, samosa chaat.
- Use in recipes: e.g. rava dhokla, rava idli, besan chilla, curd sandwiches.
- Use as a marinade: e.g. paneer tikka, tandoori aloo
How To Make Curd? (Dahi) – Instant Pot
US measuring cups are used (1 cup = 240 ml)
Ingredients
- 6 cups Milk
- 2 tablespoons Plain yogurt, from the previous batch of yogurt or Store-bought
Instructions
- Fill the Instant Pot liner with about 1 inch of water and place a rack inside.
- Put a glass container (e.g., Pyrex) on the rack and fill it with milk. Optionally, cover the container with a lid.
- Close the Instant Pot lid, set the valve to sealing, and steam for 0 minutes.
- After the pin drops, carefully remove the milk container from the Instant Pot and let it cool down to lukewarm (If it cools to room temperature, that’s fine).
- While the milk cools, remove the yogurt starter from the fridge, whisk it to smooth, and let it come to room temperature.
- Once the milk reaches lukewarm temperature (check by inserting your finger or using a thermometer – about 110°F or 43°C), add the whisked yogurt starter and stir well.
- Cover the container with its lid and place it back in the Instant Pot.
- Close the Instant Pot lid, press the 'Yogurt' button, and set the timer for 10-14 hours, depending on your desired level of sourness.
- Once the timer is done, your curd or dahi is ready. You can enjoy it immediately, but for a firmer texture, chill it in the fridge for a couple of hours.
Notes
- Ensure the milk cools down to lukewarm before adding the yogurt starter. This temperature is ideal for the fermentation process.
- If the milk is too hot, it can kill the active cultures in the starter, resulting in a curd that doesn’t set properly.
- If the milk cools down to room temperature, it’s still fine, especially since we’re fermenting it in the Instant Pot. The curd will still turn out good.
Hi. I would like to make the yogurt with soy milk. What kind of starter should I be using? Is it ok to use dairy yogurt starter? Thanks a lot 🙏🏼
I am sorry, I can’t help here.
I have never tried making vegan yogurt using soy milk.
Hi,
My husband spent time in India almost 50 years ago and he has always told me that he had the best yogurt in the world there and could never find yogurt as good here in the US. So when I saw your recipe I wanted to make it right away! It turned out really delicious but I have a couple of questions.
First, the pan got scorched when heating up the milk, even though I rinsed it with water as you suggested beforehand. I kept stirring it and turning it down, but it took a very long time to boil and the bottom of the pan was still scorched.
Second, when milk is boiled it forms a skin that separates from the liquid, so I just discarded that. Is that what I should have done?
Third, my husband said the yogurt he had in India was sweeter than this but maybe that means I just cultured it for too long? I left it for 6 hours.
Thanks in advance for any help and advice!
Glad that yogurt came out good.
The pan should have thick, heavy bottom. Yes, it takes time for the milk to come to a boil. I would remove the milk from the fridge few hours earlier and let it sit on the countertop. So it comes to a room temperature. Then when I enter the kitchen for cooking, I turn on the stove. As room temperature milk boils faster, less use of gas energy and it has less chances of scorching at the bottom. When the chilled, refrigerated milk gets heated up, it gets a temperature shock and the chances of getting scorched are high.
Yes, the skin separates, that is fat content. Personally I discard that. But if my mother-in-law sees that she would be mad at me that I have wasted the good fat from the milk. She would use the hand blender and blend that back into the milk. I skip this one extra step and honestly I don’t need any extra fat😂.
Your husband is right, the yogurt in India has slight sweet flavor profile. That is because of the quality of milk. Here in the USA, we have 3.25% fat content in whole milk. Vs, in India milk has 4.5% to 6% fat content. Hence the yogurt in India is more creamy and has sweet flavor profile.