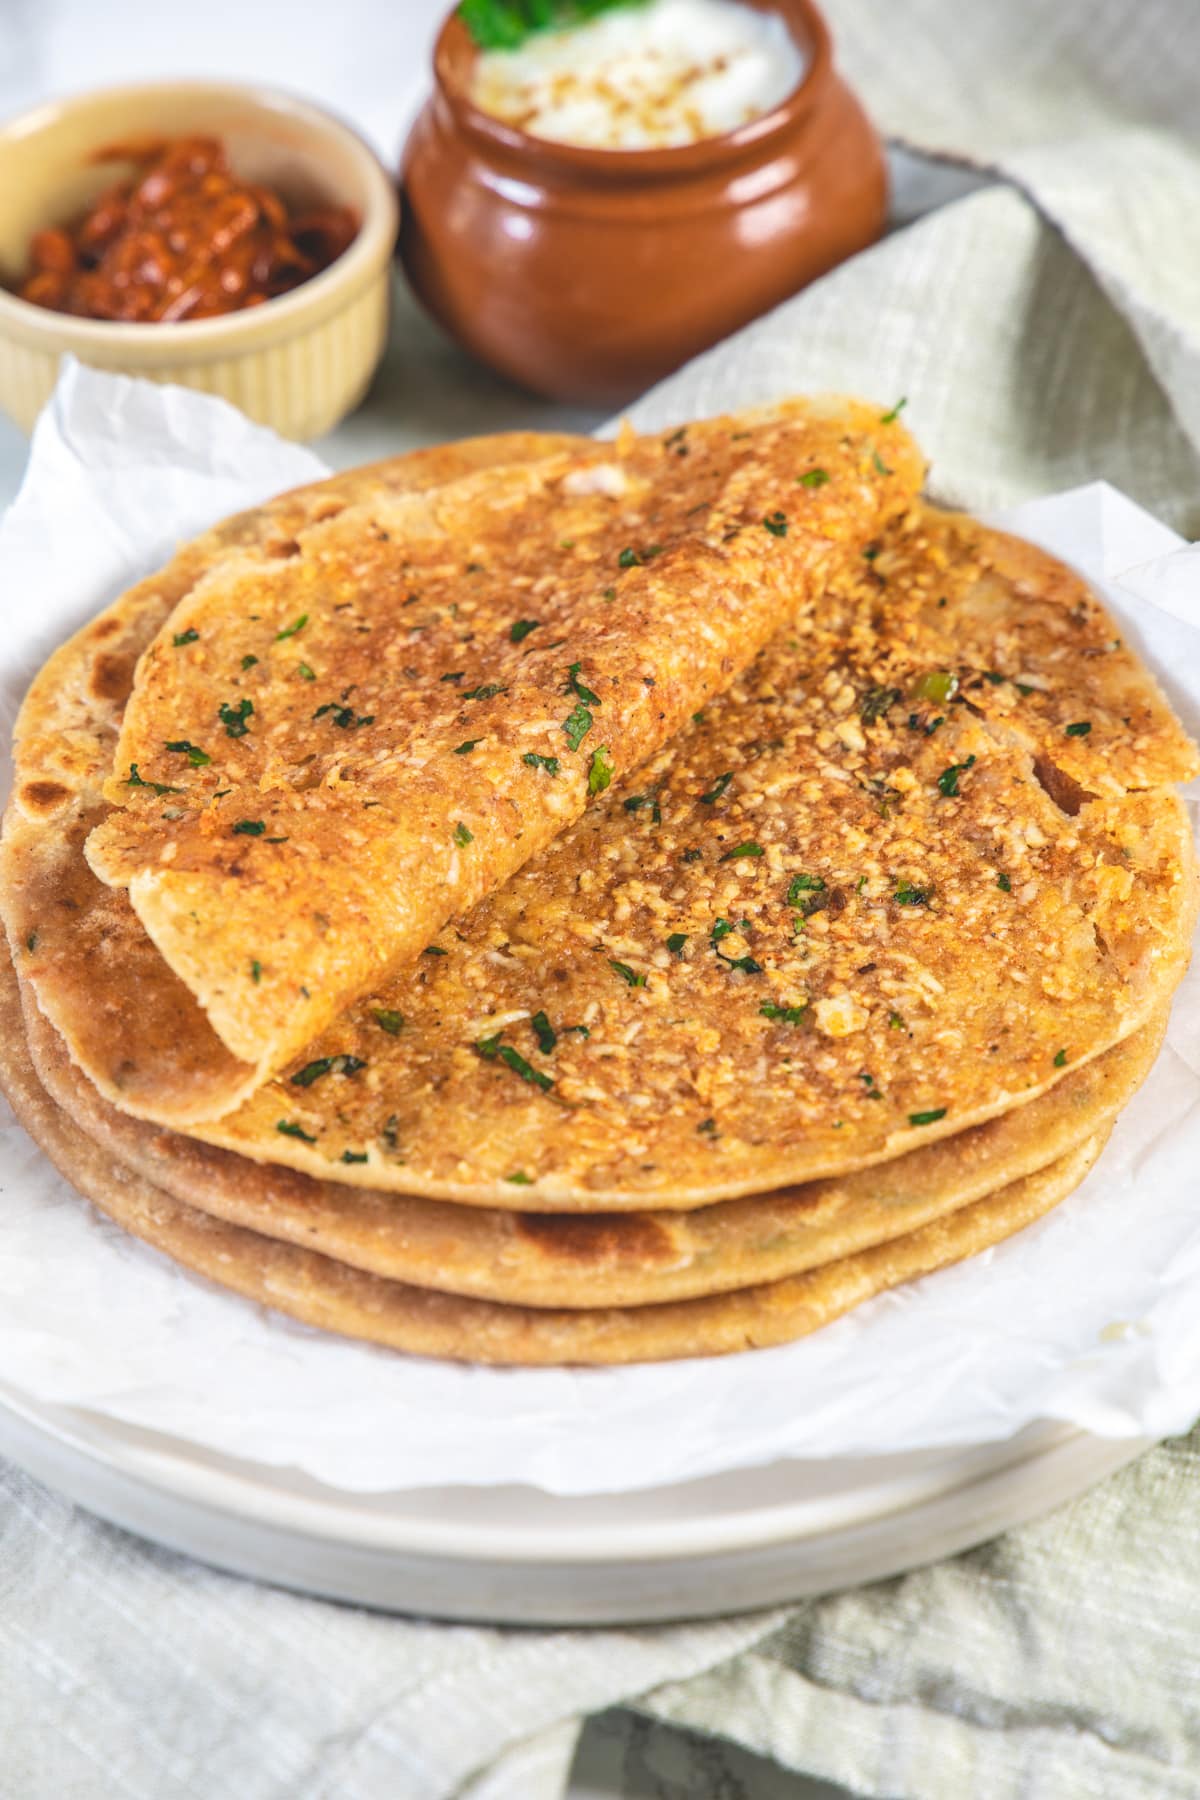
Paneer Paratha
This paneer paratha is one of the popular Indian paratha recipes that is made with the stuffing of paneer, cilantro, green chilies and a few spices.
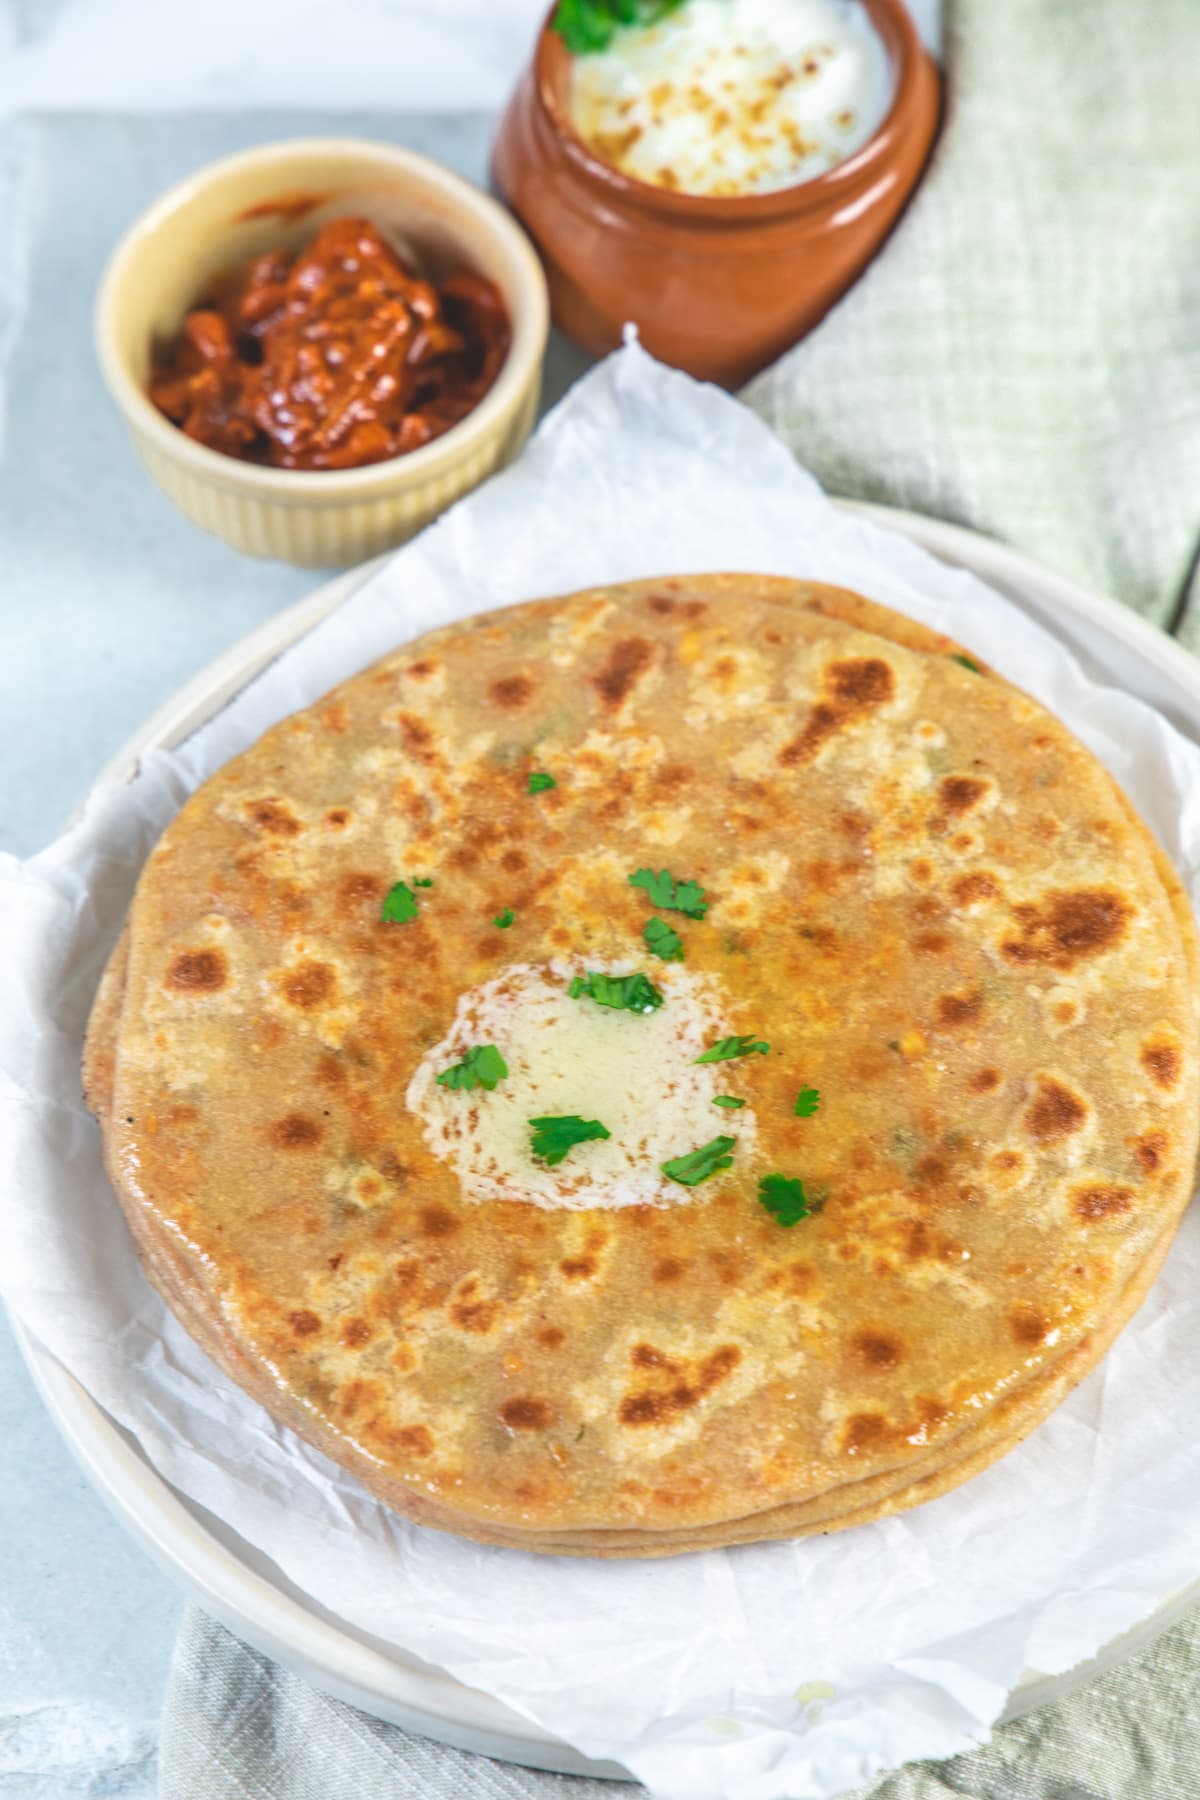
These Punjabi paneer paratha makes a filling breakfast when served with yogurt, pickle or chutney. This makes a great meal when served with lentil/bean dishes like toor dal, whole masoor dal, etc.
❤️ You’ll Love This Paneer Paratha Recipe
Easy to make:
- For the paneer stuffing, you need to mix all the ingredients and it’s ready. It’ll take under 10 minutes.
- For the dough, I have used a kitchen aid stand mixer. So while it is running to knead the dough, I prep for the stuffing. However, you can knead it by hand and that takes just 5-10 minutes.
- Lastly, roll, stuff and pan-fry the paneer paratha. Even though there are many steps but it’s super easy to make.
Customizable: The stuffing can be made as per your liking taste. Adjust the spice level if making for kids or if you prefer less spicy food in general.
Lunch box friendly: These paneer paratha can be packed into kids’ or adults’ lunch boxes. Apply a generous amount of butter or ghee on top to keep the paratha soft. Plus, it tastes super yummy with butter/ghee. Don’t forget to pack yogurt or dal in a separate container to dip your paratha.
Make ahead option: You can make the stuffing a day before and store it in the fridge. Also, you can knead the dough ahead of time and store it in the refrigerator (for up to 24 hours only). Many times I make stuffing and dough for paneer paratha the night before so I can make them quickly in the morning for breakfast or lunchbox.
🧾 Ingredient Notes
Here is the pic of the ingredients to make these delicious paneer paratha.
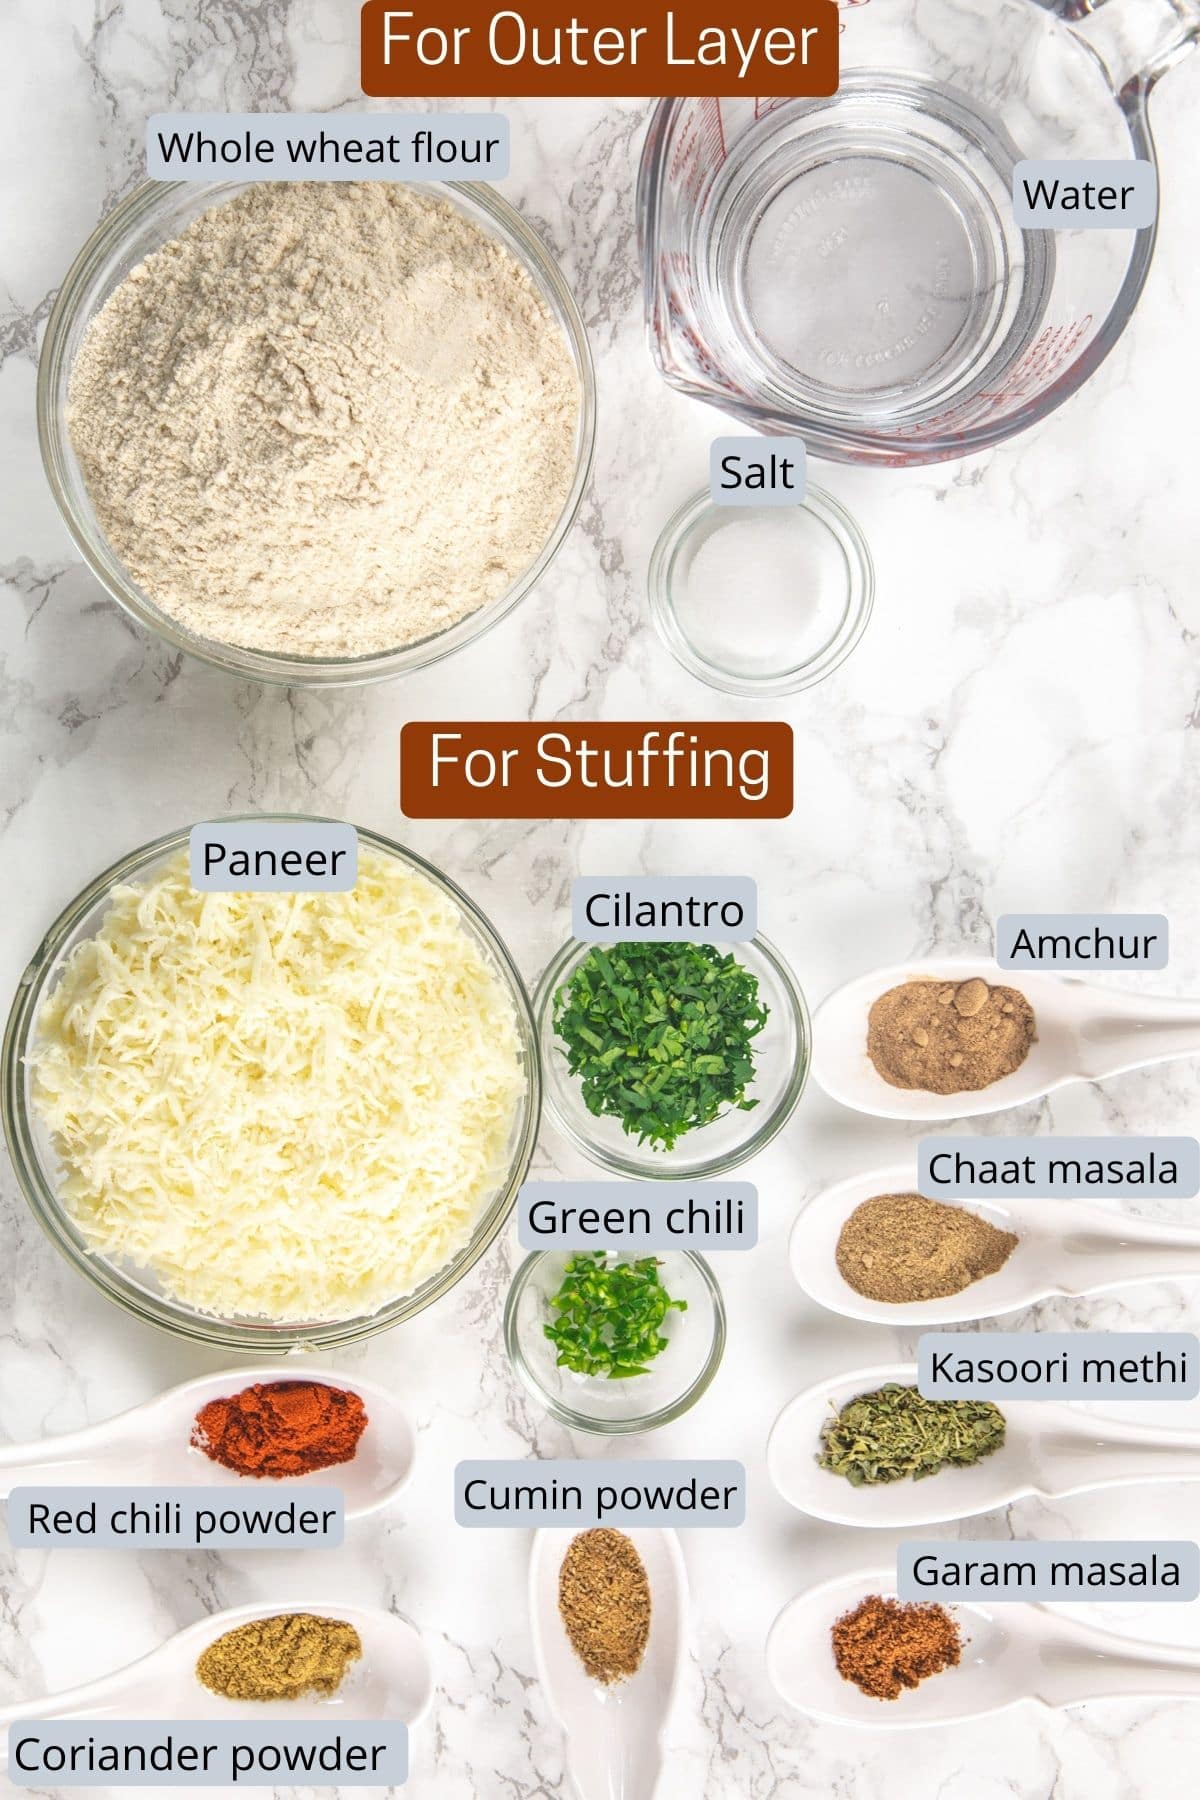
- For the outer cover: Just like any other paratha recipe, the dough is made from whole wheat flour (aka chapati atta), salt and water. Some add a couple of tablespoons of oil into the dough as well to make the outer layer more soft.
- Paneer: Here I have used store-bought paneer and used the smaller grates size from the box grater. Alternately, you can crumble the paneer. If I have made the homemade paneer then I would crumble it.
- Green chili: This can be skipped if you (or your kids) don’t like to bite into chilies.
- Spice level: If making for kids who cannot tolerate the spicy food then you can reduce/skip green chili and red chili powder.
👩🍳 How To Make Paneer Paratha? (Pics)
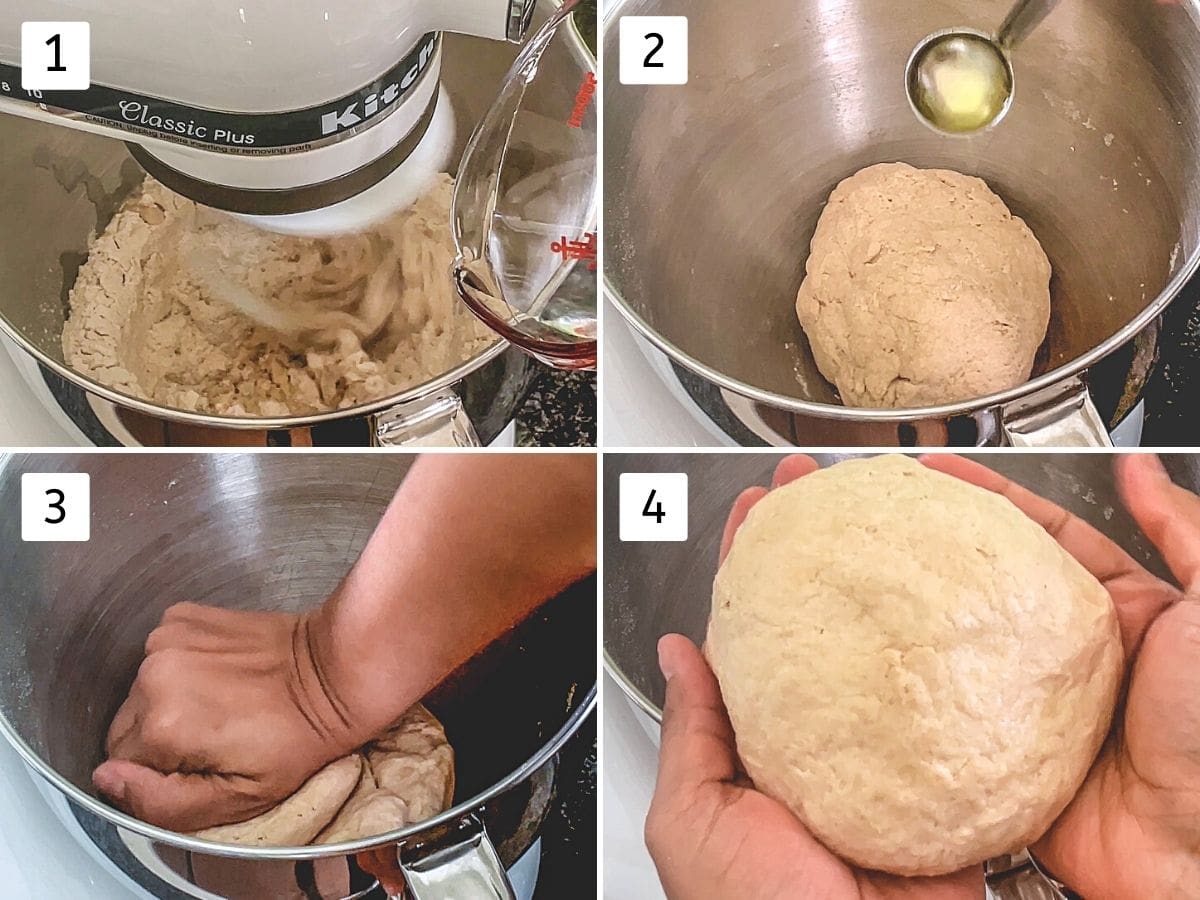
Making The Dough:
1) Take chapati atta and salt in a kitchen aid bowl. Use dough hook and add water while running it on the low.
2) Gradually increase the speed and knead it until it comes together like a dough. Drizzle a teaspoon of oil over it.
3) Knead it or smooth it out with the help of your palm.
4) Make a smooth, round dough ball, cover it with a clean kitchen towel or a plastic wrap and let it rest for 10-15 minutes.
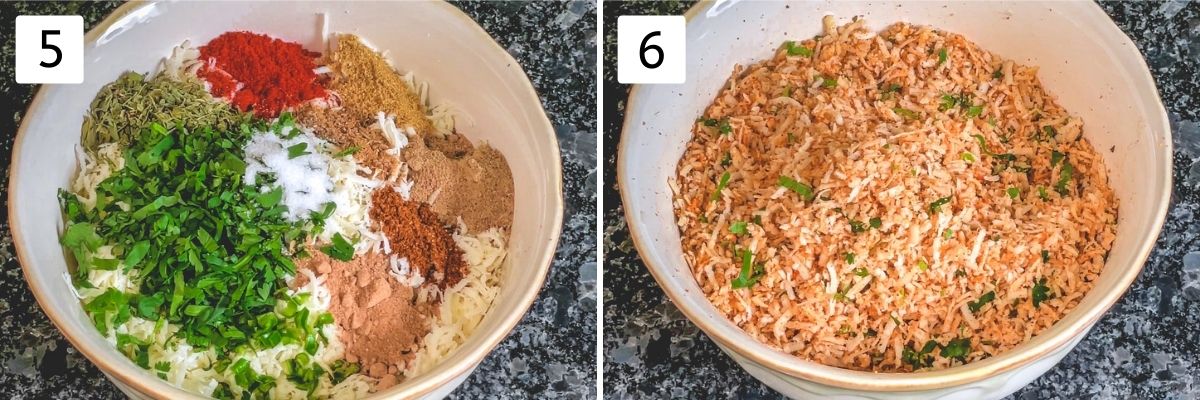
Making Stuffing:
5) Take all the stuffing ingredients to a bowl.
6) Mix until everything is well combined.
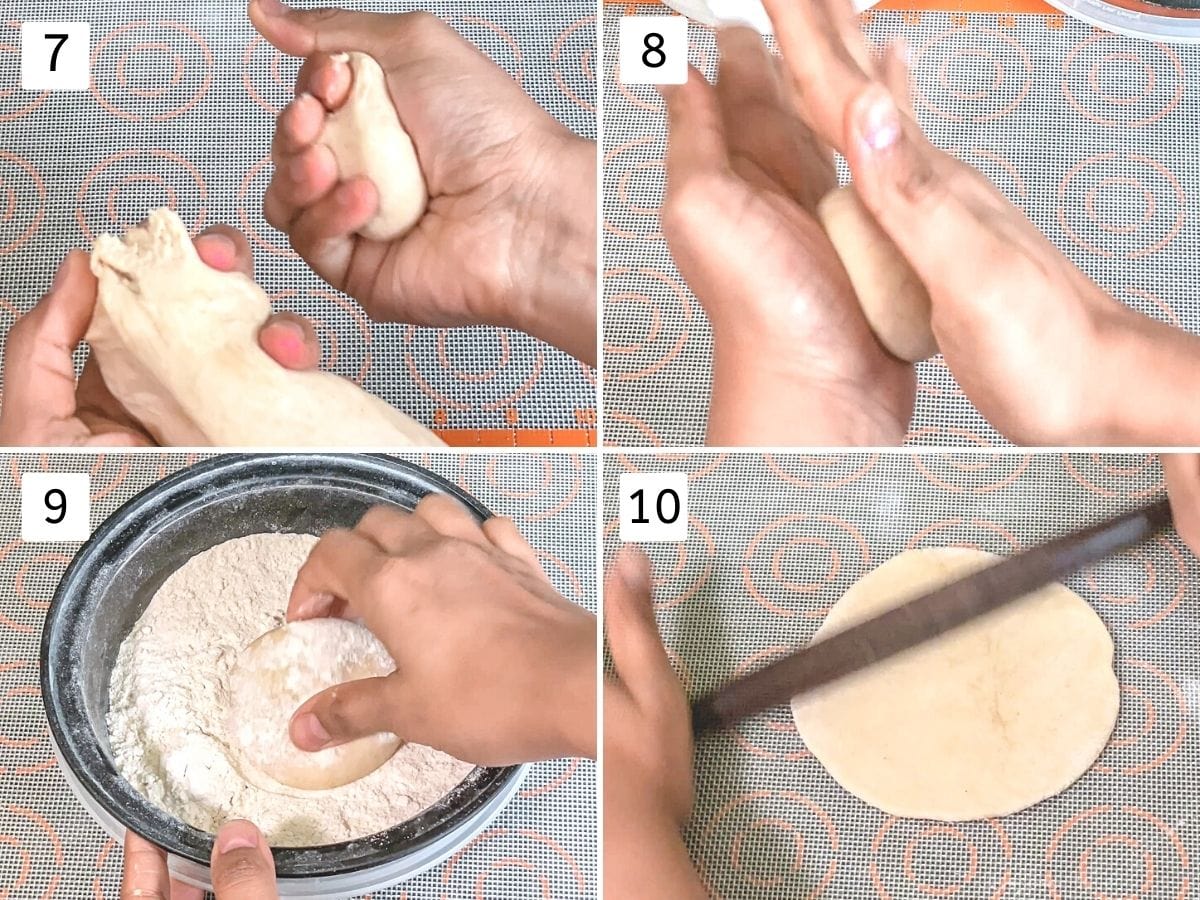
Rolling Paratha:
7) After the resting time, smooth out the dough one more time and divide it into 8 equal portions.
8) Make a smooth, round ball by rolling it between your palm and flatten it slightly to make a disc.
Before you start rolling, heat the tawa on medium-high heat.
9) Dip both sides of the flattened disc into the dry flour.
10) Start rolling it and roll it into a 4-inch diameter circle.
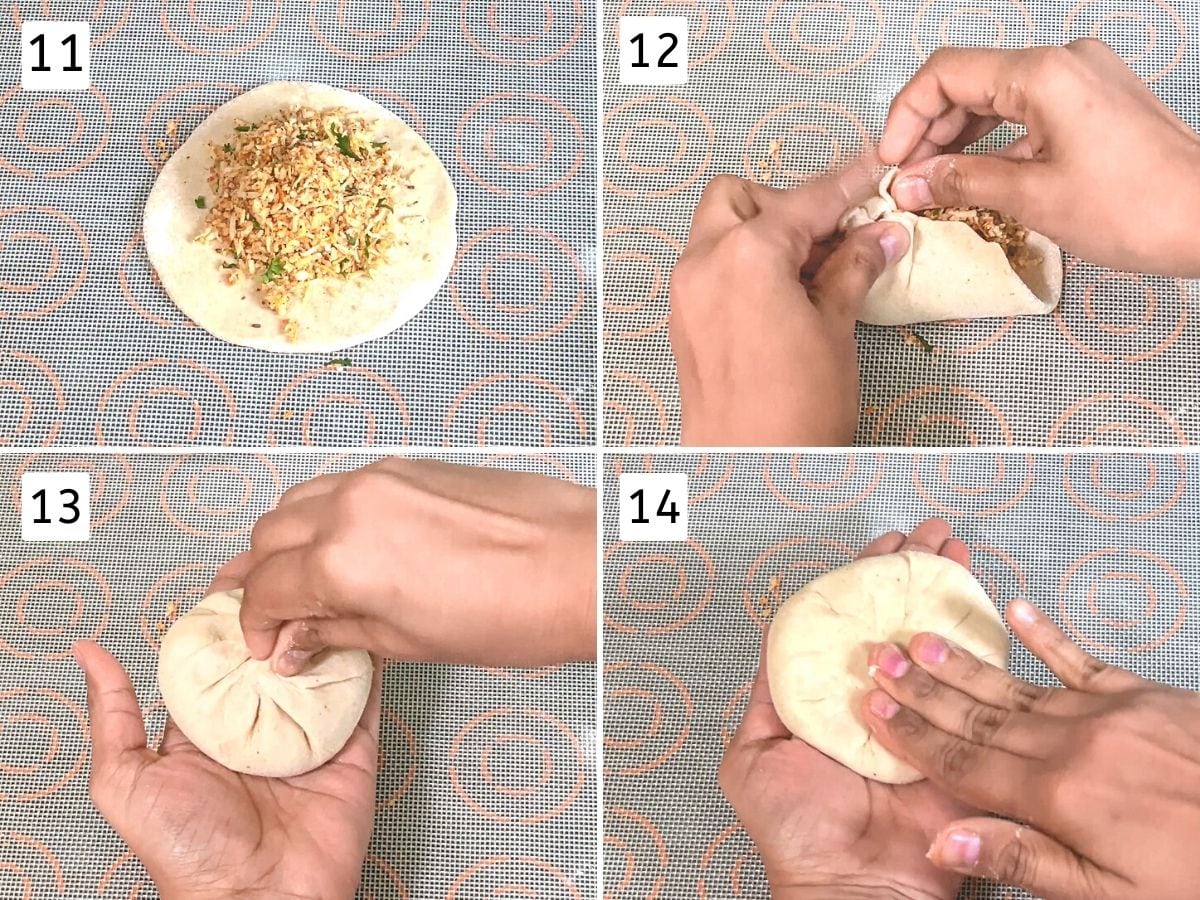
11) Place a generous amount of stuffing into the center.
12) Start gathering the edges using your hand.
13) And pinch the center to seal it properly.
14) And using the fingers press the sealed part lightly to evenly distribute the dough and make the disc a little bigger in size.
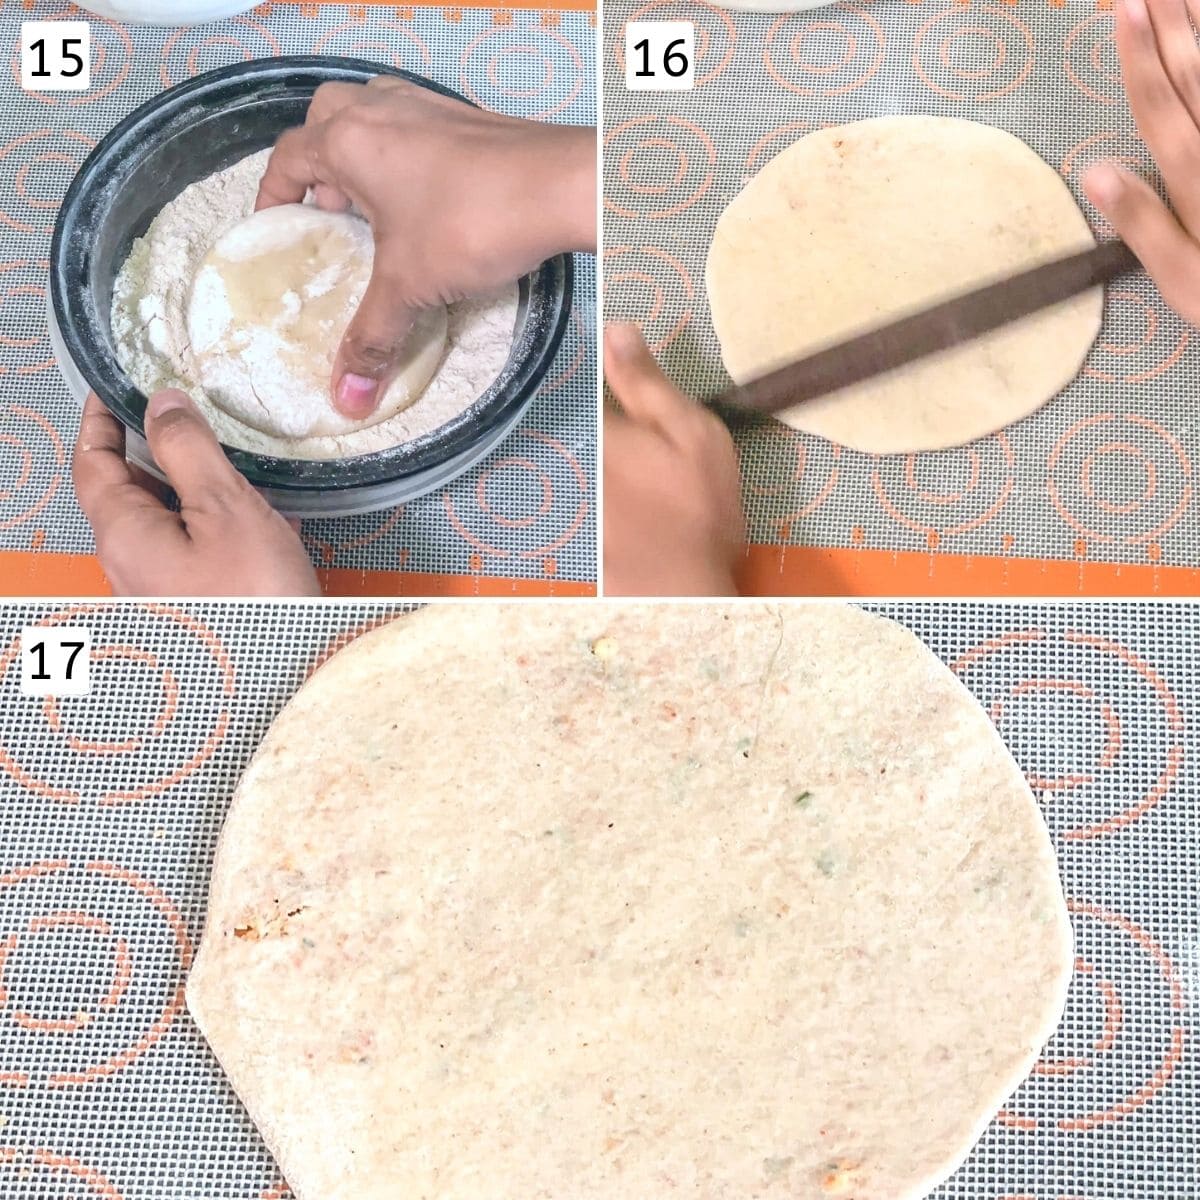
15) Again dip both sides of the disc into the dry flour.
16) And start rolling and dust with more flour if needed. Roll it by giving gentle pressure so it doesn’t break or burst open.
17) Roll into a 7 to 8 inches diameter circle of even thickness.
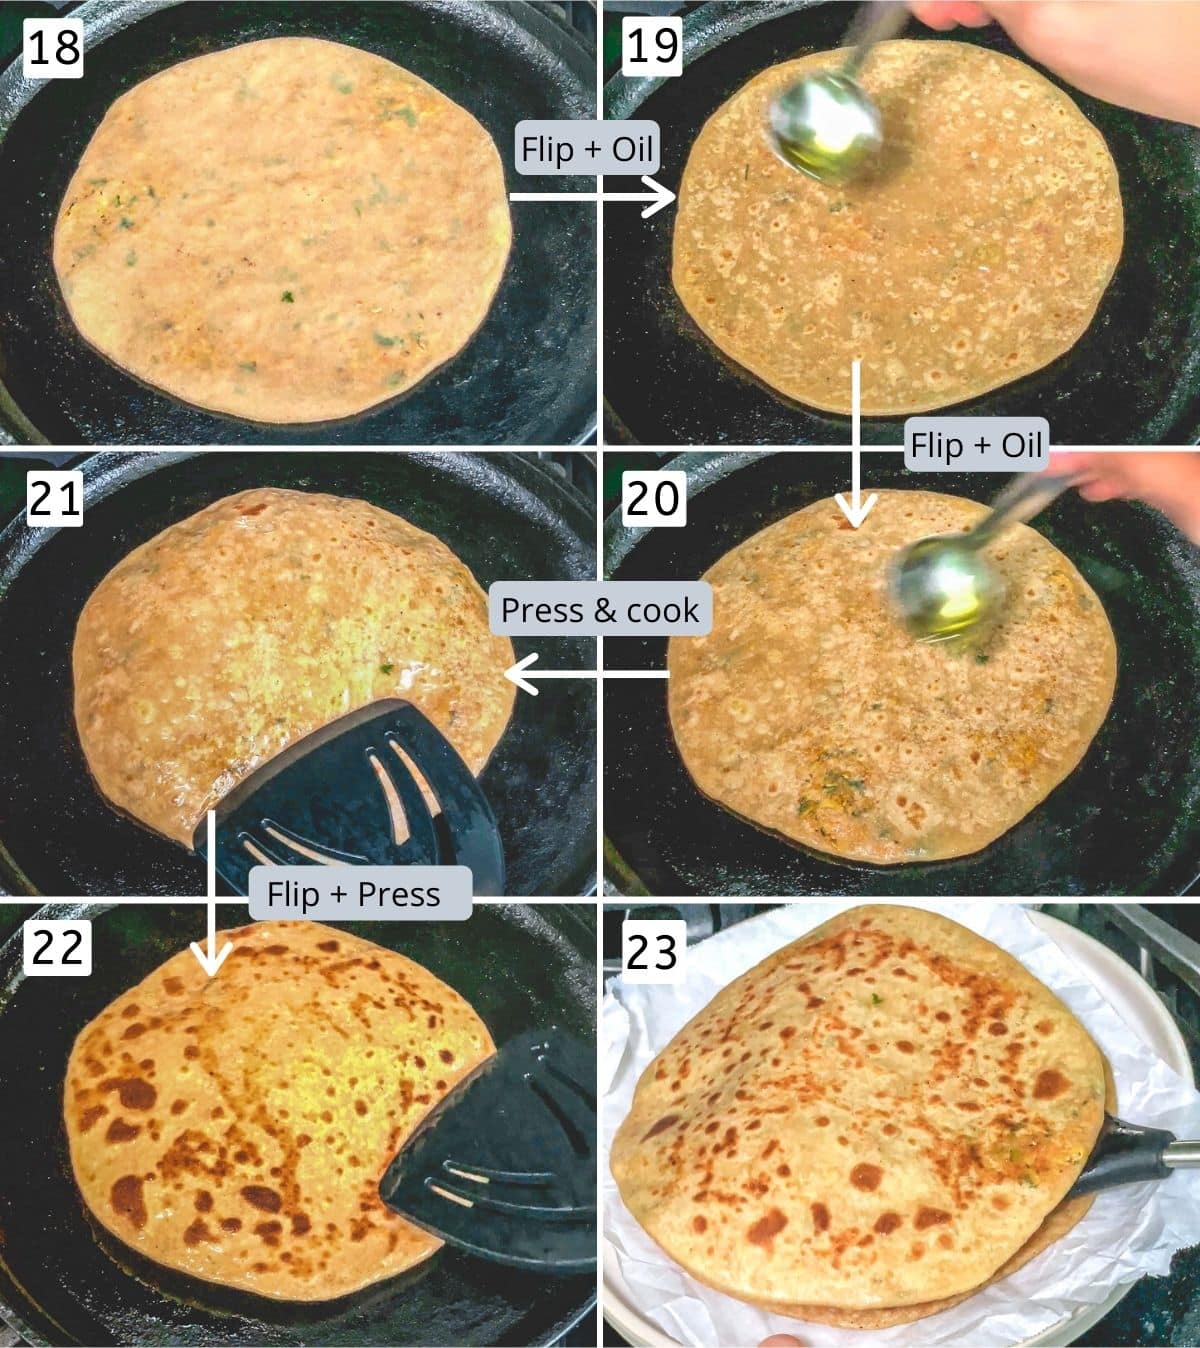
Cooking Paneer Paratha:
18) Place the rolled paneer paratha on the hot tawa. Cook for a few minutes and you’ll notice some bubbles on the surface.
19) Flip the paratha and you’ll notice a few light brown spots. Drizzle and spread about a teaspoon of oil all over the surface.
20) Flip the paratha again and apply oil again.
21) Press lightly using a spatula and cook until the bottom side has golden brown spots and no more raw doughy parts.
22) Flip and again press to cook another side.
23) Once golden brown from another side, remove it to a plate and repeat the same for the rest of the paneer paratha. Apply butter or ghee to the paratha and then serve.
💭 Expert Tips For BEST Paneer Paratha
- The dough has to be smooth and soft. If it is hard and tight then you won’t be able to roll the paratha. Similarly, if it is too soft and sticky then again it’ll be hard to roll the paratha.
- The dough ball and the size of the stuffing portions both have to be the almost same size. This way you’ll get an equal amount of dough and stuffing in every bite.
- Make sure there are no air pockets while sealing the dough after stuffing. Those air pockets will pop while rolling paratha and start to break or tear from there.
Check Out Other Paratha Recipes
Did you try this paneer paratha recipe? I’d love to hear about it! Leave a review in the comment section below.
Paneer Paratha Recipe
US measuring cups are used (1 cup = 240 ml)
Ingredients
For The Dough:
- 2 cups Whole wheat flour (Chapati atta)
- Salt, to taste
- ¾ cup Water
For The Stuffing:
- 2 cups Paneer, grated (almost 200 grams)
- 1 Green chili, finely chopped
- 2 tablespoons Cilantro or coriander leaves
- 1 ½ teaspoon Red chili powder
- 1 teaspoon Coriander powder
- 1 ½ teaspoon Roasted cumin powder
- ½ -1 teaspoon Garam masala
- 1 teaspoon Amchur powder (dried mango powder)
- 1 teaspoon Chaat masala
- 1 ½ teaspoon Kasoori methi (Dried fenugreek leaves)
- Salt, to taste
- 5-6 tablespoons Oil, for cooking paneer paratha
Instructions
- To make the dough, take chapati atta and salt in a kitchen aid bowl. Use dough hook and add water while running it on the low.
- Gradually increase the speed and knead it until it comes together like a dough.
- Drizzle a teaspoon of oil over it. Knead it or smooth it out with the help of your palm.
- Cover it with a clean kitchen towel or a plastic wrap and let it rest for 10-15 minutes.
- To make stuffing, take all the stuffing ingredients (grated paneer, chopped cilantro, green chili, salt, red chili powder, roasted cumin powder, coriander powder, garam masala, kasoori methi, chaat masala and amchur) in a bowl. Mix until everything is well combined.
- After the resting time, smooth out the dough one more time and divide it into 8 equal portions.
- Make a smooth, round ball by rolling it between your palm and flattening it slightly to make a disc.
- Before you start rolling, heat the tawa on medium-high heat.
- Dip both sides of the flattened disc into the dry flour.
- Start rolling it and roll it into a 4-inch diameter circle.
- Place a generous amount of stuffing into the center.
- Start gathering the edges using your hand. And pinch the center to seal it properly. And using the fingers press the sealed part lightly to evenly distribute the dough and make the disc a little bigger in size.
- Again dip both sides of the disc into the dry flour.
- And start rolling and dust with more flour if needed. Roll it by giving gentle pressure so it doesn’t break or burst open. Roll into a 7 to 8 inches diameter circle of even thickness.
- Place the rolled paneer paratha on the hot tawa. Cook for a few minutes and you’ll notice some bubbles on the surface.
- Flip the paratha and you’ll notice a few light brown spots. Drizzle and spread about a teaspoon of oil all over the surface.
- Flip the paratha again and apply oil again.
- Press lightly using a spatula and cook until the bottom side has golden brown spots and no more raw doughy parts.
- Flip and again press to cook another side.
- Once golden brown from another side, remove it to a plate and repeat the same for the rest of the paneer paratha.
Notes
- The dough has to be smooth and soft. If it is hard and tight then you won’t be able to roll the paratha. Similarly, if it is too soft and sticky then again it’ll be hard to roll the paratha.
- The dough ball and the size of the stuffing portions both have to be the almost same size. This way you’ll get an equal amount of dough and stuffing in every bite.
- Make sure there are no air pockets while sealing the dough after stuffing. Those air pockets will pop while rolling paratha and start to break or tear from there.
- Make ahead option: You can make the stuffing a day before and store it in the fridge. Also, you can knead the dough ahead of time and store it in the refrigerator (for up to 24 hours only).
Nice recipe…….
Thank you Pari
I tried making this tonight, but because of my daughter’s food allergies I substituted buckwheat and millet flours instead of using whole wheat flour (which I believe is the same thing as the atta). I had some difficulty with rolling out the dough, especially after the filling was added. I still managed to form something close to your pictures, and it tasted very good, but I think there could be a better way. Do you have any suggestions for a gluten free substitute for the dough? One that might work a little better? My daughter enjoyed this very much, although I cut down a little on the chili so it would not be too spicy-hot for her. Thanks again, Kanan, for another delicious meal my severely food allergic child can eat. Your blog has been a real blessing for us.
the flour you used are gluten free, so as you roll, it will fall apart and won’t give the smooth edges.
To make the gluten paratha or roti, here is the recipe for basic flour mixture:
1 cup Buckwheat flour (kuttu ka atta), 1 cup Sorghum flour (jawar atta), 3/4 cup Corn starch (corn flour), 1 teaspoon of xanthan gum and salt
Corn starch is for binding (use tapioca starch if corn is the issue). xanthan gum provides the elasticity which resembles the gluten
Using above recipe, you will able to make paratha. But still you will have little hard time while rolling after you stuff it. Of course it wont be same as whole wheat paratha. Hope this helps.
Thank you for your help!