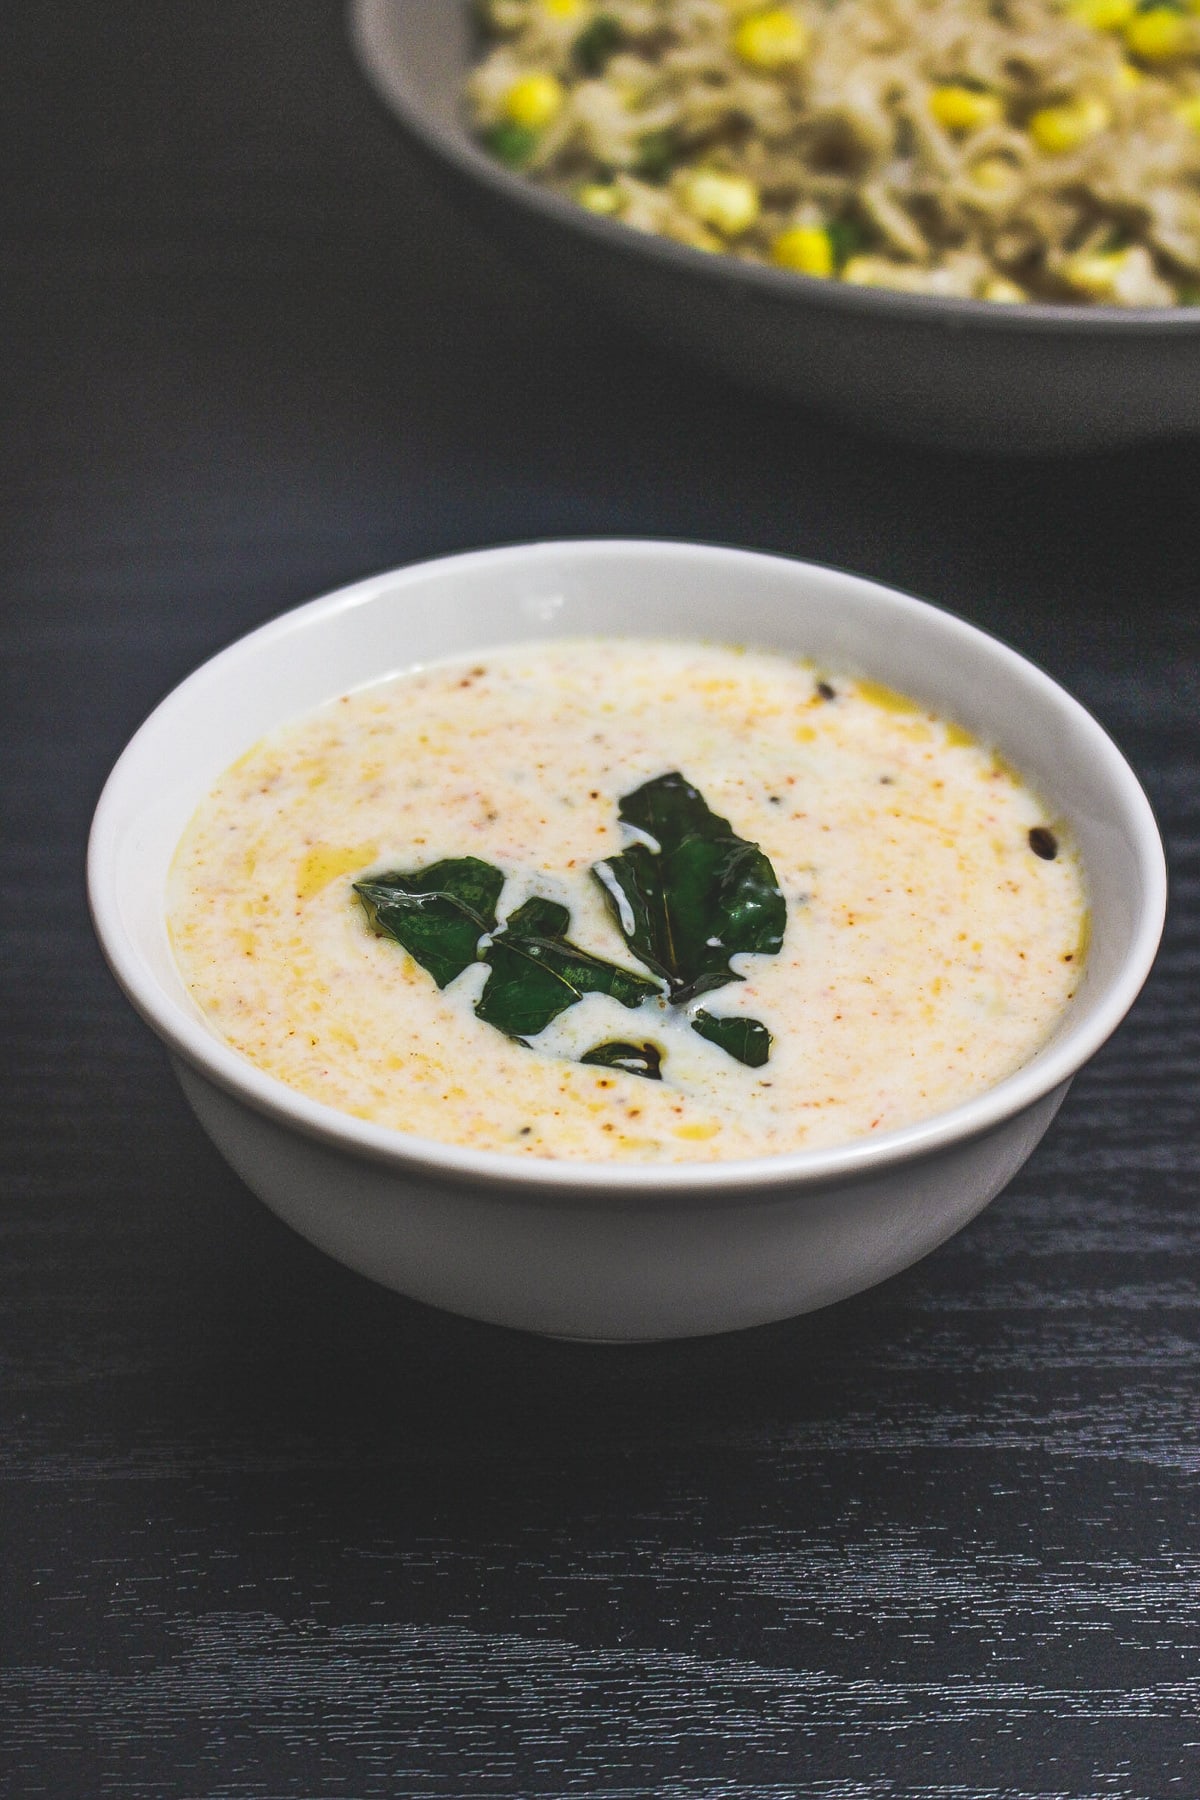
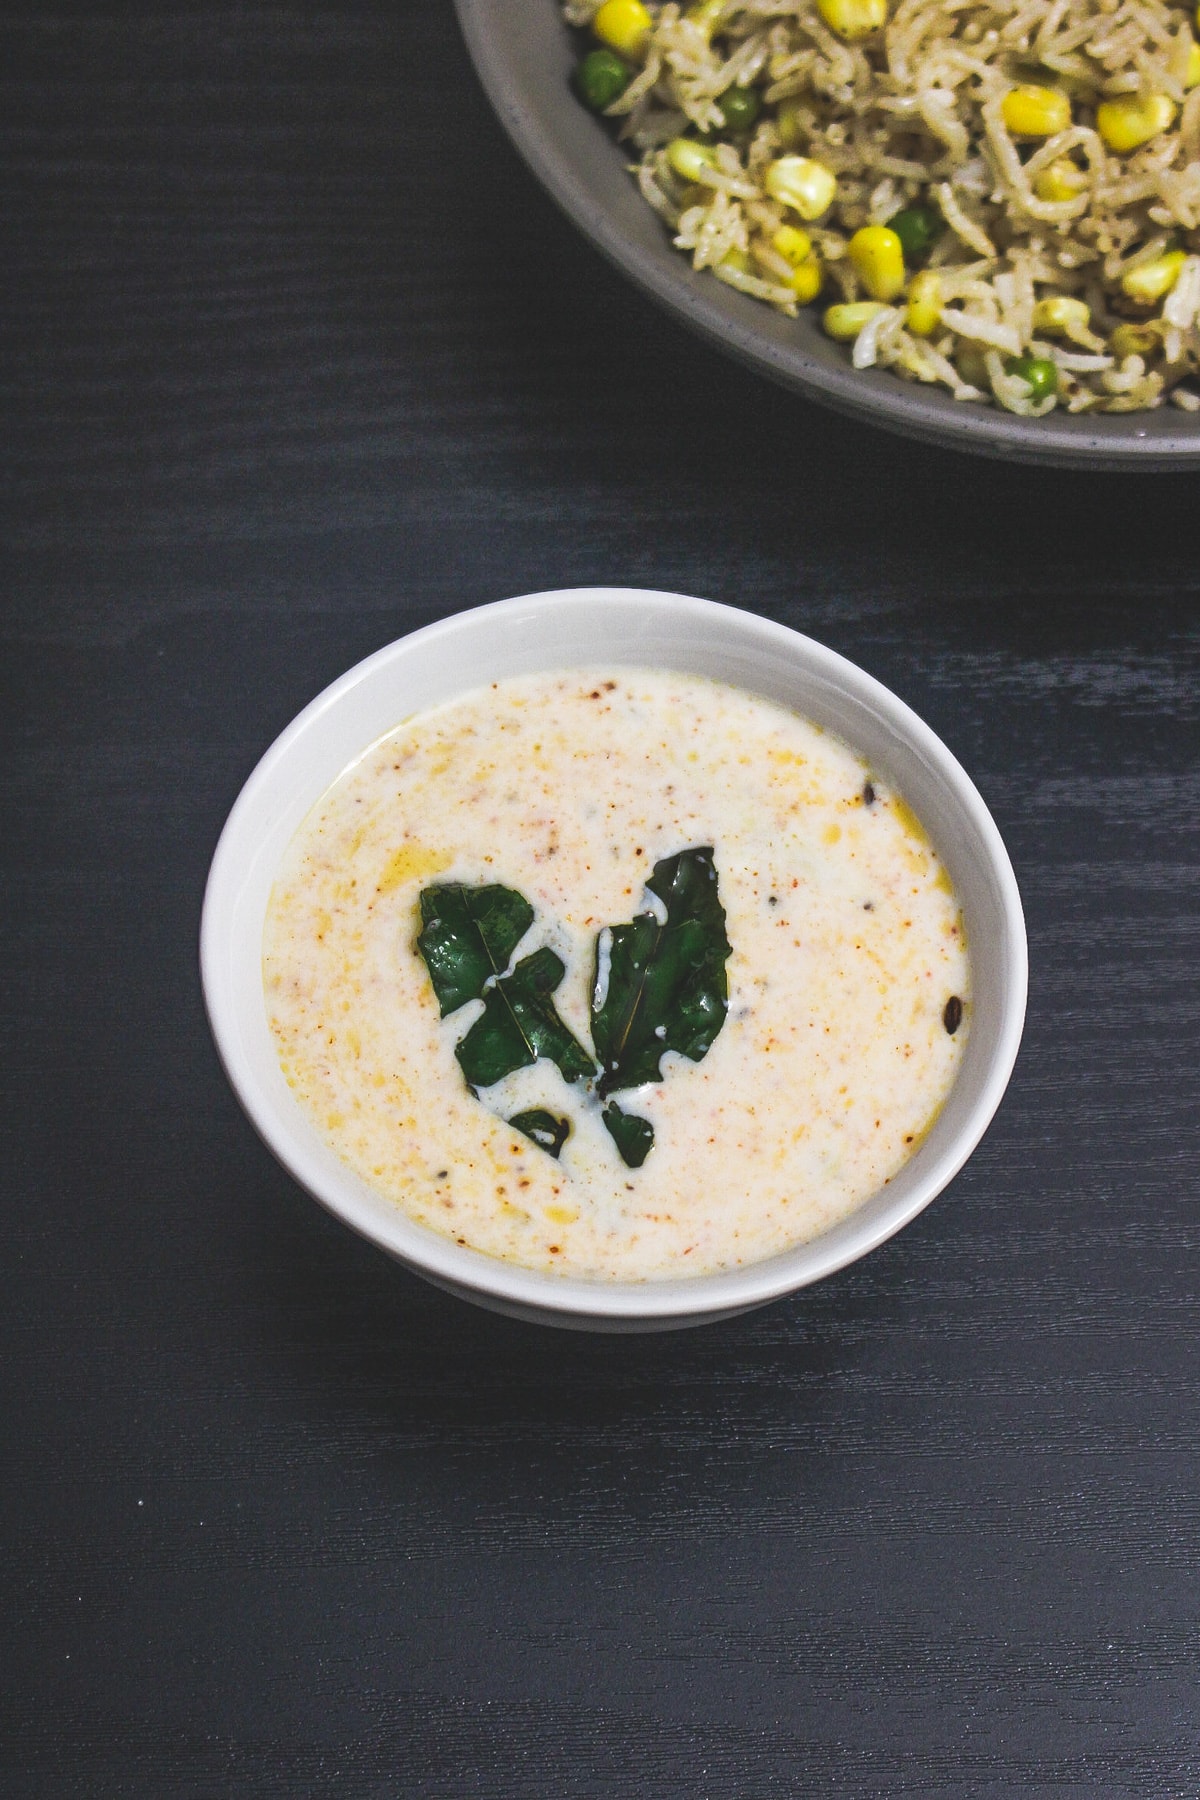
Plain Raita Recipe (Tadka Raita)
This is a super simple, plain raita recipe with a twist—a flavorful tadka (tempering) added on top! It’s creamy, refreshing, and takes just 5 minutes to make. A perfect cooling side dish to balance out any spicy Indian meal. Whether you’re pairing it with biryani, paratha, or dal rice, this tadka raita adds that extra zing!
You’ll Love This Plain Raita Recipe
Ingredient Notes For Tadka Raita
You’ll need just 8 ingredients and 5 minutes to make this refreshing, flavorful plain raita (also known as tadka raita).
How To Make Plain Raita With Tadka? (& Tips)
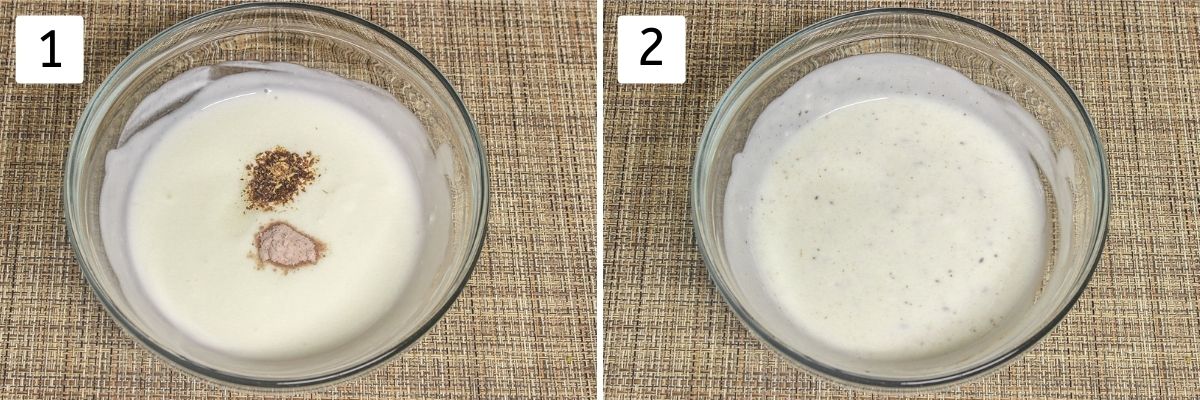
- Take chilled yogurt in a mixing bowl. Add salt, black salt, and roasted cumin powder.
- Using a whisk, beat until the yogurt is smooth and everything is well mixed.
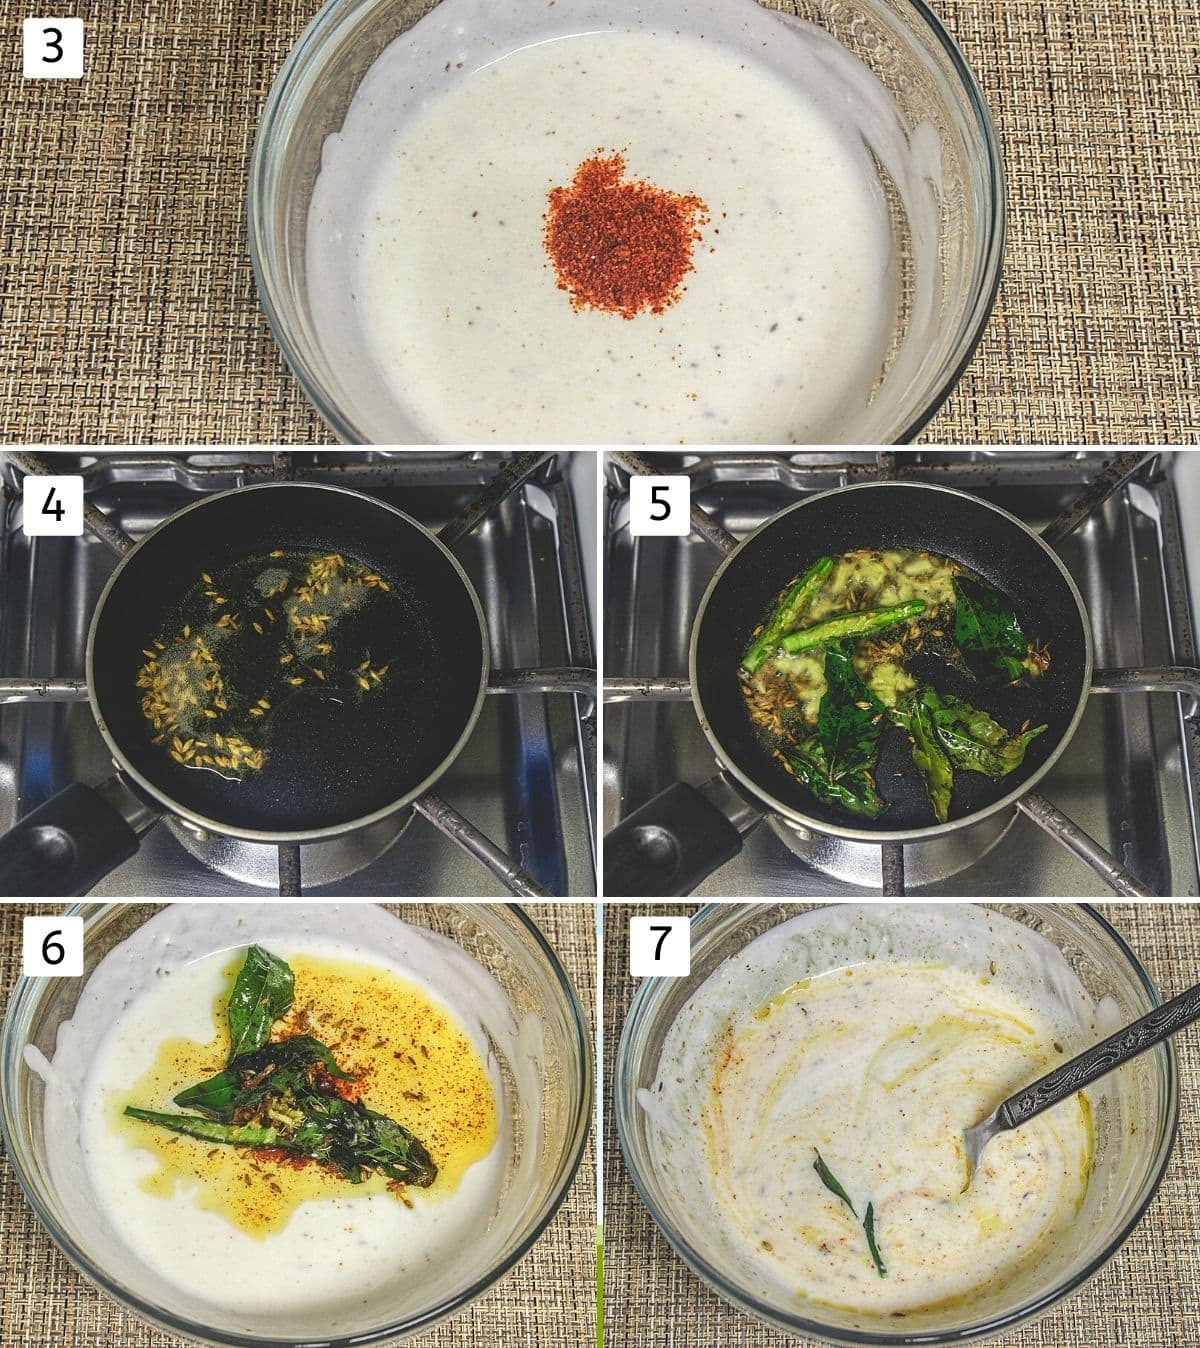
- Sprinkle red chili powder right in the center. Do not mix it yet. This step is key to bringing out a smoky flavor with the hot tadka.
- Make the tempering (tadka): Heat oil in a small tadka pan. Once hot, add cumin seeds and let them sizzle.
- Add ginger, slit green chili, and curry leaves. Sauté for 40–50 seconds or until the raw smell of ginger disappears.
- Carefully pour the hot tempering directly over the chili powder in the raita.
Why this way? Pouring hot oil on chili powder helps release its color and aroma without burning it, adding a slightly smoky depth. If you put chili powder in the hot tadka pan, it may burn and cause sneezing!
- Gently mix the tadka into the raita.
Raita tastes best when served chilled. Either use cold yogurt or refrigerate the raita after making it.
What To Serve With Tadka Raita?
- Serve this plain raita as a side dish with your rice dishes e.g. veg pulao, paneer biryani, tawa pulao, methi rice, etc.
- It can be served with any stuffed paratha, thepla, etc.
- It can be served along with your Indian meal that consists of dal, rice, sabzi, roti.
Check Out Other Raita Recipes
Did you try this plain raita recipe? I’d love to hear about it! Click here to leave a review.
Plain Raita Recipe (Tadka Raita)

US measuring cups are used (1 cup = 240 ml)
Ingredients
For Raita:
- 1 ½ cups Plain yogurt
- ½ teaspoon Roasted cumin powder
- Salt, to taste
- ½ teaspoon Black salt (Kala namak)
- ¼ teaspoon Red chili powder
For Tempering:
- 2 teaspoons Oil
- ½ teaspoons Cumin seeds
- ¼ teaspoon Ginger, minced or finely chopped, OPTIONAL
- 1 Green chili, slit
- 4-5 Curry leaves
Instructions
- Take chilled yogurt in a mixing bowl. Add salt, black salt, and roasted cumin powder.
- Using a whisk, beat until the yogurt is smooth and everything is well mixed.💡 Tip: Raita tastes best when served chilled. Either use cold yogurt or refrigerate the raita after making it.
- Sprinkle red chili powder right in the center. Do not mix it yet. This step is key to bringing out a smoky flavor with the hot tadka.
- Make the tempering (tadka): Heat oil in a small tadka pan. Once hot, add cumin seeds and let them sizzle.
- Add ginger, slit green chili, and curry leaves. Sauté for 40–50 seconds or until the raw smell of ginger disappears.
- Carefully pour the hot tempering directly over the chili powder in the raita.💡Why this way? Pouring hot oil on chili powder helps release its color and aroma without burning it, adding a slightly smoky depth. If you put chili powder in the hot tadka pan, it may burn and cause sneezing!
- Gently mix the tadka into the raita. It’s now ready to serve.💡 Serving later? Chill this plain raita in the refrigerator until ready to eat.
Hi Kanan, I had a suggestion. It would be very helpful if you include a weekly menu planner/ simple dinner ideas kind of
Action in your blog. I think a lot of folks are in the lookout for such ideas for busy weekdays and would help a lot. Might be something you can consider for the blog. Take care!!
Thank you Anjana for your suggestion.
I will see if I can manage to do meal plan kind of posts.
The thing is I usually do not plan for a week. I tried doing this before and sadly I failed.
I like to make the recipes as per what I have in my fridge and what suits based on the time that day I have.
If I plan ahead of time and that day I might not have much time or energy to cook that planned dish.
Also my husband gets unexpected travel for his work and since I am working remotely, I usually go with him. So meal plans never worked for me.
If I am not good at it, I am not confident about sharing those.
Thank you so much for an award.