Simple, Homemade Ghee Recipe. It is very fragrant and has a rich nutty taste. It is an integral part of Indian cooking. You will learn today how to make ghee from butter. YES, just one ingredient - BUTTER!!
You will also learn all the tips for success. Keep reading I will show you the different ways to use it!
Jump to:
What Is Ghee?
Ghee is a form of clarified butter made by simmering butter until all the water is evaporated and milk solids are allowed to caramelize in the butterfat. That pure fat is strained out and is known as ghee.
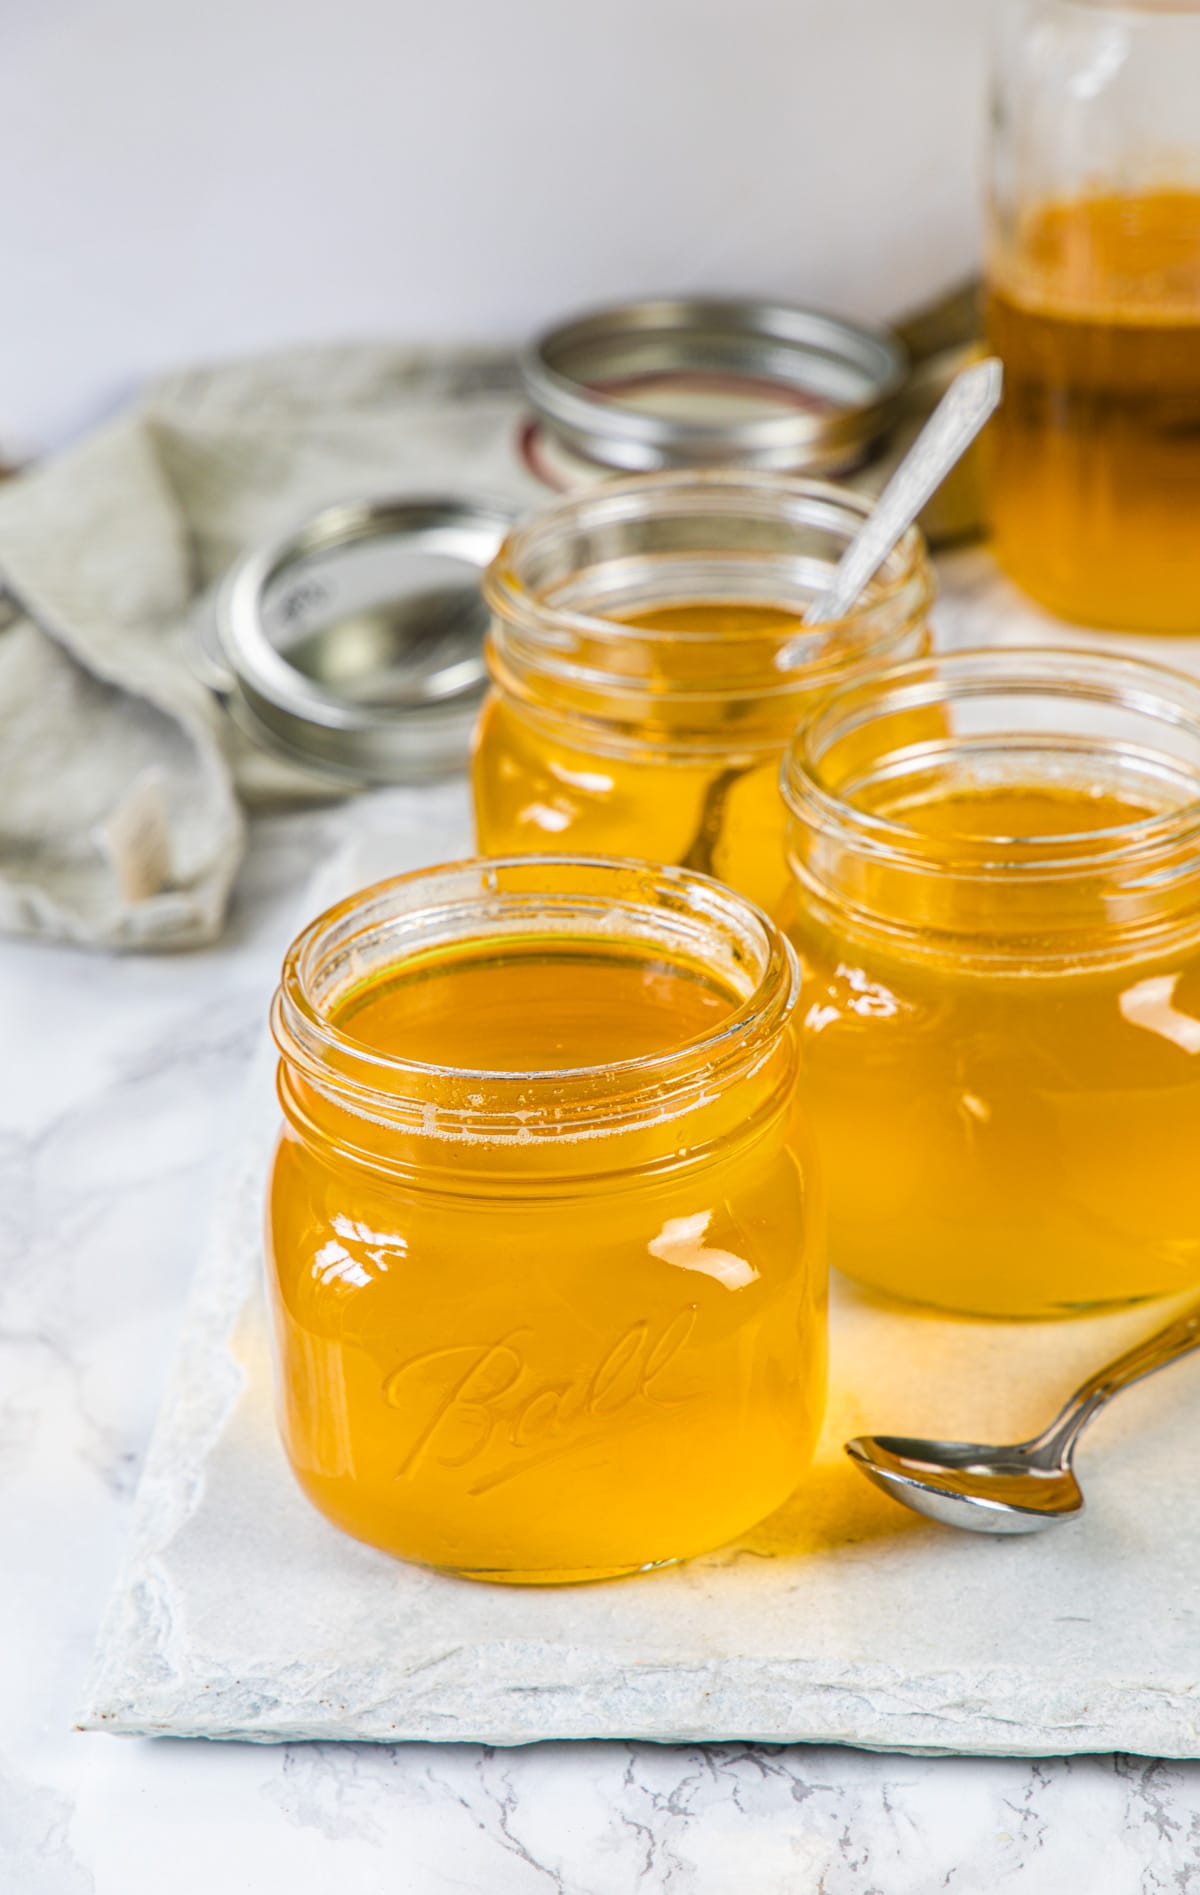
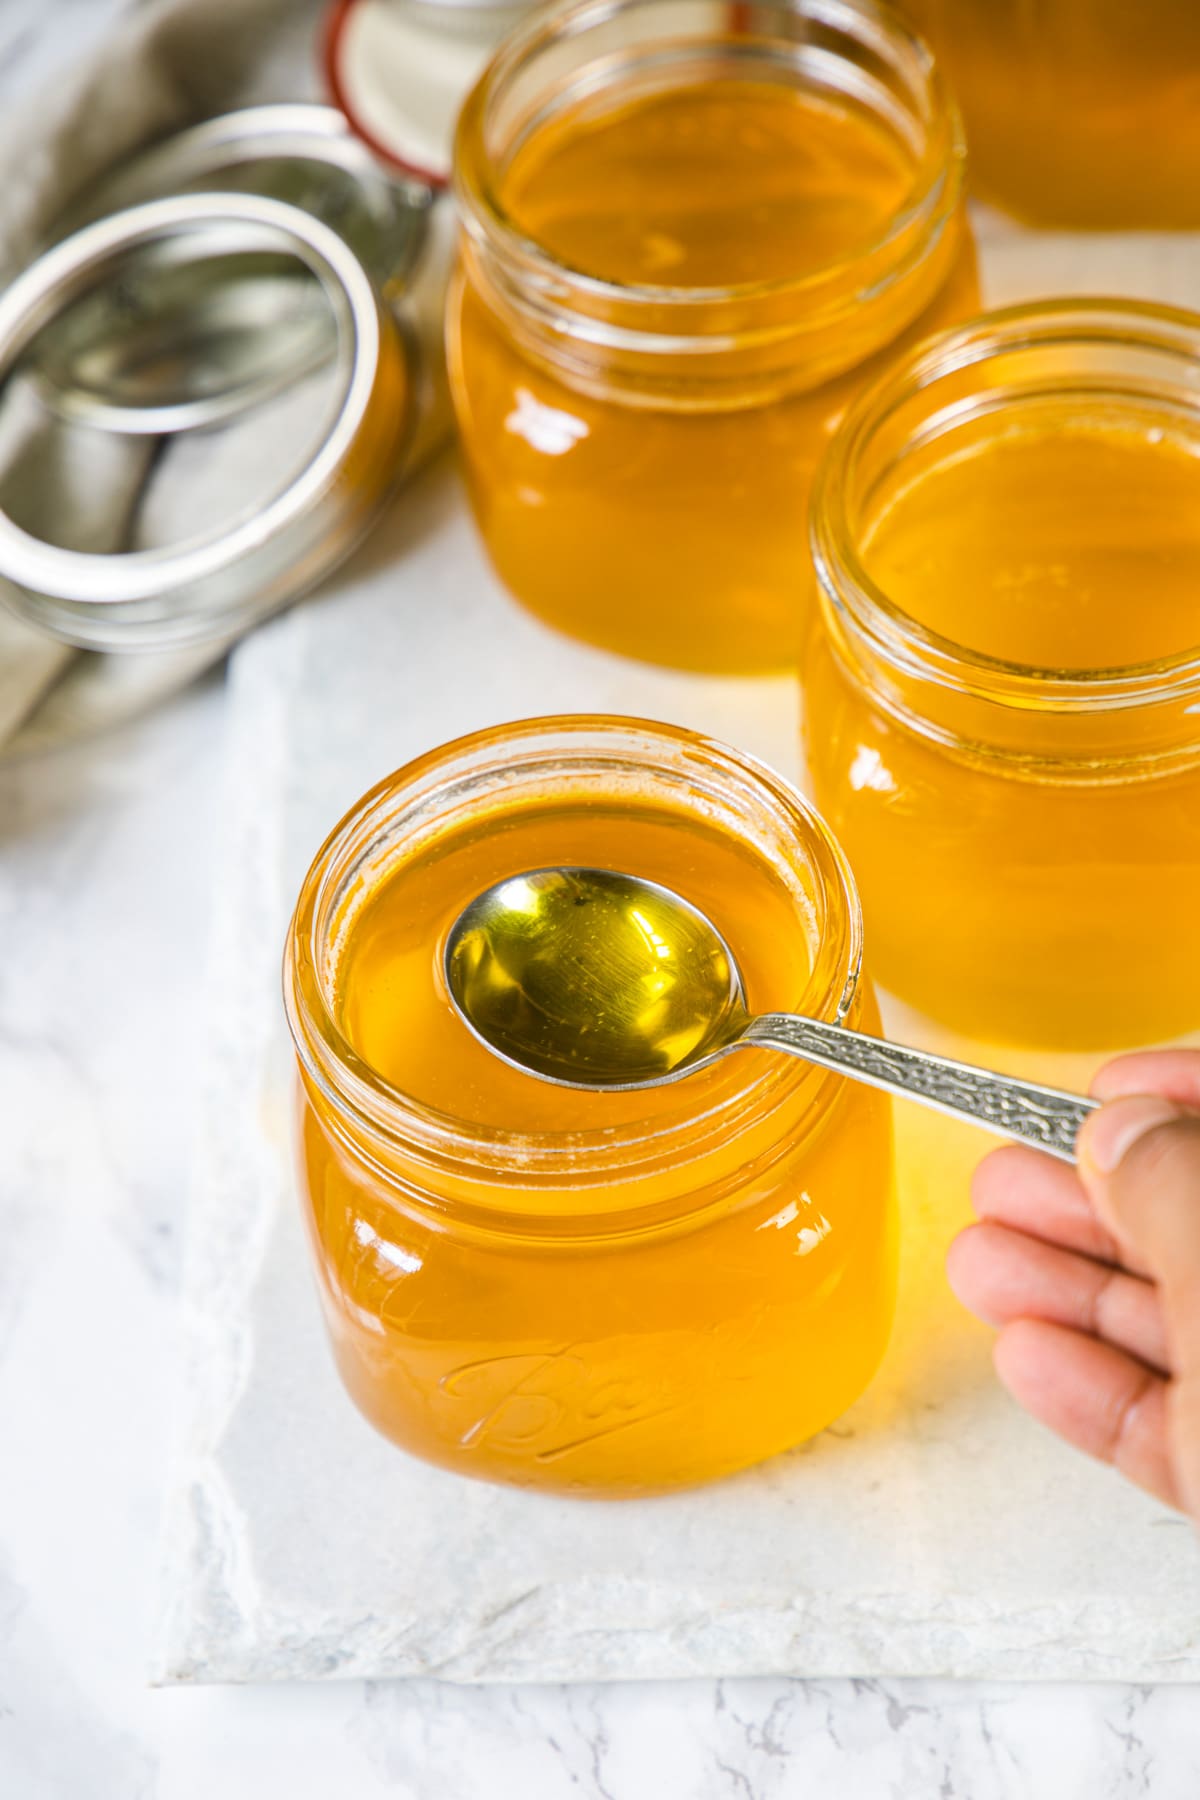
Ghee is entirely fat that has a beautiful golden-yellow color with a sweet, nutty aroma and flavor. It has a high smoke point.
In Hinduism, ghee is viewed as holy and is a key ingredient in many sweets prepared for religious pooja, and festivals. It is used to lite diyas during pooja rituals. For centuries, ghee has been used in ayurvedic medicine.
How Ghee Is Made Traditionally?
In traditional ayurveda, ghee is made from cultured butter.
First, milk is heated and cooled down. Once the milk cools down, the cream layer is formed on top. That cream is separated.
In the next step, that collected cream is cultured (fermented) overnight by adding buttermilk. It gets a unique slightly tangy aroma and flavor.
That cultured mixture is churned (traditionally a wooden churner is used) until the butter is separated.
This cultured butter is simmered to make ghee.
Ghee made from cultured butter is easy to digest.
Ghee Vs Clarified butter
Ghee is known as clarified butter but technically speaking ghee and clarified butter are not the same thing.
Ghee is a clarified butter that had gone a few steps further.
To make clarified butter, melt the butter, skim the white foam that rises on the surface, and water is evaporated.
To make ghee, no need to skim off the foam. After evaporating the water, the process goes one step further to caramelize the milk solids. This last step adds a nutty aroma and flavor that is missing from clarified butter.
Texture Of Ghee
- When ghee is hot or melted, it is in liquid form.
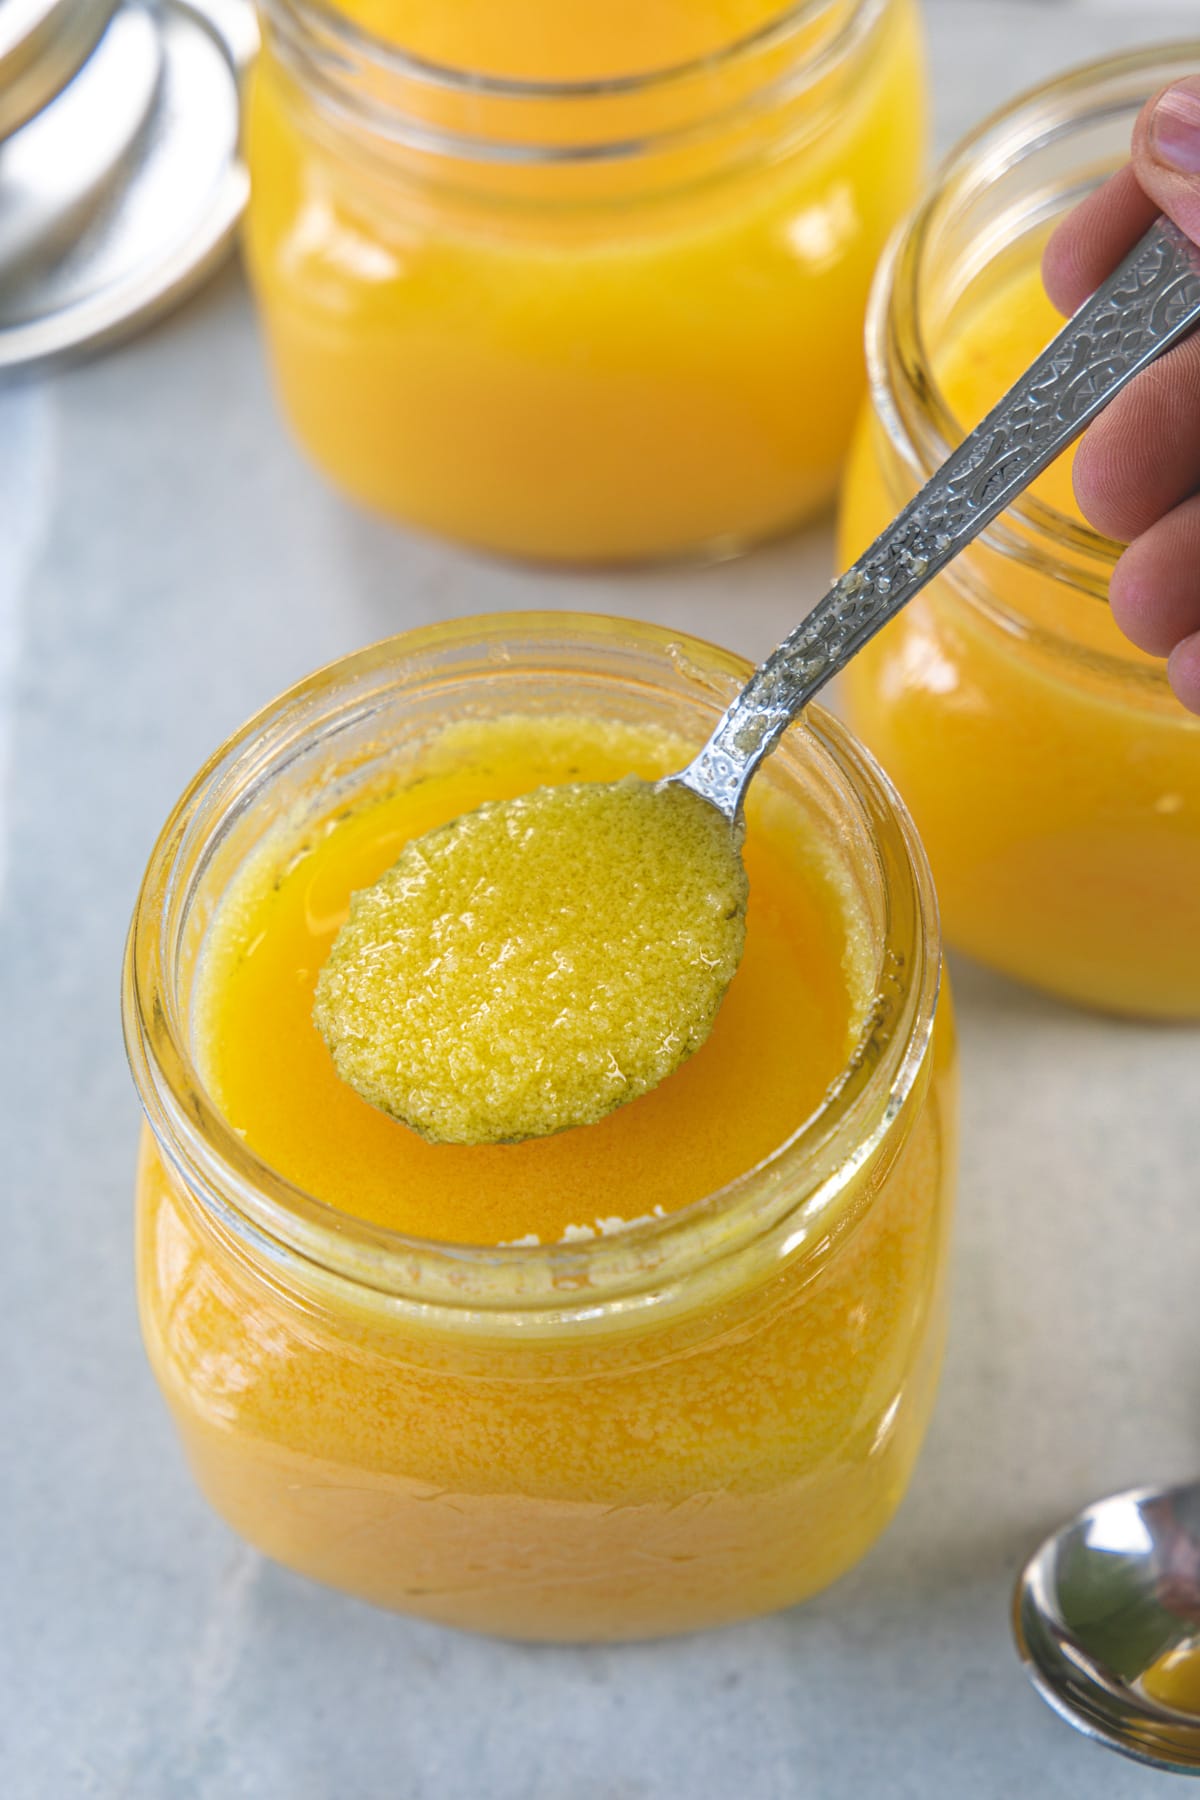
- But as it cools down, it solidifies and becomes a scoopable solid at room temperature.
- Good quality ghee should have a grainy texture after it firms up. You’ll get a grainy texture from Kerrygold butter. But the same cannot be achieved if you have used any regular stick of butter.
Homemade Ghee (Which Butter To Use?)
Today we are going to make ghee from store-bought butter unlike the traditional method to make things easy and quick.
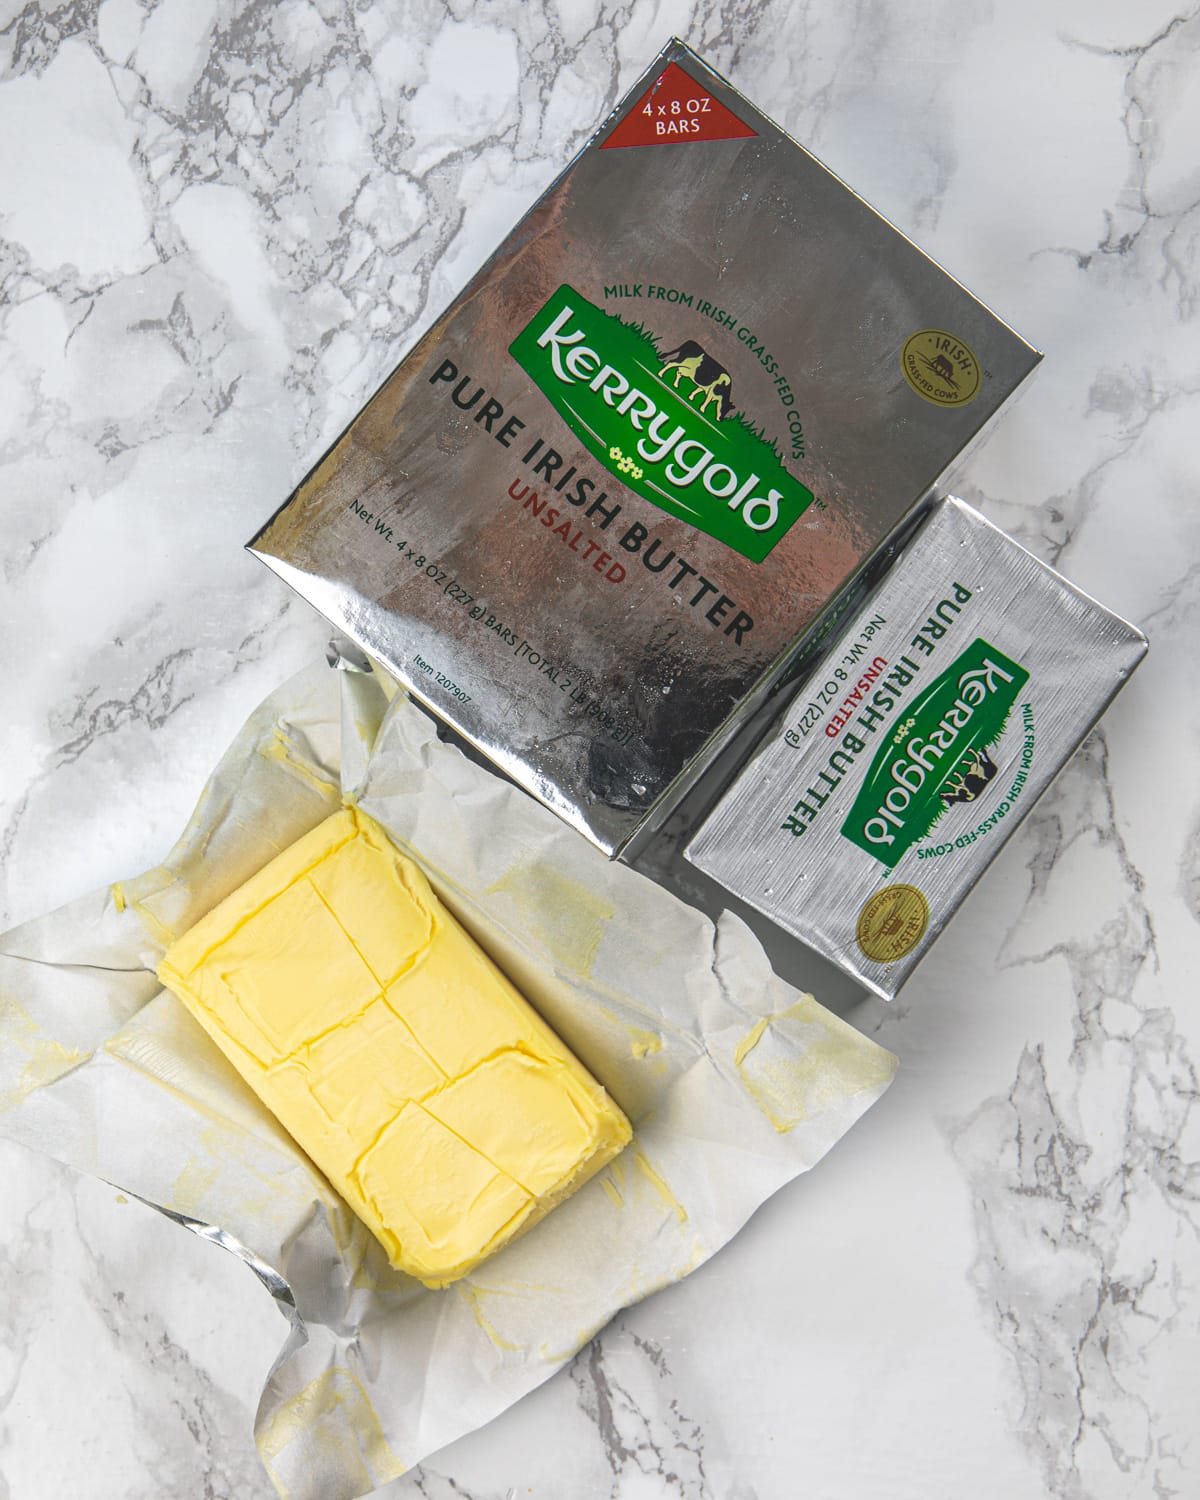
I am using Kerrygold grass-fed unsalted butter. This makes the best ghee (texture and flavor-wise) compared to made with any other butter.
I usually stock up in bulk whenever I find this butter in a deal from Costco. I store butter in the freezer and make ghee as needed.
Why grass-fed butter? Grain-fed butter may have traces of chemicals like steroids and antibiotics administered to them. And ghee made from grain-fed butter is of inferior quality. Ghee made from grass-fed butter is more nutrient-dense.
Why Homemade?
- Homemade ghee is pure and unadulterated.
- Made with a good quality ingredient (that is butter).
- Has better flavor and taste.
- Cheaper alternative to store-bought.
👩🍳 How To Make Ghee? (Step By Step Photos)
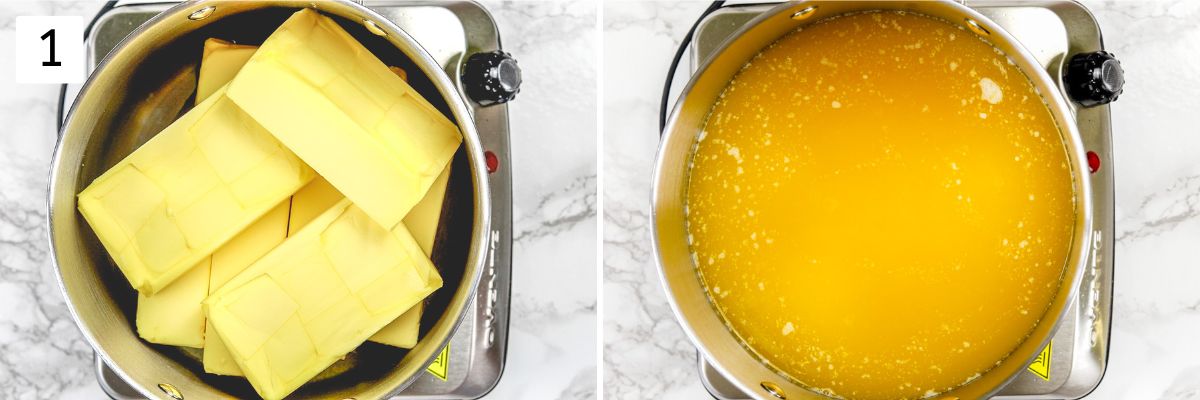
1) Melt butter.
Take butter in a heavy bottom pot on medium heat and let it melt completely.
Note: Take the butter out from the fridge a few hours earlier and bring it to room temperature. So it melts faster and evenly. You can cut the butter into chunks to make the melting process faster.
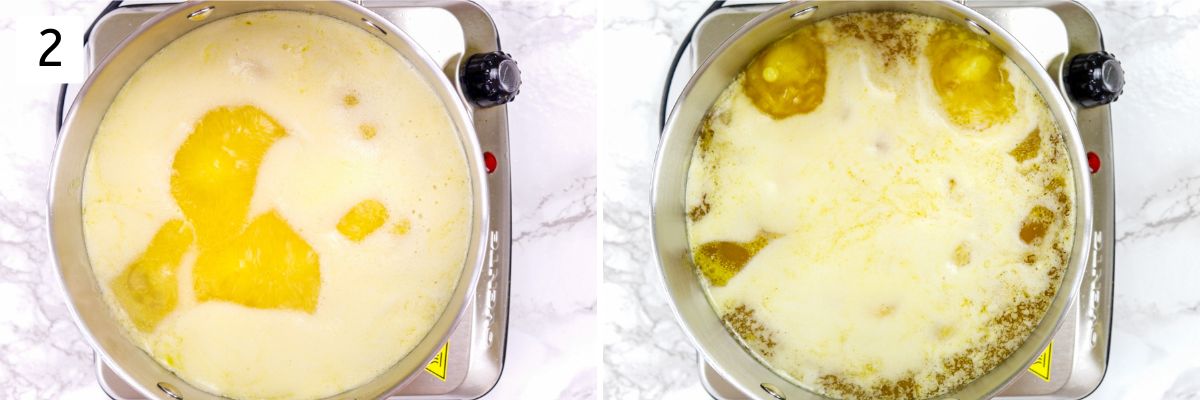
2) It foams up and starts bubbling.
As butter gets hot, it starts to foam up and bubbles rapidly. Keep simmering on medium heat (no need to stir)
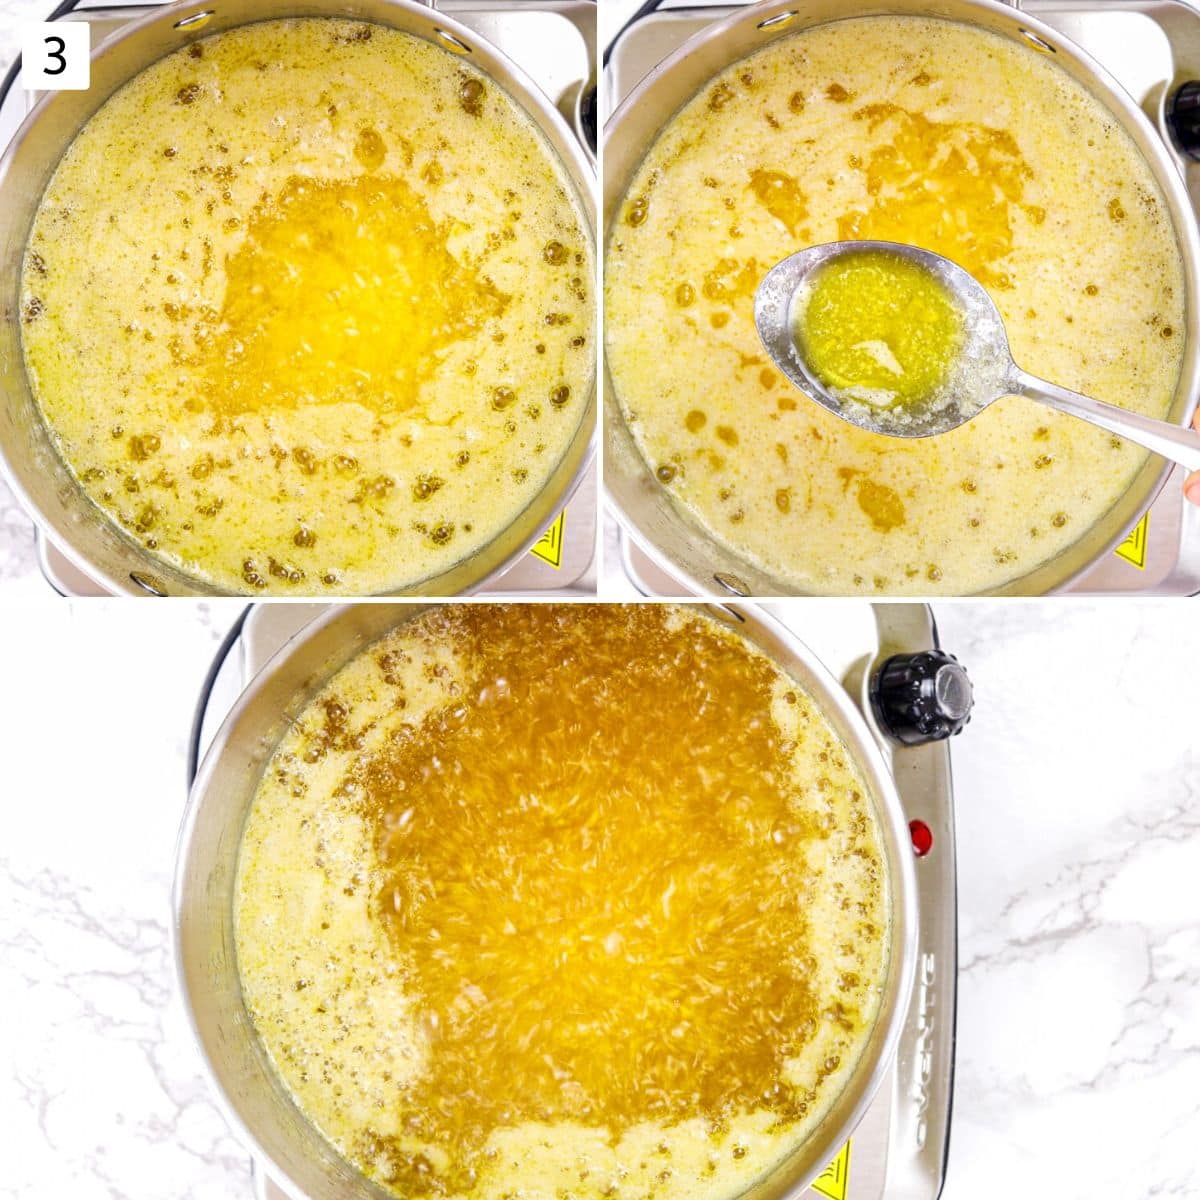
3) Begin to separate milk solids.
- Within a few minutes, the butter turns yellow to light golden color,
- Also, the foam turns into tiny bubble foam (a thin layer).
- Milk solid starts to separate (shown in the ladle) and will settle down at the bottom.
- Butter stops bubbling and starts simmering with some sound (that simmering sound because of the water content in it).
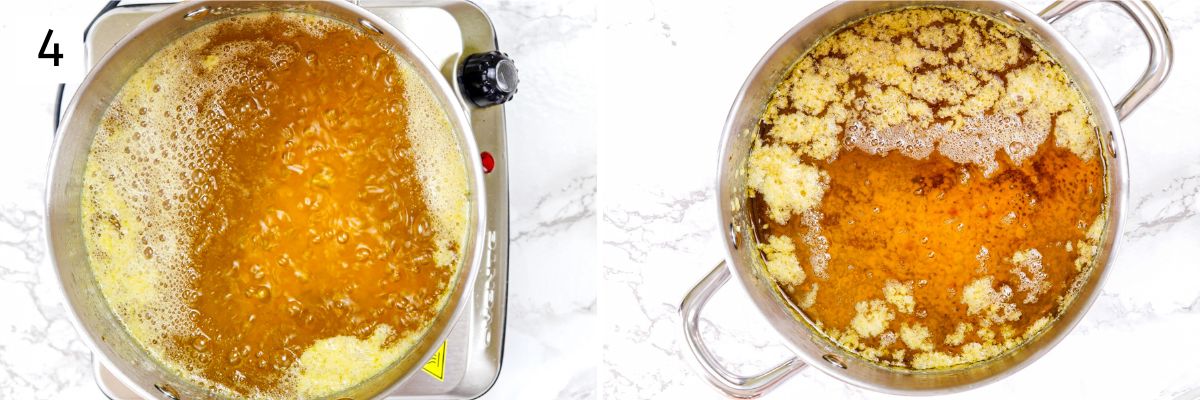
4) Milk solids turn brown.
- Continue simmering until the liquid turns golden yellow in color.
- Milk solids (that settled at the bottom) turn brown and caramelize.
- No more simmering sound (as all the water/moisture is evaporated).
Turn off the stove and the ghee will continue to cook in the hot pot and the milk solids will get even a little more brown color. Let it cool down slightly (around 5 mins).
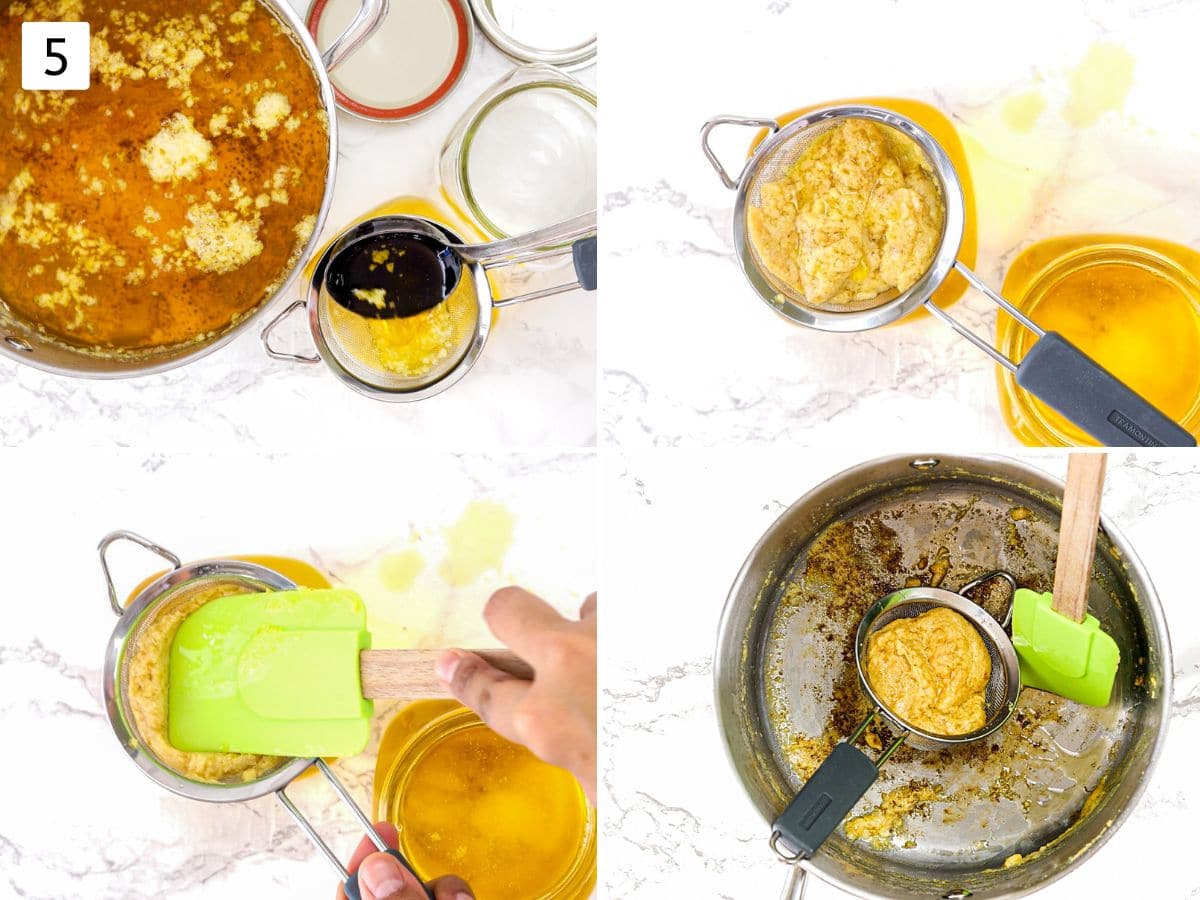
5) Strain the ghee.
- Place a clean strainer over the clean jar. Pour the ghee using a ladle and pass it through the strainer. If making a small batch then you can simply pour from the pan.
- I usually make a large batch and strain the ghee into several small jars to keep it fresh for longer.
- Lightly press the milk solids using a spoon or spatula to extract all the ghee.
- Discard the browned milk solids.
Let the ghee cool down completely then cover it with a lid. Store in a cool and dry place in your pantry as ghee is shelf-stable.
💭 Expert Tips For BEST Ghee Recipe
- Avoid overcooking: Ghee can burn easily within 20-30 seconds of overcooking. So be cautious. Remove the pot from the heat as soon as you see mild solids turn brown and the liquid is golden yellow. Plus, it will continue cooking in a hot pot even after turning off the stove.
- Always use unsalted butter, because it gives a good flavor. However, you can make ghee from salted butter as salt residue will settle at the bottom.
- Use a heavy bottom pot, otherwise, milk solids will brown faster and burn easily.
- Use stainless steel pot, because of the light-colored pan you can see the color change as is ghee is cooking. If using dark colored pan (e.g. HexClad) then it is hard to notice browned milk solids.
- Scalable: You can halve or double the recipe as needed. Just cooking time varies depending on the amount you’re making.
- Storage container: I always use glass mason jars. Back home, mom used to store in stainless steel containers.
🥣 Storage & Shelf Life Of Homemade Ghee
- Store ghee in an airtight jar.
- Keep in a cool and dark place (cabinet of your pantry, away from the stove).
- Ghee is shelf stable and stays good for up to 3 months in your pantry.
- It stays good for 6 months or more in the refrigerator.
- If making a large batch then I suggest storing ghee in several small jars. Open one use as required and the rest jars stay fresh for longer.
- Always use a clean, dry spoon to take ghee from the jar to maintain shelf life.
🍽 Ways To Use Ghee & Serving Amount
- Ideally, 3 teaspoons of ghee per day is a sufficient serving for a healthy lifestyle. (1 teaspoon each for breakfast, lunch, and dinner).
- For babies or toddlers, drizzle 2-3 drops only in their food. Ghee is good for growing kids, you must include it in their diet.
Ghee is used in many different ways in Indian cooking. E.g.
- Apply on hot phulka roti, puran poli
- Drizzle a teaspoon or two of ghee on warm khichdi, dal dhokli, varan bhaat
- Drizzle over veg biryani while cooking
- Few savory dishes have tadka (tempering) of ghee e.g. sarson ka saag, bisi bele bath, Gujarati kadhi, jeera rice, panchmel dal
- Add into the dough to make the layer flaky e.g. samosa, khasta kachori, gujiya, mathri
- Nankhatai (traditional Indian cookies)
- Many Indian sweets e.g. kheer, sheera, besan barfi, malpua, ladoo.
Check Out Other Kitchen Basics Recipe
Hope you find this guide on how to make ghee from butter at home helpful. If you have made it, I’d love to hear about it! Click here to leave a review.
Recipe Card
How To Make Ghee (From Butter)
Ingredients
- 1 lb Unsalted butter (16 oz) preferably Keerygold grass-fed
Instructions
- Melt butter. Take butter in a heavy bottom pot on medium heat and let it melt completely.
- It foams up and starts bubbling. As butter gets hot, it starts to foam up and bubbles rapidly. Keep simmering on medium heat (no need to stir)
- Begin to separate milk solids. Within a few minutes, the butter turns yellow to light golden color.Also, the foam turns into tiny bubble foam (a thin layer). Milk solid starts to separate and will settle down at the bottom. Butter stops bubbling and starts simmering with some sound (that simmering sound because of the water content in it).
- Milk solids turn brown. Continue simmering until the liquid turns golden yellow in color. Milk solids (that settled at the bottom) turn brown and caramelize. No more simmering sound (as all the water/moisture is evaporated).
- Turn off the stove and the ghee will continue to cook in the hot pan and the milk solids will get even a little more brown color. Let it cool down slightly (around 5 mins).
- Strain the ghee. Place a clean strainer over the clean jar. Pour the ghee and pass it through the strainer. Lightly press the milk solids using a spoon or spatula to extract all the ghee. Discard the browned milk solids.
- Let the ghee cool down completely then cover it with a lid. Store in a cool and dry place in your pantry.
Notes
- Avoid overcooking: Ghee can burn easily within 20-30 seconds of overcooking. So be cautious. Remove the pot from the heat as soon as you see mild solids turn brown and the liquid is golden yellow. Plus, it will continue cooking in a hot pot even after turning off the stove.
- Use a heavy bottom pot, otherwise, milk solids will brown faster and burn easily.
- Use stainless steel pot, because of the light-colored pan you can see the color change as is ghee is cooking. If using dark colored pan (e.g. HexClad) then it is hard to notice browned milk solids.

keto3000
I love your healthy, clear & easy-to-follow recipes!
You said that traditional ghee is first fermented overnight using buttermilk but your recipe doesn’t include this fermenting step. Why?
Kanan Patel
Yea, that's traditional method.
Mine is shortcut method that uses store-bought butter.